CHAT TO ME
MY TERMS
All of my ideas are copyrighted to me as they are my original designs. Any resemblence to any other tutorial is purely coincidental.
Do Not Translate, copy, email, download (ie; save to your own hard drive) distribute and/or make scripts/ quick guides from my tutorials.
Do Not hot link to my images or files.
Do Not upload my files to any other site. Do not share my files with others, as some of the contents require permission from thier creators to be shared.
If you are a group manager & wish to use my tutorials in your challenges, you must email me for permission BEFORE you link to my site. I reserve the right to join any group that links to my site.
VISITORS
Labels
- Awards (12)
- CT TUTORIALS (312)
- CUSTOM SERVICES (148)
- Freebies (64)
- MY TUTORIALS (299)
- PTU CU (12)
- ScrapKits (152)
- TAGS (9)
Blog Archive
- 2012 (60)
- 2011 (308)
- 2010 (375)
-
2009
(333)
- December(17)
- November(15)
-
October(18)
- NEW KIT~Haunted Memories
- Reflections
- Darkness
- Change of the Seasons
- Endless Love
- Rac Stalker
- Blood Thirsty
- Designer Call @ Scraps With Attitude!!
- Break the Silence of Domestic Abuse Blog Train
- Autumn's Beauty
- PunkRock
- Tear Me Apart
- Newest Kit~Shades of Autumn
- Newest Blinkies 10/9/09
- Sexy Witch
- Girl's Night Out Collab
- Insane
- Newest Blinkies! 10/4/09
- September(5)
- August(10)
- July(25)
- June(15)
- May(18)
- April(30)
- March(54)
- February(51)
- January(75)
- 2008 (13)
NEW KIT~Haunted Memories
 This kit has 67 Elements,5 Frames and 20 Papers! Along with 2 wordart. This kit is not yet uploaded to stores. Will be avilable in most stores on Nov. 15th! Along with my kit going into stores on the november 15th i will also have a small freebie that will be posted here on my blog for 1 week!! The freebie goes with my kit,Not all items were used but who don't love a freebie that is CU ok! Hope you like the new kit and CU freebie,It was a blast making it!!
 ♥Kelly
So i couldn't wait till the 15th lol. I'm excited about this new kit,It was so fun making it that i just couldn't wait for others to give this one a try :). So far this kit is uploaded to ScrapsWithAttitude and CountryHollowScraps. It will soon be uploaded to all my stores!!
Labels:
ScrapKits
|
0
comments
Reflections
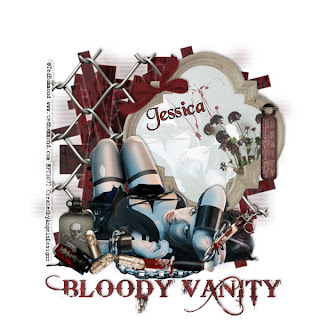
All of my tutorials require a working knowledge of PSP! This tutorial was written by me on October 27,2009. It is of my own ideas and creation! Any other tutorials found to be similar is coincidental.
Supplies Needed
Scrapkit of Choice
I'm using a Wonderful kit called Bloody Vanity,made by Gothic Inspirations. This Kit is FTU for a limited time. You can find her kit here
Tube of Choice
I'm using the Wonderful work of Ted Hammond. You must have a license to use his work! You can purchase that here
Let's Begin
Open new image 600x600,Flood fill white
Copy and paste wire fence,Resize 80%
Copy and paste Mirror,Resize 55%,Add dropshadow of choice
Copy and paste tube of choice,Resize 80%,Place to your liking in the mirror
Highlight the mirror,Click on the inside of the frame with your magic wand
Selections,Modify,Expand by 1,Selections,Invert
Highlight the tube layer,Hit delete on your keyboard,Selections,Select none
Change the Blend Mode on your tube layer to Screen
Copy and paste Tube of choice,Resize 80%,Add dropshadow,See mine for placement
Copy and paste Oldbottle2,Resize 30%,See mine for placement,Add dropshadow
Copy and paste Pills,Resize 30%,Image,Flip,Place by the bottle,Add dropshadow
Copy and paste Needle,Resize 30%,Image,Flip
See mine for placement,Use your Eraser Tool to remove the small part around the fence
Copy and paste Splatter,Resize 30%,Take your Deform Tool to rotate sideways,See mine for placement
Copy and paste Razor,Resize 20%,Place down by the bottle,Use your Deform Tool to rotate it
Add dropshadow of choice
Copy and paste BloodyKnife,Resize 30%,See mine for placement,Add dropshadow
Copy and paste Paper10,Resize 65%,Apply mask of choice,Merge Group on mask layer
Copy and paste Wordart3,Resize 30%,Place towards the bottom of tag,Add dropshadow
Copy and paste Bow,Resize 30%,Place on the mirror,Add dropshadow
Copy and paste Tag2,Resize 30%,Place on the mirror like mine,Add dropshadow
Now Add Your Name and CopyRight Info!!
All done,Save as a JPEG.
Labels:
MY TUTORIALS
|
1 comments
Darkness
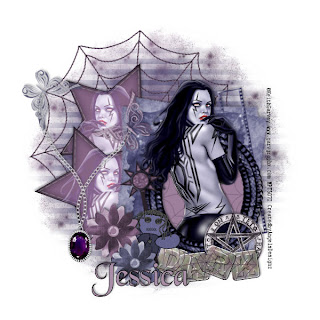 All of my tutorials require a working knowledge of PSP! This tutorial was written by me on October 27,2009. It is of my own ideas and creation! Any other tutorials found to be similar is coincidental.
Supplies Needed
Scrapkit of Choice
I'm using a Wonderful kit called Dark of the Night,made by Gothic Inspirations. This is a PTU kit i cannot supply. You can purchase her kit here
Tube of Choice
I'm using the Wonderful work of Keith Garvey. You must have a license to use his work! You can purchase that here
Let's Begin
Open new image 600x600,Flood fill white
Copy and paste FrameCluster,Resize 75%
Copy and paste tube of choice
Rename this layer to Tube
Place tube inside ClusterFrame,Once happy with placement,Duplicate tube
Move the original Tube layer under the cluster frame
Take your eraser tool and remove any parts of your tube that is hanging over the bottom of the frame
Also remove any hanging out of the bottom of the frame on both tube and duplicated layers
Add dropshadow to the original tube layer
Copy and paste Web,Resize 75%,Move this layer above white background layer but below all other layers
Copy and paste pentagon,Reszie 35%,Place on bottom right side of the clusterframe
Add a dropshadow
Copy and paste WordartDark,Reszie 35%,Place down at the bottom of the clusterframe like mine
Add a dropshadow of choice
Copy and paste VoodooDoll2,Resize 25%,Place next to the wordart,Add dropshadow
Copy and paste paper10Purple,Resize 65%,Move this layer right above your white background layer
Apply mask of choice,Merge group on mask layer
Copy and paste Paper7Blue,Resize 70%,Move above the other mask layer
Apply another mask of choice,Merge group on mask layer
Copy and paste Star1,Find your duplicated tube layer and duplicate it again
Image,Mirror,Place to your liking on the star
Highlight the star layer,Click on it using your magic wand tool
Selections,Modify,Expand by 3
Selections,Invert
Highlight the tube layer that is on the star and hit delete on your keyboard
Selections,Select none
Change the Blend mode of the tube to Screen
Merge this layer and the star together,Move behind the frame,Add dropshadow
Duplicate the star,Image,Mirror,Place like mine
Copy and paste wand hand2,Resize 75%,Place behind the voodoodoll
Use your deform tool to tilt the wand,Add dropshadow
Copy and paste Flower2,Resize 35%,See mine for placement,Add dropshadow
Copy and paste Flower3,Resize 30%,See mine for placement,Add dropshadow
Copy and paste Neclace,Resize to your liking,See mine for place,Add dropshadow
Copy and paste butterfly's of choice,Resize 25%,Place to the end of each part of the neclace
Add a dropshadow,Use your Deform Tool to tilt them
Now Add Your Name and CopyRight Info!!
All done,Save as a JPEG
Labels:
MY TUTORIALS
|
0
comments
Change of the Seasons
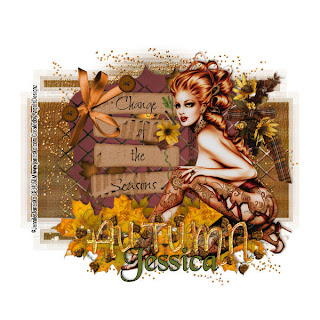 All of my tutorials require a working knowledge of PSP! This tutorial was written by me on October 21,2009. It is of my own ideas and creation! Any other tutorials found to be similar is coincidental.
Supplies Needed
Scrapkit of Choice
I'm using a Wonderful kit called Autumn Blessings,made by Gothic Inspirations. This is a PTU kit i cannot supply. You can purchase her kit here
Tube of Choice
I'm using the Wonderful work of Jennifer Janesko. You must have a license to use her work! You can purchase that here
Let's Begin
Open new image 600x600,Flood fill white
Copy and paste TagBack2,Resize to your liking or around 40-50%
Take your Deform Tool to tilt it a bit,Add a dropshadow of choice
Copy and paste VineWLeaves,Resize 30 to 40%,Place on TagBack,add dropshadow
Copy and paste Screen,Resize 30%,Use your Deform tool again only this time stretch it to fit (See mine for reference)
Copy and paste TagTabs,Resize 50%,Place on top of the Screen,Add dropshadow
Copy and paste your tube of choice,Resize 90%,Add dropshadow and move to the right of your tag
Copy and paste Leaves1,Resize 45%,Place on the bottom left side of the tagback,Add dropshadow
Duplicate,Image,Mirror
Copy and paste Glitter Trail,Resize 45%,Use your deform tool to rotate it
Place on top of the leaves,add dropshadow
Copy and paste RibbonWFlowers,Resize 30%,Image,Mirror,Place on the right side of the screen
Add dropshadow
Copy and paste GlitterBling,Resize 90%,Place below the tagback layerCopy and paste WordartAutumn,Resize 60%,Place at bottom of tag and add a dropshadow
Copy and paste RibbonWRivets,Resize 25%,See mine for placement,Add dropshadow
Copy and paste button,Resize 10%,Place on the RibbonWRivets like mine
Duplicate,Move this one over to the other side
Copy and paste paper1,Resize 65%,Apply mask of choice,Merge Group on mask layer
Choose a font and write out Change of the Seasons like mine or one of your own
Add Your Name and CopyRight Info now!!
All done,Save as a JPEG.
Labels:
MY TUTORIALS
|
0
comments
Endless Love
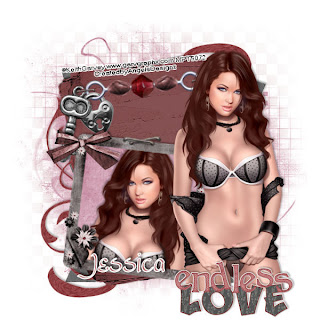
All of my tutorials require a working knowledge of PSP! This tutorial was written by me on October 19,2009. It is of my own ideas and creation! Any other tutorials found to be similar is coincidental.
Supplies Needed
Scrapkit of Choice
I'm using a Wonderful kit called EndlessLove,made by Gothic Inspirations. This is a PTU kit i cannot supply. You can purchase her kit here
Tube of Choice
I'm using the Wonderful work of Keith Garvey. You must have a license to use his work! You can purchase that here
Let's Begin
Open new image 600x600,Flood fill white
Copy and paste JournalingPiece2,Resize 55%
Find your Deform Tool and rotate to the left a little
Add dropshadow of choice
Copy and paste tube of choice,Resize 85%,Add dropshadow
Copy and paste Tagback,Place behind the journalingpiece,Add dropshadow
Copy and paste paper6,Resize 65%
Apply mask of choice,Once happy with mask,Merge group on mask layer
Move this layer below the tagback layer
Copy and paste paper5,Resize 70%.Apply another mask of choice
Merge group on mask layer
Copy and paste swirl behind the journalingpiece,Resize to your liking
Add dropshadow,Duplicate,Image,Mirror,Image,Flip,(See mine for reference)
Copy and paste frame1,Resize 45-50%
Copy and paste paper6,Resize 45%,Place below frame1
Copy and paste same tube as before,Place to your liking in the frame
Once happy with placement of your tube,Highlight frame1 layer
Take your magic wand tool,Click on the inside of the frame,Selections,Modify,Expand by 5
Highlight paper6 layer,hit delete on your keyboard
Highlight tube layer that is in the frame,Hit delete on your keyboard again
Selections,Select none
Give your tube in the frame a dropshadow,Merge frame1,paper6 and tube together
Take your Deform tool,and rotate a little,Add dropshadow to the frame1 layer
Move to the bottom of the journalingpiece like mine
Copy and paste Wordart1WGlow,Resize 25%,Place at the bottom of frame1,Add dropshadow
Copy and paste Key,Resize 30%,Place on the staple on the top of the journalingpiece,Add dropshadow
Take your eraser tool,Size set at 8,Remove part of the circle so it looks like it's hanging
(See mine for reference)
Copy and paste Staple,Resize 25%,Place on top of frame,Use your Deform Tool to rotate it
Duplicate,Image,Mirror,Move over on top of other staple
Copy and paste Bow,Resize 25%,Place on top left corner of the frame,Add dropshadow
Add Your Name and CopyRight Info now!!!
All done,Save as a JPEG.
Labels:
MY TUTORIALS
|
0
comments
Rac Stalker
 All of my tutorials require a working knowledge of PSP! This tutorial was written byme on October 19,2009. It is of my own ideas and creation! Any other tutorials foundto be similar is coincidental.
Supplies Needed
Scrapkit of Choice
I'm using a Wonderful kit called ORD,made by Creationzbyjo. This is a PTU kit i cannot supply. You can purchase her kit here
Tube of Choice
I'm using the Wonderful work of Ismael Rac. You must have a license to use his work! You can purchase that here
Let's Begin
Open new image 600x600,Flood fill white
Copy and paste Star2,Resize 65%,Use your Deform Tool to rotate it a little
Copy and paste tube of choice,Resize 85%,Add dropshadow of choice
Copy and paste TextCircle,Resize 25%,Move behind your tube
Copy and paste Chain,Resize 45%,Add dropshadow,see mine for placement
Copy and paste paper3,Resize 65%,Apply mask of choice
Merge Group on mask layer
Copy and paste paper17,Apply same mask as before,Merge Group on mask layer
Move this layer above the other mask layer
Find your magic wand,Click on the star layer
Click inside the star with your magic wand
Selections,Modify,Expand by 4
New Raster layer,Flood fill black
Selections,Select none
Move this layer below the star
Copy and paste SkullSticker2,Resize 25%,Place on the star,add dropshadow
Copy and paste Mesh,Resize 30%,Place at the bottom of your tag below your tube
Duplicate,Image,Flip,Move under circletext,star,black floodfill,Chain
Take your Eraser tool,remove a few parts of the mesh,See mine for reference
Copy and paste Wordart3,Place at the bottom of your tube,Add dropshadow 2x's
Copy and paste starts,Resize 65%,Use your deform tool to turn them
Place at bottom of tag under wordart
Duplicate,Image,Flip,Move under tube and Star layer
Add your Name and CopyRight Info now!!
All done,Save as a JPEG
Labels:
MY TUTORIALS
|
0
comments
Blood Thirsty
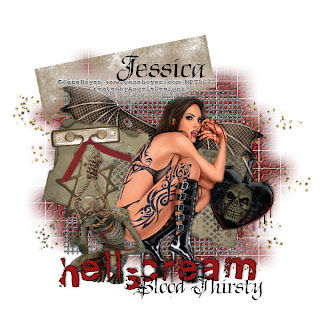 All of my tutorials require a working knowledge of PSP! This tutorial was written byme on October 19,2009. It is of my own ideas and creation! Any other tutorials foundto be similar is coincidental.
Supplies Needed
Scrapkit of Choice
I'm using a Wonderful kit called HellScream,made by Gothic Inspirations. This is a PTU kiti cannot supply. You can find her kit here
Tube of Choice
I'm using the Wonderful work of Cane Hoyer. You must have a license to use hiswork! You can purchase that here
Let's Begin
Open new image 600x600,Flood fill white
Copy and paste TagCluster,Resize 70%
Copy and paste tube of choice,Resize 85%,Add a dropshadow of choice
Copy and paste Wordart1,Resize 30%,Place at the bottom of your tag
Copy and paste Glitter1,Resize 80%,Move below tube,tagcluster and wordart
Copy and paste paper21,Resize 65%,Apply mask of choice
Merge group on mask layer
Copy and paste BackDropPattern,Resize 30%,Place below tube layer
Copy and paste Ghoul,Resize 40%,See mine for placement,Add dropshadow
Copy and paste BloodyBag,Resize 20%,See mine for placement,Add dropshadow
Copy and paste Staple of choice,Resize 50%,Find your Deform Tool,Rotate the staple like mine
Place over the top of the BloodyBag
Copy and paste Noose,Resize 25%,See mine for placement
Duplicate,Move the original layer below the Ghoul
Take your Eraser tool and remove the part hanging over the mouth of the Ghoul
(You want it to look like the Noose is around the Ghoul's neck)
Add dropshadow to the Original layer
Copy and paste Bow2,Resize 25%,Place at the top of the Noose,Add dropshadow
Copy and paste TapePiece,Resize 50%,Take your deform tool again to rotate a little like mine
Add Your Name and CopyRight Info now!!
All done,Save as a JPEG
Labels:
MY TUTORIALS
|
1 comments
Designer Call @ Scraps With Attitude!!

Missy @ Scraps With Attitude Store is having a Designer Call! This store rocks in so many ways. So if your looking for a another store to join,then this is the store for you!
Break the Silence of Domestic Abuse Blog Train
 Break the Silence of Domestic Abuse Blog Train leaves the station on October 18th. Don't forget to visit the special blog here to see a special video and or make a donation
.
You can download my portion of the blog train HERE then visit each of the designers sites below to grab their portions.
These Great Designers have joined together to Break the Silence:
http://angelsdesignz.blogspot.com/ -U ARE HERE
PLEASE BE SURE TO LEAVE A THANK YOU TO ALL DESIGNERS,WE LOVE TO READ THE COMMENTS! ~Hugs~Kelly
Labels:
Freebies
|
9
comments
Autumn's Beauty
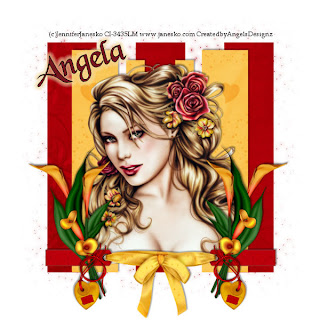
All of my tutorials require a working knowledge of PSP! This tutorial was written by
me on October 14,2009. It is of my own ideas and creation! Any other tutorials found
to be similar is coincidental.
Supplies Needed
Scrapkit of Choice
I'm using a Wonderful kit called Love Nature,made by Bastelgalaxy. This is a PTU kit
i cannot supply. You can purchase her kit here
i cannot supply. You can purchase her kit here
Tube of Choice
I'm using the Wonderful work of Jennifer Janesko. You must have a license to use her
work! You can purchase that here
work! You can purchase that here
Let's Begin
Open new image 600x600,Flood fill white
Open paper16 in your psp,Click on the bottom large box in your materials
Click on the pattern tab,find your paper and hit ok
Make the foreground box null
Find your rectangle preset shape tool,Draw out a medium size rectangle and a thinner
one,See mine for reference
one,See mine for reference
Convert to raster layer,Add dropshadow
Duplicate,Image,Mirror both
Hide your white background layer,Merge all other layers visible
Unhide white background
Copy and paste paper02,Resize 75%
Apply mask of choice,Merge group on mask layer
Move the below the rectangles layer
Copy and paste tube of choice,Resize 75%,Add dropshadow
Copy and paste ribbonbow04,Resize 80%,See mine for placement,add dropshadow
Copy and paste flower02,Resize 75%,Place on right side of tube
Add dropshadow,Duplicate,Image,Mirror
Copy and paste heart04,Resize 50%,Place down on the flowers
Add dropshadow,Duplicate,Image,Mirror
Add Your Name and Copyright Info now!!
All Done,Save as a jpeg.
Labels:
MY TUTORIALS
|
0
comments
PunkRock
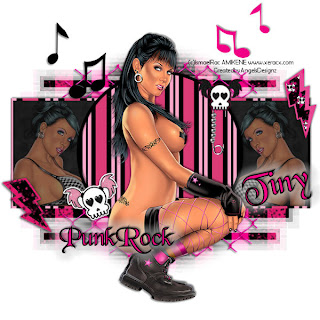 All of my tutorials require a working knowledge of PSP! This tutorial was written by me on October 13,2009. It is of my own ideas and creation! Any other tutorials found to be similar is coincidental.
Supplies Needed
Scrapkit of Choice
I'm using a Wonderful kit called Totally Punk'r,made by Tiny Designs. This is a PTU kit i cannot supply. You can purchase her kit here
Tube of Choice
I'm using the Wonderful work of Ismael Rac. You must have a license to use his work! You can purchase that here
Let's Begin
Open new image 600x600,Flood fill white
Find your Preset shape tool-Eclipse,Make your foreground black and background null
Change your width to 6.00
Draw out a circle,See mine for size,Convert to raster
Open paper4 in psp,Copy and paste onto your canvas,Resize 70%
Highlight the circle layer,Take your magic wand and click inside the circle
Selections,Modify,Expand by 2
Selections,Invert
Highlight the paper layer,Hit delete on your keyboard
Selections,Select none,Move this layer below the circle layer
Open paper4 in your psp,Click on your foreground box in materials
Click on the pattern tab,find paper4,hit ok
Find the rectangle in your preset shape tool,Change the width 5.00
Draw out a rectangle,See mine for reference on size,Convert to a raster layer
Copy and paste paper7 onto your canvas,Resize 85%
Hightlight the rectangle layer,Click inside the rectangle with your magic wand tool
Selections,Modify,Expand by 2,Selections,Invert
Highlight paper7 layer and hit delete on your keyboard,Selections,Select none
Move this paper layer below the rectangle layer
Copy and paste another tube of choice,Resize 75%
Paste in the black box on the right side,See mine for reference
Highlight the rectangle,Click inside the rectangle with your magic wand
Selections,Modify,Expand by 2,Selections,Invert
Highlight the tube layer,Hit delete on your keyboard,Selections,Select none
Add dropshadow,Change the opacity to 50%
Duplicate,Image,Mirror
Copy and paste paper12,Resize 75%
Apply mask of choice,Merge Group on mask layer
Copy and paste wire,Resize 75%,See mine for placement,Add dropshadow
Copy and paste music notes,resize 1 @ 55% and the other @ 50%
See mine for placement,Add dropshadow
Copy and paste bolt1 and bolt2,Resize 55%,See mine for placement,Add dropshadow
Copy and paste Safety pin2,Resize 55%,Place like mine,add dropshadow
Copy and paste Sticker2,Resize 55%,Place like mine,Add dropshadow
Add Your Name and CopyRight Info now!!!
All done,Save as a jpeg.
Labels:
MY TUTORIALS
|
0
comments
Tear Me Apart
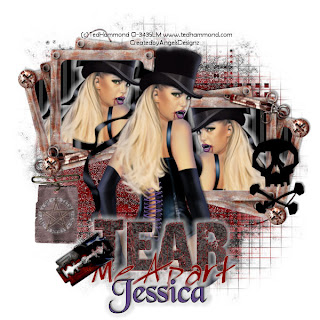 All of my tutorials require a working knowledge of PSP! This tutorial was writtenby me on October 12,2009. It is of my own ideas and creation! Any other tutorialsfound to be similar is coincidental.
Supplies Needed
Scrapkit of Choice
I'm using a Wonderful kit called Dr.Evil,made by Gothic Inspirations. Thisis a PTU kit i cannot supply. You can purchase her kit here
Tube of Choice
I'm using the Wonderful work of Ted Hammond. You must have a license to use his
work! You can purchase that here
work! You can purchase that here
Let's Begin
Open new image 600x600,Flood fill white
Copy and paste FrameCluster,Resize 60%
Take your tube of choice,Resize 85%,Place inside the frame
Once happy with placement,click on the frame layer
Take your magic wand tool,Click inside the frame
Selections,Invert
Highlight your tube,Hit delete on your keyboard
Selection,Select none
Do the same as above for the other parts of the frame
Copy and paste paper20,Resize 50%,Move to below the frame and tube layers
Highlight the frame layer again,Take your magic wand tool
Click on the inside of the frame,make sure you click into the other parts of the
frame
frame
Selections,Modify,Expand by 2
Selections,Invert
Highlight paper 20 layer,Hit delete on your keyboard,Selections,Select none
Add a dropshadow of choice to your tube layer
Hide white background layer,Merge all other layers visable
Unhide white background layer
Copy and paste your tube again,Resize 90%,Add dropshadow of choice
Highlight the frame layer,Duplicate,Image,Mirror,(See mine for placement)
Add a dropshadow to both frames
Copy and paste Syringe,Resize 40%,Use your deform tool to turn it like mine
Place to the right side of the frame like mine,Add dropshadow
Duplicate,Image,Mirror,Place on other side,(See mine for reference)
Move this layer below your tube layer
Copy and paste paper13 above your white background layer,Resize 65%
Apply mask of choice,Merge Group on mask layer
Copy and paste skull,Resize 30%,Add dropshadow and place on bottom right of frame
Copy and paste Wordart-Tear me apart,Resize 50%,(See mine for placement)
Add a dropshadow,I added a white gradient glow to mine
Copy and paste Razor,Resize 30%,Use your deform tool to rotate it a bit
Place by wordart and add a dropshadow of choice
Open Tag label in psp,Image,Rotate,Rotate CounterClockwise,Resize 30%
(See mine for placement),Add dropshadow
Copy and paste Pentagon,Resize 20%,Place on tag label,Change Opacity to 50%
Copy and paste Glitter of choice,Place above your mask layer
Change the opacity to 65%
Copy and paste rusty screw,Resize 20%,Place on both corners of the frames
(See mine for reference),Add dropshadow of choice
Add Your Name and Copyright Info!!!
All done!
Save as a jpeg.
Labels:
MY TUTORIALS
|
1 comments
Sexy Witch
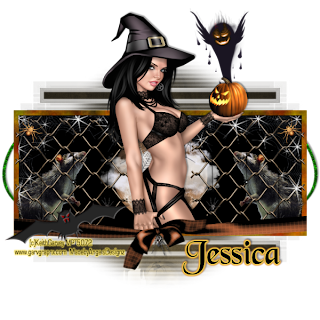 All of my tutorials require a working knowledge of PSP! This tutorial was written
by me on October 8,2009. It is of my own ideas and creation! Any other tutorials
found to be similar is coincidental.
Supplies Needed
Scrapkit of Choice
I'm using a Wonderful kit called Eerie Hauntings,made by Gothic Inspirations. This
is a PTU kit i cannot supply. You can purchase her kit here
is a PTU kit i cannot supply. You can purchase her kit here
Tube of Choice
I'm using the Wonderful work of Keith Garvey. You must have a license to use his work! You can purchase that here
Let's Begin
Open new image 600x600,Flood fill white
Open paper 22 in your psp,Click on the top box in materials
Click on the pattern tab and find paper22,Hit ok
On the bottom box,click on it and when the color chart pops up select black
Find your preset shape-rectangle,(See mine for size)
Convert to raster layer
Copy and paste tube of choice,put in the center of the tag
Resize 90%,Add dropshadow
Copy and paste paper6 below all layers but above white background
Apply mask of choice,Merge Group on mask layer
Copy and paste spiderwebtopper,Resize 85%
Place below your tube layer,(see mine for reference)
Take your Deform Tool and stretch the spiderwebtopper out so it fits nicely inside
the rectangle
the rectangle
Copy and paste wireback,Resize 55%,Place on the left side of the rectangle below the
spiderwebtopper and your tube
spiderwebtopper and your tube
Duplicate,Image,Mirror
Copy and paste Rat,Resize 45%,Place on the right side below the wireback
Add dropshadow,Duplicate,Image,Mirror
Copy and paste RibbonWrap2,Resize 65%,Place on bottom of the rectangle
Take your Deform Tool and stretch the ribbon out so it connects to both sides of the
rectangle
rectangle
Move this over your the bottom of your tube
Take your eraser tool and remove any part of the bottom of your tube hanging out
Copy and paste Moon,Resize 45%,Move behind your tube,(See mine for reference)
Add dropshadow of choice
Copy and paste Ghost1,Resize 55%,Image,Mirror
Move over to the pumpkin,(see mine for reference)
Add any extra elements of choice,Add dropshadow
Now add your name and Copyright Info!!!
All done,Ty 4 trying my tutorial:)
Labels:
MY TUTORIALS
|
0
comments
Girl's Night Out Collab

Here is a free layout made with this kit for you to downloadit is avalible all 3 of ours blogs . U can download it HERE

This collab kit is exclusively @ ScrappinBratz only. The cost is $5.00
Go HERE to find this kit!
Go HERE to find this kit!
Labels:
ScrapKits
|
0
comments
Insane
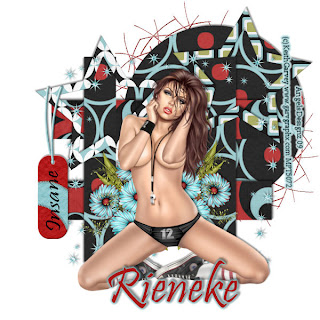 All of my tutorials require a working knowledge of PSP! This tutorial was writtenby me on October 6,2009. It is of my own ideas and creation! Any other tutorials found to be similar is coincidental.
Supplies Needed
Scrapkit of Choice
I'm using a Wonderful kit called Insane,made by Rieneke Designs. This is a PTU kit i
cannot supply. You can purchase her kit here
cannot supply. You can purchase her kit here
Tube of Choice
I'm using the Wonderful work of Keith Garvey. You must have a license to use his
work! You can purchase that here
work! You can purchase that here
Let's Begin
Open new image 600x600,Flood fill white
Open paper 6 in your psp
Under materials on the top right side,Click on the bottom box
Click on the patterns tab,find paper6 and hit ok
Take your Eclipse tool and draw out a medium size circle
Convert this layer to a raster
Do the same as above with a different paper of choice
Now take your selections tool-rectangle and draw out a rectangle
(see mine for reference)
Convert this layer to a raster layer,Duplicate,Image,Flip
Now back to paper6,Draw out another rectangle,(See mine for reference)
Convert to raster layer
Duplicate,Image,Mirror
Add dropshadow of choice to each layer
Copy and paste star2,Resize 40%,Image,Mirror,See mine for placement
Add dropshadow
Copy and paste star3,Resize 40%,See mine for placement,Add dropshadow
Copy and paste tube of choice,Resize 80%,Add dropshadow
Copy and paste blue border,Resize 60%,Move this layer under your tube
Copy and paste deco3,Resize 50%,Place to the top left of the circle paper
(See mine for reference),Duplicate,Image,Flip
Copy and paste tag3,Resize 35%,Place to your liking and add a dropshadow
Add Your name and CopyRight Info now!!
All done,Thanks 4 trying my tut;)
Labels:
MY TUTORIALS
|
0
comments
Subscribe to:
Comments (Atom)
Blog Archive
-
▼
2009
(333)
-
▼
October
(18)
- NEW KIT~Haunted Memories
- Reflections
- Darkness
- Change of the Seasons
- Endless Love
- Rac Stalker
- Blood Thirsty
- Designer Call @ Scraps With Attitude!!
- Break the Silence of Domestic Abuse Blog Train
- Autumn's Beauty
- PunkRock
- Tear Me Apart
- Newest Kit~Shades of Autumn
- Newest Blinkies 10/9/09
- Sexy Witch
- Girl's Night Out Collab
- Insane
- Newest Blinkies! 10/4/09
-
▼
October
(18)
