CHAT TO ME
MY TERMS
All of my ideas are copyrighted to me as they are my original designs. Any resemblence to any other tutorial is purely coincidental.
Do Not Translate, copy, email, download (ie; save to your own hard drive) distribute and/or make scripts/ quick guides from my tutorials.
Do Not hot link to my images or files.
Do Not upload my files to any other site. Do not share my files with others, as some of the contents require permission from thier creators to be shared.
If you are a group manager & wish to use my tutorials in your challenges, you must email me for permission BEFORE you link to my site. I reserve the right to join any group that links to my site.
VISITORS
Labels
- Awards (12)
- CT TUTORIALS (312)
- CUSTOM SERVICES (148)
- Freebies (64)
- MY TUTORIALS (299)
- PTU CU (12)
- ScrapKits (152)
- TAGS (9)
Blog Archive
- 2012 (60)
- 2011 (308)
- 2010 (375)
-
2009
(333)
- December(17)
- November(15)
- October(18)
- September(5)
- August(10)
- July(25)
- June(15)
- May(18)
- April(30)
- March(54)
- February(51)
-
January(75)
- Flower Garden
- Valentine Sweetheart
- Orange Crush
- Letters From Iraq
- Someone I ♥ has Lupus
- Hope
- Lil Birdie's
- Another New Blinkie 1/29/09
- Newest Blinkie 1/29/09
- WildLife-Friends
- Jeans Kinda Girl
- Love You-Valentine
- Passion
- Goth Love
- Kiss This
- Girlz Rule
- Pirate Chick
- Addicted
- Pot of Gold
- Country Hollow Scraps Store
- British Pride
- Love Notes
- Sexy Valentine
- S♥W♥A♥K
- Newest Blinkie Made 1/23/09
- Bright & Beautiful
- Newest Blinkies Made Today! 1/22/09
- CT Call!
- Farrah's having a SALE!!!!
- Newest Blinkie I Made 1/21/09
- Envy Me
- Arizona Cardinals
- el-e-gance
- Go Team
- Guardian Angel
- Always & Forever
- Divalicious
- Award
- Intentions
- Sweet Valentine
- Newest Blinkie and Banner set!
- Twisted
- Beauty Within
- Be Mine
- Another New Blinkie
- Newest Blinkie
- Blinkie I Made 1/16/09
- Blinkies Made by Me!
- My 1st QP
- $1.00 Sale @ Scrappin'Bratz
- Sunflowers Galore
- Signs Of Love
- Cherished
- New Blinkie I Made 1/14/09
- Touble
- Gothic Princess
- Happy 2009
- Paradise
- Sale! Sale! Sale!
- Material Girl
- Geisha
- Lavender Crush
- Grand Opening to Country Hollow Scraps
- Goth Bytch
- Pink Laces
- Naughty Minx
- Scrappin' Bratz CT Call
- Bratz
- Cowgirl Wanted
- Envious
- Devoted
- Fairy-licious
- With Love
- Anchor'd
- Love Me
- 2008 (13)
Flower Garden
 All of my tutorials require a working knowledge of PSP!This tutorial was written by me on January 31,2009. It is of my own ideas and creation! Any other tutorials found to be similar is coincidental.
Supplies Needed
Scrapkit of Choice
I'm using a Beautiful kit called Gardening made by Chantal @ ChaDesignz. This is a PTU kit that you can purchase here
Tube of Choice
I'm using the Fabulous work of Suzanne Woolcott. You must have a license to use her work! You can purchase that here
Mask of Choice-Optional
Let's Begin
Open new image 600x600
Flood fill white
Copy and paste fence
Resize 60%
Copy and paste tube of choice
Resize 60% if using the same as me
Add a dropshadow of choice
Copy and paste ribbon3
Resize 30%
Place on the bottom of the fence
Image,Mirror
Using your deform tool,Stretch the ribbon so it fits evenly with the fence
Copy and paste paper7
Apply mask of choice,Merge Group
Copy and paste branch1
Resize 60%,Image,Mirror. Place on top of fence
Duplicate,Image,Mirror
Copy and paste hanging heart
Resize 30%
Place at the top of the mask (see mine for reference)
Duplicate,Image,Mirror
Copy and paste flowerpot
Resize 50%
Place on left corner of fence
Add dropshadow
Copy and paste the watercan2
Resize 40%
Place down by the flowerpot
Image,Mirror, Add dropshadow
Copy and paste bird1
Resize 15%
Place on top corner of the fence
Add a dropshadow,Duplicate,Image Mirror
Copy and paste angelofgarden2
Resize 60%
Place on right side of fence
Copy and paste angelofgarden1
Resize 50%
Place next to the other one,Add dropshadow to both
Copy and paste bow4
Resize 20%(See mine for placement)
Add a dropshadow
Copy and paste butterfly1
Resize 20%
Place in middle of bow4
Add a dropshadow
Copy and paste lilac
Resize 20%
Place behind the flowerpot
Copy and paste wordart1
Resize 60%
Place down at the bottom of the canvas(See mine for placement)
Add a dropshadow
Copy and paste bee1
Resize 10%
Place in the heart
Duplicate,Image,Mirror
Add Name and CopyRight Info!
All Done,Hope you enjoyed my tutorial!
Labels:
MY TUTORIALS
|
0
comments
Valentine Sweetheart
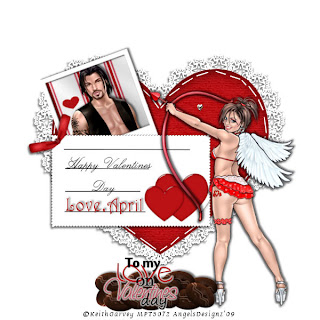
All of my tutorials require a working knowledge of PSP!This tutorial was written by me on January 30,2009. It is of my own ideas and creation! Any other tutorials found to be similar is coincidental.
Supplies Needed
Scrapkit of Choice
I'm using a Wonderful kit called Be Mine made by April @ Reece's Pieces Scraps. You can purchase this Beautiful kit here
Tube of Choice
I'm using the Wonderful work of Keith Garvey. You must have a license to use his work! You can purchase that here
Mask of Choice-Optional
Let's Begin
Open new image 600x600
Flood fill white
Copy and paste notecard
Resize 60%
Add dropshadow of choice
Copy and paste tube of choice
Resize 80%
Add a dropshadow, Place on the right side of the canvas
Copy and paste heart and lace
Place behind the notecard
Add a dropshadow to it
Copy and paste chocolates
Resize 60%
Duplicate 2x's
Copy and paste Chrome hearts
Place on the heart and lace
Using your deform tool,push the sides in to make it fit nicely on the heart and lace
Move chrome hearts below tube
Copy and paste wordart2
Resize 60%
Place on top of chocolates
Add a white dropsahdow
Copy and paste poloroid frame
Resize 60%
Image,Rotate,Free Rotate 20.00,Left(See mine for placement)
Copy and paste paper16
Resize 60%
Image,Rotate,Free Rotate 20.00,Left
Copy and paste another tube (preferably a man)
Image,Rotate,Free Rotate 20.00,Left
Place this layer below the poloroid frame
Take your Magic wand and click on the inside of your poloroid
Selections,Modify,Expand by 5
Selections,Invert
Hightlight the paper16 layer, Hit delete on your keyboard
Highlight the man tube, Hit delete on your keyboard
Selections,Select none
Add a dropshadow of choice to the man tube and the poloroid frame
Now Add your Name and CopyRight Info!!
All Done,Thanks for trying my tutorial!
All Done,Thanks for trying my tutorial!
Labels:
MY TUTORIALS
|
0
comments
Orange Crush
 All of my tutorials require a working knowledge of PSP!This tutorial was written by me on January 30,2009. It is of my own ideas and creation! Any other tutorials found to be similar is coincidental.
Supplies Needed
Scrapkit of Choice
I'm using a Wonderful kit called Sparkling Citrus,made by April @ Reece's Pieces Scraps. You can purchase this kit here
Tube of Choice
I'm using the Wonderful work of Elias Chatzoudis. You must have a license to use his work! You can purchase that here
Mask of Choice-Optional
Let's Begin
Open new image 600x600
Flood fill white
Find the frame2
Image,Rotate,Rotate Counter clockwise 90
Copy and paste onto white canvas as a new layer
Resize 50%
Duplicate,Image,Mirror(See mine for placement)
Copy and paste staple
Place on the adjoining frames
Copy and paste paperpiece3
Move this layer below your frame layer
Place to your liking under the top left frame
Take your Magic wand, Click on the inside of the top frame
Selections,Modify,Expand by 3
Selections,Invert
Highlight paper layer,Hit delete on your keyboard
Selections,Select none
Do the same thing as above for the bottom right frame
Copy and paste tube of choice
Resize 80%
Hide your tube,whitebackground layer
Merge the frames,paperpiece3 Visable
UnHide your tube and white background
Place your tube to your liking
Add a dropshadow of choice
Resize the frame layer 80%
Copy and paste paper13 below the frame layer
Apply mask of choice,Merge Group
Copy and paste button 10
Resize 80%
Place on top left corner of frame
Duplicate (see mine for placement)
Duplicate again,Image,Mirror, move over to right side of bottom frame
Copy and paste bow3
Resize 30%
Place to your liking or See mine for placement
Add a dropshadow of choice
Copy and paste bow 2
Resize 30%
Place ontop of other bow
Copy and paste wordart
Resize 60%
Place wordart in the middle of the top frame
Dropshadow of choice
Copy and paste bead
Resize 40%(See mine for placement)
Add your Name and CopyRight Info!
That's it,Hope your enjoyed my tutorial~
Labels:
MY TUTORIALS
|
0
comments
Letters From Iraq
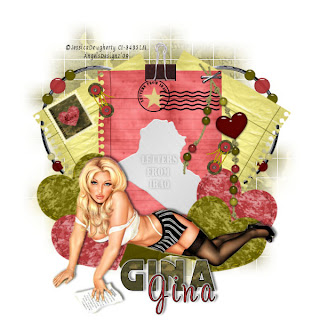 All of my tutorials require a working knowledge of PSP!This tutorial was written by me on January 30,2009. It is of my own ideas and creation! Any other tutorials found to be similar is coincidental.
Supplies Needed
Scrapkit of Choice
I'm using a Wonderful kit calledLetters from Iraq made by Gina @ Kikeka Kits. You can purchase this kit here
Tube of Choice
I'm using the Wonderful work of Jessica Dougherty. You must have a license to use her work! You can purchase that here
Mask of Choice-Optional
Let's Begin
Open new image 600x600
Flood fill white
Copy and paste notepaper2
Resize 60%
Image,Rotate,Free Rotate 30.00,Left
Duplicate-Image,Mirror
Copy and paste notepaper1
Resize 60%
Copy and paste tube of choice
Resize by 80%
Place to your liking,Add dropshadow
Copy and paste iraq
Resize 60%
Place on the center notepaper
Copy and paste postmark
Resize 60%
Place to your liking
Copy and paste Stamp
Resize 60%
Image,Rotate,Free Rotate 30.00,Left
Place on the left notepaper
Copy and paste wrap3
Resize 60%
Place on the bottom of the notepaper
Copy and paste heartstring
Resize 60%
(See mine for placement)
Copy and paste camoheart14
Resize 60%
Image,Rotate,Free Rotate 30.00,Left
Copy and paste camoheart13
Resize 60%
Image,Rotate,Free Rotate 30.00,Right
Duplicate both camoheart,Image,Mirror
Copy and paste clip1
Resize 60%
Place to the left side of the canvas,Move this layer below all layers but above the white background
Duplicate-Image,Mirror
Copy and paste fastener1
Resize 30%
(See mine for placement)
Duplicate-Image,Mirror
Copy and paste paper15
Apply mask of choice, Merge Group
Copy and paste binder1
Resize 30%,Place at the top of the notepaper
Now Add your Name and CopyRight Info!
All Done,Thanks for trying my tutorial~
Labels:
MY TUTORIALS
|
0
comments
Someone I ♥ has Lupus
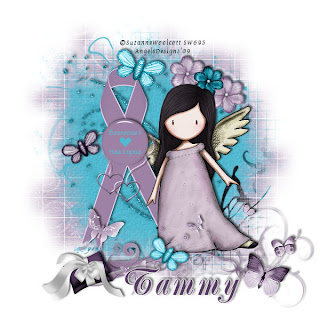 All of my tutorials require a working knowledge of PSP!This tutorial was written by me on January 30,2009. It is of my own ideas and creation! Any other tutorials found to be similar is coincidental.
Supplies Needed
Scrapkit of Choice
I'm using a Magnificent kit called Butterflies for Tammy made by Jillann @ Jillann's Creations. This is a PTU kit, you can purchase it here
Tube of Choice
I'm using the Wonderful work of Suzanne Woolcott. You must have a license to use her work! You can purchase that here
Mask of Choice
Let's Begin
Open new image 600x600
Flood fill white
Copy and paste the LupusAwarenessRibbon2
Resize if needed
Copy and paste tube of choice
Resize 80%
Duplicate tube layer and rename it Tube2
Drag the original below the lupusawarenessribbon2 layer
On the Tube2 layer,Take your eraser tool and erase the left side of the tube that is covering the ribbon
(See mine for reference)
Add a dropshadow to the original tube layer
Copy and paste paper3
Apply mask of choice,Merge Group
Copy and paste paper6
Apply another mask of choice or the same one,Merge Group
Using your deform tool,move the top mask in slightly so you can see the bottom one
Copy and paste Flair1
Resize 40%
Place to your liking
Adjust,Sharpness,Sharpen
Add dropshadow
Copy and paste doodle1
Resize 80%
Image,Mirror
Place at the bottom of the canvas
Add dropshadow of choice
Copy and paste pillow1
Resize 20%
Place on the end of the doodle
Add dropshadow of choice
Copy and paste glitterbutterfly2
Resize 30%
Image,Rotate,Free Rotate 30.00,Left
Add a dropshadow of choice,Place to your liking
Copy and paste glitterbutterfly3
Resize 30%
Image,Rotate,Free Rotate 30.00,Right
Place to your liking, Add a dropshadow
Copy and paste GlitterFlower2
Resize 30%
Place on top right side of mask
Add a dropshadow
Duplicate,Pull to the right a bit
Copy and paste GlitterFlower3
Resize 25%
Add a dropshadow,Place in the middle of the other 2
Merge the 3 flowers Visable
Copy and paste ChainedHearts
Resize 30%
Place below Flair1
Effects,Inner Bevel
Add your Name and CopyRight Info!
That's it,Thanks for trying my tutorial~
Labels:
MY TUTORIALS
|
0
comments
Hope
 All of my tutorials require a working knowledge of PSP!This tutorial was written by me on January 30,2009. It is of my own ideas and creation! Any other tutorials found to be similar is coincidental.
Supplies Needed
Scrapkit of Choice
I'm using a Magnificent kit called Butterflies for Tammy made by Jillann @ Jillann's Creations. This is a PTU kit, you can purchase it here
Tube of Choice
I'm using the Wonderful work of Jamie Kidd. You must have a license to use her work! You can purchase that here
Mask of Choice
Let's Begin
Open new image 600x600
Flood fill white
Copy and paste frame1
Resize 80%
Copy and paste paper5 above white background layer
Using your magic wand click inside the frame
Selections,Modify,Expand by 17
Selections,Invert
Highlight paper5 layer,Hit delete on your keyboard
Selections,Select none
Copy and paste tube of choice
Resize if needed (If using the same as me,resize 80%)
Postion to your liking
Duplicate this layer,Rename tube2
Drag the original below the frame
Take your eraser tool,Remove any parts of the bottom of the frame hanging over
(You want it too look like the tube is coming out of the frame)
(See mine for reference)
Add a dropshadow to the original
Also add a dropshadow to your frame
Copy and paste wordart1
Resize 50%
Image,Rotate,Free Rotate,30.00, Left
Adjust,Sharpness,Sharpen
(See mine for placement)
Add a dropshadow of choice
Copy and paste paper6 above white background layer
Apply mask of choice
MergeGroup on mask layer
Copy and paste glitterdoodle1
Move to left side of the frame
Duplicate-Image,Mirror,Image,Flip
Copy and paste diamond-charm2
Resize 30%
Place up next to the wordart
Copy and paste the charmedbow4
Resize 30%
Place on the bottom of the frame
Add your Name and CopyRight Info!
All Done! Thanks for trying my tutorial!
Labels:
MY TUTORIALS
|
0
comments
Lil Birdie's
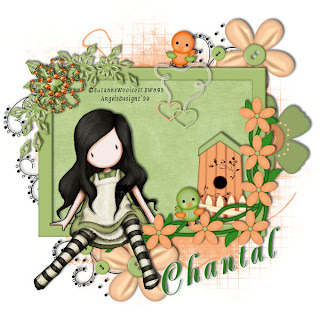 All of my tutorials require a working knowledge of PSP!This tutorial was written by me on January 29,2009. It is of my own ideas and creation! Any other tutorials found to be similar is coincidental.
Supplies Needed
Scrapkit of Choice
I'm using a Beautiful kit called Bird Song made by Chantal @ ChaDesignz. You can purchase this kit here
Tube of Choice
I'm using the Wonderful work of Suzanne Woolcott. You must have a license to use her work! You can purchase that here
Mask of Choice
Let's Begin
Open new image 600x600
Flood fill white
Copy and paste frame3
Resize 50%
Copy and paste tube of choice
Place on bottom of frame
Duplicate and rename this layer tube2
Drag the original tube below the frame
Take your eraser tool and remove anything hanging over onto the flower from tube2
Add a dropshadow to the original tube layer
Copy and paste paper6 above white background layer
Take your magic wand tool
Click on the inside of the frame
Selections,Modify,Expand by 3
Selections,Invert
Highlight paper layer,Hit delete on your keyboard
Selections,Select none
Add a dropshadow to your frame layer
Copy and paste paper8 right above your white background layer but below paper6 layer
Apply mask of choice
MergeGroup on mask layer
Copy and paste flower3
Resize 50%
Move toward left of canvas,Move this layer below frame and paper layer
Duplicate-Image,Flip,Image,Mirror
Add a light dropshadow to both
Copy and paste birdhouse1
Resize 30%
Move below frame layer but above paper6 layer
Add a dropshadow of choice
(See mine for placement)
Copy and paste bird5
Resize 15%
Place down by the birdhouse1
Add a light dropshadow
Copy and paste bird6
Resize 15%
Image,Mirror
Place on top of frame
(See mine for reference)
Add a dropshadow of choice
Copy and paste gem_flower
Resize 30%
Place in top left corner of frame
Add a dropshadow of choice
Copy and pate metallic flower2
Resize 30%
Image,Flip,Image Mirror
Place under gem_flower
(see mine for reference)
Add dropshadow of choice
Copy and paste heart
Resize 30%
Place towards top right of frame
(See mine for placement)
Add a dropshadow of choice
Add Your Name and CopyRight Info!
!That's it,Thanks for trying my tutorial!!
Save as a JPEG
Labels:
MY TUTORIALS
|
0
comments
Another New Blinkie 1/29/09
I was messing around as i do from time to time lol. And i made this cute little blinkie for a bestie of mine. Kit Used is called Warm and Cozy made by ChaDesignz!
Labels:
CUSTOM SERVICES
|
1 comments
Newest Blinkie 1/29/09
Blinkie was made for a bestie of mine. Kit used was Seriously Kaleb w/ a part of Strawberry Garden all made by Jillann @ Jillann's Creations!
Labels:
CUSTOM SERVICES
|
0
comments
WildLife-Friends
 All of my tutorials require a working knowledge of PSP!This tutorial was written by me on January 29,2009. It is of my own ideas and creation! Any other tutorials found to be similar is coincidental.
Supplies Needed
Scrapkit of Choice
I'm using a Wonderful kit called Falling for you, made by Michelle @ Candy Kisses Designz. You can purchase her kit here
Tube of Choice
I'm using the Wonderful work of Suzanne Woolcott. You must have a license to use her work! You can purchase that here
Mask of Choice
Let's Begin
Open new image 600x600
Flood fill white
Copy and paste frame4
Resize 80%
Copy and paste paper6
Move this layer below your frame
Using your magic wand tool
Click on the inside of your frame
Selections,Modify,Expand by 3
Selections,Invert
Highlight paper6 layer
Hit delete on your keyboard
Selections,Select none
Hide the white background layer by clicking on the eye
Merge the frame and paper6 visable
Un hide the white background
Copy and paste tube of choice
Resize if needed
Add a dropshadow
Copy and paste Tree
Resize 70%
Place on the left side of the canvas
(See mine for reference)
Copy and paste the owl
Resize 20%
Place in the tree
Add a dropshadow
Copy and paste binderclip
Resize 40%
Place on the top left of frame
Copy and paste pendant
Resize 40%
(See mine for placement)
Copy and paste Untitled-1
Resize 40%
Place on bottom right side of frame
Copy and paste flower-element4
Resize 40%
Place down on the bottom of the tree
Add dropshadow
Duplicate,Image,Mirror
Copy and paste the flower-element2
Resize 30%
(See mine for placement)
Add dropshadow
Duplicate,Image,Mirror
Add Your Name and CopyRight Info!
Copy and paste paper8 above white background layer
Apply mask of choice
MergeGroup on mask layer
All Done,Thanks for trying my tutorial!
Labels:
MY TUTORIALS
|
0
comments
Jeans Kinda Girl
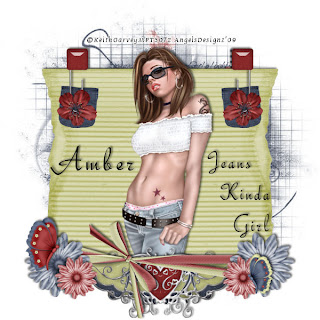 All of my tutorials require a working knowledge of PSP!This tutorial was written by me on January 28,2009. It is of my own ideas and creation! Any other tutorials found to be similar is coincidental.
Supplies Needed
Scrapkit of Choice
I'm using a Beautiful kit called Love for Denim or Khaki, made by BitterSweet Designs. You can purchase her kit here
Tube of choice
I'm using that Wonderful work of Keith Garvey. You must have a license to use his work! You can purchase that here
Mask of Choice
Let's Begin
Open new image 600x600
Flood fill white
Copy and paste tube of choice
Resize if needed
Add a dropshadow
Copy and paste paper10
Apply mask of choice
MergeGroup on mask layer
Place behind tube but above mask
Copy and paste cardboard edge 2
Resize 50%
Place to the left on your tube
Add a dropshadow
DuplicateImage,Mirror
Copy and paste the wrap3
Resize 50%
Place at the bottom of tube,cardboard edge
(See mine for reference)
Copy and paste flower3
Place on corner of the cardboard edge2
Resize 30%
Add a dropshadow
Duplicate
Image,Mirror
Copy and paste flower1
Resize 20%
(See mine for placement)
Add a dropshadow of choice
Duplicate
Image,Mirror
Copy and paste paperclip1
Resize 30%
Add a light dropshadow
Duplicate
Image,Mirror
Copy and paste pocket3
Resize 15%
Place under the paperclip
Duplicate
Image,Mirror
Copy and paste butterfly1
Resize 20%
Place on the flower of choice
Add a dropshadow
Copy and paste Doodle1
Resize 40%
Place below ribbon
(See mine for placement)
Add a dropshadow
Copy and paste flower4
Resize 15%
Place on top of the pocket
Duplicate
Image,Mirror
Copy and paste butterfly2
Image,Mirror
Resize 15%
Place on bottom right flower
Add a dropshadow
Add your name and copyright info!!
That's it,Hope you enjoyed my tutorial!
Labels:
MY TUTORIALS
|
0
comments
Love You-Valentine
All of my tutorials require a working knowledge of PSP!This tutorial was written by me on January 27,2009. It is of my own ideas and creation! Any other tutorials found to be similar is coincidental.
Supplies Needed
Scrapkit of Choice
I'm using a Beautiful kit called Love Bugz made by Charly @ Country Hollow Creations. You can purchase her kit here
Tube of choice
I'm using that Wonderful work of Suzanne Woolcott. You must have a license to use her work! You can purchase that here
Mask of Choice
Let's Begin
Open new image 600x600
Flood fill white
Copy and paste the Envelope
Resize 80%
Move to bottom left side of canvas
Add a dropshadow of choice
Copy and paste frame3
Resize 80%
Image,Rotate,Free Rotate, 15.00,Right
Copy and paste a tube of choice
(best to use one with a background)
Resize as needed
Place to your liking in the frame3
Using your magic wand tool
Click on the inside of your frame
Selections,Modify,Expand by 2
Selections,Invert
Click on your tube w/ background layer
Hit delete on your keyboard
Selections,Select none
Move this layer below the frame
Copy and paste paper2
Apply mask of choice
MergeGroup on mask layer
Copy and paste bear1
Resize 30%
Place on the right of the frame
Add dropshadow of choice
Copy and paste bear2
Resize 30%
Place on the left side of the envelope
Add a dropshadow
Copy and paste doodles1
No need to resize
Place behind the mask layer
Add dropshadow of choice
Copy and paste candyheartlolipop3
Resize 30%
Place on the left side of the envelope
Duplicate
Move the original behind the envelope
Take your eraser tool and on the duplicated layer remove the stick
Add your name and copyright info!
All done,Thanks for trying my tutorial!
Labels:
MY TUTORIALS
|
0
comments
Passion
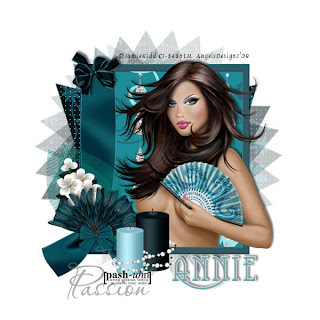 All of my tutorials require a working knowledge of PSP!This tutorial was written by me on January 27,2009. It is of my own ideas and creation! Any other tutorials found to be similar is coincidental.
Supplies Needed
Scrapkit of Choice
I'm using a Beautiful kit called Moment In Time, made by Annie @ Annie's Design. You can purchase this kit here
Tube of Choice
I'm using the Wonderful work of Jamie Kidd. You must have a license to use her work! You can purchase it here
Mask of Choice
Let's begin
Open new image 600x600
Flood fill white
Copy and paste frame7
Resize 40%
Copy and paste paper2
Move this layer below the frame
Selections,Modify,Expand by 3
Selections,Invert
Highlight paper layer
Hit delete on your keyboard
Selections,None
Copy and paste tube of choice
Place to your liking
Duplicate
Move the original layer below the frame layer
Take your eraser tool,remove any part of the tube hanging over the frame on the duplicated tube layer
Add dropshadow to the original tube layer
Copy and paste paper8
Apply mask of choice
MergeGroup on mask layer
Copy and pasteDustofPearl
Move this layer below original tube layer
Copy and paste Garden2
Resize 40%
Place on the bow on the frame
Add a dropshadow of choice
Copy and paste flower7
Resize 30%
Place behind the Garden2
(See mine for reference)
Copy and paste candle2
Resize 20%
(See mine for placement)
Add a dropshadow of choice
Copy and paste candle
Resize 25%
Place next to the other candle
(See mine for reference)
Add a dropshadow of choice
Copy and paste bow4
Resize 10%
Place on top Left corner of frame
Add a light dropshadow
Image,Rotate,Free Rotate 15.00,Left
Add any Wordart of choice
Add Your Name and CopyRight Info!!!
All Done,Hope you enjoyed my tutorial!
Labels:
MY TUTORIALS
|
0
comments
Goth Love
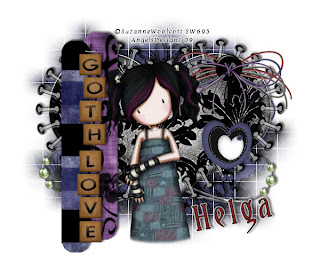
All of my tutorials require a working knowledge of PSP!This tutorial was written by me on January 26,2009. It is of my own ideas and creation! Any other tutorials found to be similar is coincidental.
Supplies Needed
Scrapkit of Choice
I'm using a Wonderful kit called Goth Love made by Classie Creationz. This is a PTU kit. You can purchase it here
Tube of Choice
I'm using the Wonderful work of Suzanne Woolcott. You must have a license to use her work! You can purchase that here
Mask of Choice
Let's Begin
Open new image 600x500
Flood fill white
Copy and paste BondedHeart2
Resize if needed
Add a light dropshadow of choice
Copy and paste tube of choice
Resize if needed
(If using the same tube as me,Resize 80%)
Add a dropshadow of choice
Copy and paste MatalDoodle3
Move this layer below the bonded heart layer
(See mine for placement)
Add a light dropshadow
Copy and paste paper7
Place this layer above white background layer
Apply mask of choice
MergeGroup on mask layer
Copy and paste Wordart on string2
Resize 65%
Place on left side of tag
Pick 2 papers of choice
Find your 1st paper in your patterns
Click on your preset shape tool
(with these settings)
Rectangle
Horizontal Radius: 22.00
Vertical Radius: 24.00
Width 6.00
Draw a rectangle out to the length of the wordart on a string
Do the same thing for the other paper as well
Copy and paste button bow2
Resize 50%
Place on the right top side of the bondedheart
Copy and paste dangling heart2
Resize 50%
Place to your liking
Add a dropshadow of choice
Add Your Name and CopyRight Info!
All Done! Thanks for trying my tut!
Labels:
MY TUTORIALS
|
0
comments
Kiss This
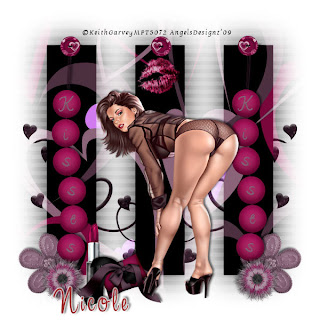 All of my tutorials require a working knowledge of PSP!This tutorial was written by me on January 26,2009. It is of my own ideas and creation! Any other tutorials found to be similar is coincidental.
Supplies Needed
Scrapkit of Choice
I'm using a Wonderful kit called Raspberry Kisses made by Nicole @ SID. This is a PTU kit! You can purchase her kit here
Tube of Choice
I'm using the Wonderful work of Keith Garvey. You must have a license to use his work! You can purchase that here
Mask of Choice
Let's Begin
Open new image 600x600
Flood fill white
Copy and paste flower2
Resize 30%
Add a dropshadow
Copy and paste tube of choice
Resize if needed
Add a dropshadow
Copy and paste paper11
Apply mask of Choice
Merge Group on mask layer
Copy and paste GlitterSwirlz2
Move this layer below the mask layer
Place like mine
Duplicate,Image,Mirror
Copy and paste button1
Resize 30%
(See mine for placement)
Or place to your liking
Copy and paste beads
Resize 50%
Place on the left side of the tag
Add Dropshadow of choice
Copy and paste feather flower
Resize 20%
Place on the bottom of the beads
Duplicate,Image,Mirror
Copy and paste lips1
Resize 40%
Add a dropshadow place to your liking
Copy and paste Pillow2
Resize 30%
Place at the bottom of the canvas
Add a dropshadow
Copy and paste lipstick1
Resize 30%
Place down by the pillow
Add a light dropshadow
Add Your Name and CopyRight Info!
All Done,Thanks for trying my tut!
Labels:
MY TUTORIALS
|
0
comments
Girlz Rule
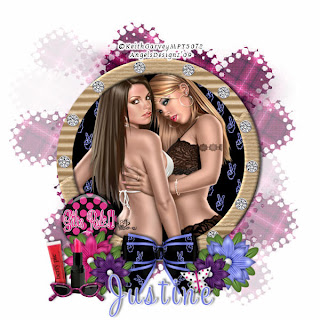 All of my tutorials require a working knowledge of PSP!This tutorial was written by me on January 26,2009. It is of my own ideas and creation! Any other tutorials found to be similar is coincidental.
Supplies Needed
Scrapkit of Choice
I'm using a Wonderful kit called Girls Rule,made by Justine @ Psp Addict & Digital Scraps. This is a PTU kit, you can purchase it here
Tube of Choice
I'm using the Wonderful work of Keith Garvey. You must have a license to use his work! You can purchase that here
Mask of Choice
Let's Begin
Open new image 600x600
Flood fill white
Copy and paste Frame
Resize 85%
Copy and paste paper5
Move below frame layer
Resize 60%
Using your magic wand tool
Click on the inside of your frame
Selections,Modify,Expand by 6
Selections,Invert
Highlight your paper layer
Hit delete on your keyboard
Selections,Select none
Copy and paste tube of choice
Resize if needed
Highlight your frame
Click on the inside of the frame with your magic wand tool
Selections,Modify,Expand by 6
Selections,Invert
Highlight your tube
Hit delete on your keyboard
Selections,Select none
Move this layer below your frame but above the paper
Add a dropshadow of choice
Copy and paste bow4
Resize 50%
Place on bottom of the frame
Add dropshadow of choice
Copy and paste paper2
Apply mask of choice
Merge Group on the mask layer
Copy and paste sunglasses
Resize 20%
Place to your liking
Add a dropshadow
Copy and paste the Brad5
Resize 20%
Place onto frame
Adjust,Sharpness,Sharpen
Duplicate this layer as many times as you need to
(See mine for reference)
Copy and paste Lipgloss tube
Resize 30%
Add a dropshadow
Place to your liking
Copy and paste lipstick tube
Resize 30%
Place by the lipgloss tube
Add a dropshadow
Copy and paste flower4
Resize 30%
Place on the left side of the bow4
Add dropshadow of choice
Copy and paste flower
Move this layer below flower4
Resize 40%
Add a dropshadow
(See mine for placement)
Copy and paste flower2
Resize 40%
Place on the right side of the bow
Highlight flower4
Duplicate,Image,Mirror
Copy and paste butterfly2
Resize 20%
Image,Rotate,Free Rotate,10.00,Left
Add a dropshadow of choice
Place on the bottom right side onto flower4
Add Your Name and CopyRight Info!
All Done,Hope your enjoyed my tutorial!
Labels:
MY TUTORIALS
|
0
comments
Pirate Chick
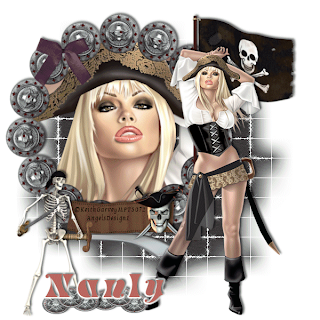 All of my tutorials require a working knowledge of PSP!This tutorial was written by me on January 26,2009. It is of my own ideas and creation! Any other tutorials found to be similar is coincidental.
Supplies Needed
Scrapkit of Choice
I'm using a Wonderful kit called Pirate Girl,made by Scrap Nanly. This is a PTU kit,you can purchase it here
Tube of Choice
I'm using the Wonderful work of Keith Garvey. You must have a license to use his work! You can purchase that hereMask-WSL mask 84 here
Animation Shop
Plugins-Xenofex 2 here
Let's Begin
Open new image 600x600
Flood fill white
Copy and paste frame 01
Resize 70%
Move to left of the canvas slightly
Copy and paste Close of tube of choice
Place below the frame layer
Resize if needed
Highlight your frame
Click inside frame with magic wand
Selections,Modify,Expand by 3
Selections,Invert
Highlight close up tube
Hit delete on your keyboard
Selections,Select none
Merge closeup tube and frame together
Copy and paste paper10
Apply mask of choice
Merge Group on mask layer
Copy and paste tube
Resize if needed
Add a dropshadow of choice
Copy and paste ruban 4
Resize 50%
Place on the bottom of the frame
Add a dropshadow of choice
Copy and paste scelette
Resize 60%
Place down by the ruban
Add dropshadow of choice
Copy and paste the t*te Pirate
Resize 30%
Place on the right side of the ruban
Add a dropshadow of choice
Copy and paste the drapeau 02
Resize if needed
Place to your liking
Add a dropshadow
Copy and paste ,p,e_02
Resize 60%
Image,FlipPlace to your liking
Add a dropshadow
Copy and paste m,daillon_02
Resize 20%
Place to your liking
I duplicated this layer 2x's. then Duplicated,Image,Mirror
Add dropshadow of choice
Add your Name and CopyRight Info!
Time to Animate
Highlight mask layer
Using your magic wand click on the mask layer
Effects,Plugins,Xenofex2,Constellation with these settings
2.76
50
50
0
100
75
Twinkle Rotation: 45
Background Fill: Keep original Fill
Hit Random seed 1 time
Selections,Select none
CopyMerge over to Animation Shop
Paste as new animation in animation shop
Back to PSPHit undo 2x's
Apply constellation again
Hit Random Seed 1 time
Selections,Select none
CopyMerge over to Animation shop
Paste after current frame
Back to PSPHit undo 2x's
Apply constellation again
Hit random seed 1 time
Selections,Select none
CopyMerge to animation shop
Paste after current frame
View animation(2nd button from top right)
Once happy with animation
Save as a gif
All Done,Thanks for trying my tutorial!!
Labels:
MY TUTORIALS
|
0
comments
Addicted
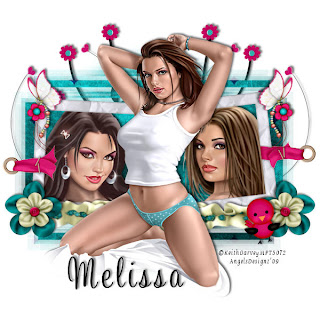 All of my tutorials require a working knowledge of PSP!This tutorial was written by me on January 26,2009. It is of my own ideas and creation! Any other tutorials found to be similar is coincidental.
Supplies Needed
Scrapkit of Choice
I'm using a Wonderful kit called Conspicuouslly Sexy made by Melissa @ CharmeDiva Scrapz. You can purchase this PTU kit here
Tube of Choice
I'm using the Wonderful work of Keith Garvey.You must have a license to use his work! You can purchase that here (I'm using 1 tube and 2 closeups)
Mask of Choice
Let's Begin
Open new image 600x600
Flood fill white
Find (68) white&Pink frame
Image,Rotate,Rotate Counter Clockwise 90
Copy and paste onto canvas as new layer
Move towards top of canvas
Rename this layer Frame
Copy and paste tube of choice
Place in the middle of the frame
Add a dropshadow of choice
Resize if needed
Copy and paste your first closeup of choice
Resize if needed
Place to your liking on the left side of the frame
Using your magic wand tool
Click on the inside of your frame
Selections,Modify,Expand by 3
Selections,Invert
Highlight your closeup tube
Hit delete on your keyboard
Selections,Select none
Move this layer below your frame
Do the same thing for the Right side of the frame
(Use a different tube or the same,up to you)
Add dropshadow of choice to both tubes in the frame
Copy and paste paper1 above the white background layer
Apply mask of Choice
Merge Group on mask layer
Merge the frame,2 close up tubes only visable
Move frame down to middle of mask
(See mine for reference)
Copy and paste (44)
Resize 60%
(See mine for placement)
Using your deform tool,pull the right side over just a little bit
Dropshadow of choice
Copy and paste (35)
Resize 20%
Place on the end of (44)
Add a dropshadow
Duplicate,Image,Mirror
Copy and paste (79)
Resize 20%
Place on the top left corner of the frame
Add dropshadow of choice
Duplicate,Image,Mirror
Copy and paste (42)
Resize 20%
Add dropshadow of choice
Move to right side of frame
(See mine for placement)
Copy and paste (78)
Resize 15%
Add dropshadow of choice
Place on (79)
Duplicate,Image,Mirror
Copy and paste (12)
Resize 60%
Move to left side of canvas
Move this layer below the mask layer
Dropshadow of choice
Duplicate,Image,Mirror
Add Your Name and CopyRight Info!!
All Done,Hope you enjoyed my tutorial!
Labels:
MY TUTORIALS
|
0
comments
Pot of Gold
 All of my tutorials require a working knowledge of PSP!This tutorial was written by me on January 25,2009. It is of my own ideas and creation! Any other tutorials found to be similar is coincidental.
Supplies Needed
Scrapkit of Choice
I'm using a Wonderful kit called Luck_O_The _Irish made by April @ Reeces Pieces. This is a PTU kit,You can purchase it here
Tube of Choice
I'm using the Wonderful work of Keith Garvey. You must have a license to use his work!! You can purchase that here
Mask of Choice-Optional
AnimationShop
Plugins-Xenofex2 here
Let's Begin
Open new image 600x600
Flood fill white
Copy and paste tube of choice
Resize if needed
Image,Mirror
Add a dropshadow of choice
Copy and paste embroidered
Place behind your tube of choice
(See mine for reference)
Add a dropshadow of choice
Copy and paste bouquet
Resize 50%
Image,Rotate,Free Rotate, 15.00 Left
(See mine for placement)
Adjust,Sharpness,Sharpen
Add a dropshadow of choice
Copy and paste paper1
Apply mask of choice
Merge Group on mask layer
Copy and paste the wordart
Resize 50%
Place to your liking
Add a white dropshadow of choice
Copy and paste blank card
Move below all layers,but above white background,mask layer
Add a dropshadow of choice
Copy and paste tag
Move this layer behind your tube layer
(See mine for reference)
Add Your Name and Copyright Info!
Time to Animate
Using your Magic Wand
Tolerence: 38
Click on the gold(You may have to click a few times to get all of the gold covered)Effects,Plugins,Xenofex2,Constellation (with these settings)
2.76
50
50
12
100
75
Twinkle Rotation: 45
Background Fill: Keep original image
Hit Random Seed 1 time
Selections,Select none
CopyMerge over to Animation Shop
Paste as new animation
Back to Psp
Hit undo 2x's
You should have marching ants again
Do the same as above hit random seed
Copymerge over to Animation shop
Paste after current frame
Back to psp,Same as before hitting random seed
CopyMerge over to Animation shop
Paste after current frame
Check animation (2nd button from top Right)
Save as a gif
All Done! Hope you enjoyed my tutorial!
Labels:
MY TUTORIALS
|
0
comments
British Pride
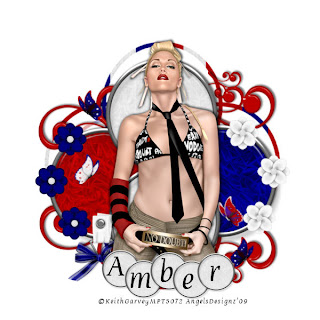 All of my tutorials require a working knowledge of PSP!This tutorial was written by me on January 24,2009. It is of my own ideas and creation! Any other tutorials found to be similar is coincidental.
Supplies Needed
Scrapkit of Choice
I'm using a Wonderful kit called British Pride made by Bittersweet Designs. You can purchase this kit here
Tube of Choice
I'm using the Wonderful work of Keith Garvey. You must have a license to use his work. You can purchase that here
Mask of Choice-Optional
Let's Begin
Open new image 600x600
Flood fill white
Copy and paste Brad 1,2,3
(See mine for Placement)
Add a Dropshadow to all 3
Duplicate Brad1
Image,Flip
Copy and paste tube of choice
Resize if needed
Add a dropshadow of choice
Copy and paste Doodle1
Resize 30%
Place behind the Brads
Duplicate,Image,Flip
Dropshadow of choice on both
Copy and paste butterfly3
Resize 10%
Place to your liking
Copy and paste butterfly2
Resize 10%
Image,Mirror
Place to your liking
Copy and paste butterfly1
Resize 10%
Place to your liking
Duplicate butterfly1
Image,Mirror And place again
Copy and paste buckle3
Resize 30%
Place on the Red Brad
Copy and paste Flower1,3
Resize 20%
(I duplicated mine to add some more flowers around the brads)
Copy and paste bow1
Resize 30%
Place on the buckle
If adding a mask,Copy and paste paper7
Apply mask of choice
Merge Group on mask layer
Copy and paste brad1
Resize 30%
Place along the bottom of your tube
(If your tube has the bottom cut off)
Duplicate as many times as the name you are using
Add Your Name and Copyright Info!
All Done,Thanks for trying my tut!!
Labels:
MY TUTORIALS
|
0
comments
Love Notes
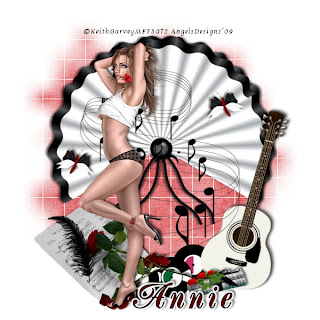 All of my tutorials require a working knowledge of PSP!This tutorial was written by me on January 24,2009. It is of my own ideas and creation! Any other tutorials found to be similar is coincidental.
Supplies Needed
Scrapkit of Choice
I'm using a Wonderful kit called Romance,Made by Annie @ Annie's Design. You can purchase this kit here
Tube of Choice
I'm using the Wonderful work of Keith Garvey. You must have a license to use his work! You can purchase that here
Mask of Choice
Let's Begin
Open new image 600x600
Flood fill white
Copy and paste note
Place in the center of the canvas
Copy and paste your tube of choice
Resize if needed
(See mine for placement)
Add a dropshadow of choice
Copy and paste Partition
Resize 60%
Place at the bottom of the note
(See mine for reference)
Add a dropshadow of choice
Copy and paste fan
Resize 60%
Place behind the note
Duplicate,Image,MirrorImage,Rotate,Free Rotate 30.00,Right
Add a dropshadow of choice
Copy and paste paper6
Apply mask of choice
Merge Group on mask layer
Copy and paste disque
Resize 60%
(See mine for placement)
Copy and paste the Guitar
Resize 10%
Place on the bottom left side of the canvas
(See mine for reference)
Image,Rotate,Free Rotate,15.00,Right
Add a dropshadow
Copy and paste feather4
Resize 60%
Place on top of partition
Image,Mirror
Copy and paste the partition2
Resize 40%
Add dropshadow of choice
Copy and paste the butterfly
Resize 10%
Image,Rotate,Free Rotate,15.00,Right
Duplicate,Image,Mirror
Add a dropshadow of choice to both
Add Your Name and copyright Info!!
All done. Thanks for trying my tut!
Labels:
MY TUTORIALS
|
0
comments
Sexy Valentine
 All of my tutorials require a working knowledge of PSP!This tutorial was written by me on January 24,2009. It is of my own ideas and creation! Any other tutorials found to be similar is coincidental.
Supplies Needed
Scrapkit of Choice
I'm using a Wonderful kit called PaperHearts,made by Cindy @ Scrappin With Lil Ole Me. You can purchase this kit here
Tube of Choice
I'm using the Wonderful work of Jamie Kidd. You must have a license to use her work. You can purchase that here
Mask of Choice-Optional
Let's Begin
Open new image 600x600
Flood fill white
Copy and paste frame6
Resize 70%
Copy and paste paper2
Move this layer below your frame layer
Resize 70%
Click on the inside of your frame using your magic wand tool
Selections,Modify,Expand by 3
Selections,Invert
Highlight paper2 layer
Hit delete on your keyboard
Selections,Select none
Copy and paste tube of choice
Place to your liking in the frame
Resize if needed
Duplicate this layer
Drag the original below the frame layer
Using your Eraser tool,Remove any parts of the bottom of the tube hanging over the frame on your duplicated tube
Also remove any hanging out below frame on the original tube layer
Add a dropshadow to the original tube layer
Add a dropshadow to the frame as well
Copy and paste flower2
Move to the right side of the canvas
Drag this layer below the paper layer
Duplicate,Image,Mirror
Add a light dropshadow to both
Copy and paste paper3
Apply mask of choice
Merge Group on mask layer
Move this layer behind all layer but above white background
Copy and paste bow7
Resize 60%
Place on the right side of the frame
Dropshadow of choice
Copy and paste the hangingheart
Resize 20%
(See mine for placement)
Add dropshadow of choice
Copy and paste Clipart9
Resize 30%
Place to your liking
Dropshadow of choice
Copy and paste wordart1
Resize 60%
Place down towards the bottom of the frame
Copy and paste clipart7
Resize 40%
Place at the bottom of the frame
(See mine for placement)
Add dropshadow of choice
Copy and paste clipart6
Resize 30%
Place on the bottom of the hangingheart
Add Your Name and CopyRight Info Now!!
All Done,Thanks for trying my tut!
Labels:
MY TUTORIALS
|
0
comments
S♥W♥A♥K
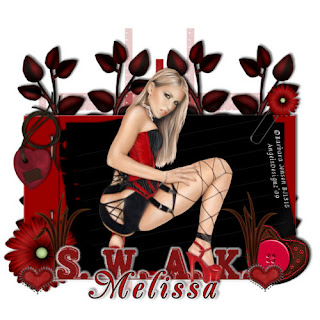 All of my tutorials require a working knowledge of PSP!This tutorial was written by me on January 24,2009. It is of my own ideas and creation! Any other tutorials found to be similar is coincidental.
Supplies Needed
Scrapkit of Choice
I'm using a Beautiful kit called Valentine Baby,made by CharmeDiva Scrapz. This is a PTU kit,you can purchase it here
Tube of Choice
I'm using the Wonderful work of Barbara Jensen. You must have a license to use her work,you can purchase that here
Mask of Choice-Optional
Let's Begin
Open new image 600x600
Flood fill white
Copy and paste Journals(2)
Resize 70%
Add a dropshadow of choice
Copy and paste wordart of choice
Resize if needed
Place this on the bottom of the journal
Copy and paste tube of choice
Resize if needed
Duplicate this layer
Move the original below the wordart layer
Grab your Eraser tool
Erase parts of the tube that is hanging over the wordart
(See mine for reference)
Add a dropshadow on the original layer
Copy and paste the branches
Resize 70%
Move behind Journal
Add a dropshadow of choice
Duplicate this layer3x's and place like mine
Copy and paste heart9
Resize 20%
Image,Mirror
Place on the bottom corner of the journal
Copy and paste the Heart2
Resize 10%
Place on the left side of the wordart
Duplicate,Image,Mirror
Copy and paste leaf
Resize 30%
(See mine for placement)
Duplicate,Image,Mirror
Copy and paste Heart3
Resize 30%
Place on top left corner of the journal
Add a dropshadow of choice
Copy and paste paper2
Apply mask of choice
Merge group on the mask layer
Add Your Name and CopyRight Info!
All done,Ty for trying my tutorial!
Labels:
MY TUTORIALS
|
0
comments
Newest Blinkie Made 1/23/09
Made this blinkie for Mary @ Mary's Place Tuts. Kit used is called Seriously Kaleb made by Jillann @ Jillann's Creations.
Labels:
CUSTOM SERVICES
|
0
comments
Bright & Beautiful
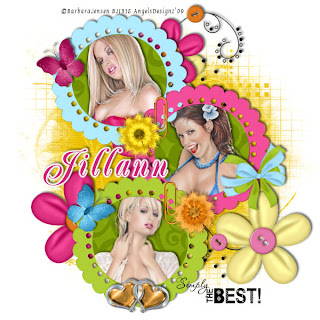 All of my tutorials require a working knowledge of PSP!This tutorial was written by me on January 23,2009. It is of my own ideas and creation! Any other tutorials found to be similar is coincidental.
Supplies Needed
Scrapkit of Choice
I'm using a Awesome kit called Seriously Kaleb, made by Jillann @ Jillann's Creations. This is a PTU kit. You can purchase it here
Tube of Choice
I'm using the Wonderful work of Barbara Jensen. You must have a license to use her work! You can purchase one here
Mask of Choice
Wordart of Choice-Optional
Let's Begin
Open new image 600x600
Flood fill white
Copy and paste frame 1,2,3
Resize all 3 @ 60%
(See mine for placement)
Copy and paste the paperclip2
Duplicate this image
(See mine for placement of the 2)
Take your eraser tool,and remove parts of the paperclip so it looks like it's holding the frames together
Hide your white background layer by clicking on the eye
Merge the frames and 2 paperclips Visable
UnHide the white background by clicking on the eye again
Rename this layer FRAME
Copy and paste paper of choice,I'm using paper8
Move this layer below your frame layer
Grab your magic wand tool,Click on the middle of each frame
Selections,Modify,Expand by 3
Selections,Invert
Highlight the paper layer
Hit delete on your keyboard
Selections,Select none
Now pick 3 tubes of choice
For the top frame,copy and paste your first tube
Move this layer below the frame layer
Position to your liking
Using your magic wand again,Same settings as above
Add a dropshadow to your tube
Do the same thing for the next to frames
Pick 2 different tubes
And add a dropshadow to each
(See mine for reference)
Hide your white background again
Merge all other layers Visable
Unhide your white background
Copy and paste FloweDoodle 1,2
Resize 85%
Place behind the frame
Add a light dropshadow to both
Copy and paste butterfly1
Image,Rotate,Free Rotate,40.00,Right
Resize 40%Place to your liking
Add a dropshadow
Copy and paste butterfly2
Do the same as above but rotate to the left
Copy and paste HeartGem4
Resize 30%
Place on the bottom frame
(See mine for reference)
Add a dropshadow
Copy and paste flower6,8
Resize 30%
Place like mine
Dropshadow of choice
Copy and paste bow7
Resize 30%
Place to your liking
Add a dropshadow
Copy and paste paper3
Move this layer behind all other layers but above white background
Add Mask of Choice
Merge the mask group together
Add Your Name and CopyRight Info!
All Done,Thanks for trying my tutorial!
Labels:
MY TUTORIALS
|
0
comments
Newest Blinkies Made Today! 1/22/09
These 3 were made for Charly @ Country Hollow Scraps Store
Last one i was messing around with and made it for PP2.. The kit used is called Gothic Lover,made by Chantal @ ChaDesignz. Go check out her blog here
Labels:
CUSTOM SERVICES
|
0
comments
Newest Blinkie I Made 1/21/09
Made this one today! What a Cute kit,So many possibilties!! Kit used is called Monkeying_Around made by Just a Girl's Designs. You can find her kit here
Labels:
CUSTOM SERVICES
|
0
comments
Envy Me
 All of my tutorials require a working knowledge of PSP!This tutorial was written by me on January 21,2009. It is of my own ideas and creation! Any other tutorials found to be similar is coincidental.
Supplies Needed
Scrapkit of Choice
I'm using a Wonderful kit called Green with Envy,made by Gina @ Kikeka Kits. This is a PTU kit,you can purchase it here
Tube of Choice
I'm using the Wonderful work of Anothony Guerra. You must have a license to use his work! You can purchase that here
Mask of Choice
Let's Begin
Open new image 600x600
Flood fill white
Copy and paste frame9
Resize if needed
Copy and paste your tube of choice
Resize if needed
Duplicate
Move the orginal under the frame
On the duplicated layer
Grab your eraser tool and remove any parts of the tube hanging over on the left side
(If using the same tube as me)
Add a dropshadow on the original layer
Copy and paste flower4
Duplicate,Image,Mirror
Place both below the frame and tubes but above the white background
Copy and paste paper13
Move this above white background layer,but below all other layers
Highlight your frame layer
Grab your magic wand tool
Click on the inside of the frame
Selections,Modify,Expand by 3
Selections,Invert
Highlight your paper13 layer
Hit delete on your keyboard
Selections,Select none
Copy and paste bling1
Move all the way down under all layer except the white background layerDuplicate,Image,Mirror
Copy and paste the ivy
Add a light dropshadow
Place to where it barely shows on the left side of the frame
Duplicate,Image,Mirror
Merge these 2 together
Move this layer right above the white background but below all other layers
Copy and paste a butterfly of choice
Resize 30%
Place in the top right corner
Light dropshadow of choice
Copy and paste staple1
Place on top left corner
Duplicate,Image,Mirror
Add any extra elements of choice
Copy and paste paper9 above the white background
Add your mask of choice if any
MergeGroup(mask layer)
Add Your name and Copyright Info!!
All Done~Thanks for trying my tutorial!
Labels:
MY TUTORIALS
|
0
comments
Subscribe to:
Posts (Atom)
Blog Archive
-
▼
2009
(333)
-
▼
January
(75)
- Flower Garden
- Valentine Sweetheart
- Orange Crush
- Letters From Iraq
- Someone I ♥ has Lupus
- Hope
- Lil Birdie's
- Another New Blinkie 1/29/09
- Newest Blinkie 1/29/09
- WildLife-Friends
- Jeans Kinda Girl
- Love You-Valentine
- Passion
- Goth Love
- Kiss This
- Girlz Rule
- Pirate Chick
- Addicted
- Pot of Gold
- Country Hollow Scraps Store
- British Pride
- Love Notes
- Sexy Valentine
- S♥W♥A♥K
- Newest Blinkie Made 1/23/09
- Bright & Beautiful
- Newest Blinkies Made Today! 1/22/09
- CT Call!
- Farrah's having a SALE!!!!
- Newest Blinkie I Made 1/21/09
- Envy Me
- Arizona Cardinals
- el-e-gance
- Go Team
- Guardian Angel
- Always & Forever
- Divalicious
- Award
- Intentions
- Sweet Valentine
- Newest Blinkie and Banner set!
- Twisted
- Beauty Within
- Be Mine
- Another New Blinkie
- Newest Blinkie
- Blinkie I Made 1/16/09
- Blinkies Made by Me!
- My 1st QP
- $1.00 Sale @ Scrappin'Bratz
- Sunflowers Galore
- Signs Of Love
- Cherished
- New Blinkie I Made 1/14/09
- Touble
- Gothic Princess
- Happy 2009
- Paradise
- Sale! Sale! Sale!
- Material Girl
- Geisha
- Lavender Crush
- Grand Opening to Country Hollow Scraps
- Goth Bytch
- Pink Laces
- Naughty Minx
- Scrappin' Bratz CT Call
- Bratz
- Cowgirl Wanted
- Envious
- Devoted
- Fairy-licious
- With Love
- Anchor'd
- Love Me
-
▼
January
(75)
