CHAT TO ME
MY TERMS
All of my ideas are copyrighted to me as they are my original designs. Any resemblence to any other tutorial is purely coincidental.
Do Not Translate, copy, email, download (ie; save to your own hard drive) distribute and/or make scripts/ quick guides from my tutorials.
Do Not hot link to my images or files.
Do Not upload my files to any other site. Do not share my files with others, as some of the contents require permission from thier creators to be shared.
If you are a group manager & wish to use my tutorials in your challenges, you must email me for permission BEFORE you link to my site. I reserve the right to join any group that links to my site.
VISITORS
Labels
- Awards (12)
- CT TUTORIALS (312)
- CUSTOM SERVICES (148)
- Freebies (64)
- MY TUTORIALS (299)
- PTU CU (12)
- ScrapKits (152)
- TAGS (9)
Blog Archive
- 2012 (60)
- 2011 (308)
- 2010 (375)
-
2009
(333)
- December(17)
- November(15)
- October(18)
- September(5)
- August(10)
- July(25)
- June(15)
- May(18)
- April(30)
-
March(54)
- Colors of Spring
- Hippity Hop Blog Train Starts March 30th!!
- Another New Blinkie 3/29/09
- Newest Blinkie 3/29/09
- Easter Surprise Tagger Size Kit
- Easter Surprise Alpha Freebie!!
- Newest Blinkies 3/27/09
- Sneek Peak-Easter Surprise
- Summer Fun
- Newest Blnkie 3/25/09
- Creative Team Call
- Designer Call
- Newest Blinkie 3/24/09
- More New Blinkies 3/21/09
- Egg-tastic
- Newest Blinkie 3/21/09
- Newest Blinkies 3/20/09
- Newest Banner 3/19/09
- Newest Blinkies 3/19/09
- Time Stands Still
- Easter Bunny
- Egg Hunt
- Coffee Shop
- Key To My Heart
- Glitz & Glam
- Sexy Leprechaun
- Country Music
- Sweet As Sugar
- Newest Banner 3/11/09
- Newest Banner 3/10/09
- Newest Banner 3/9/09
- Newest Blinkies 3/9/09
- Hopes and Dreams for Farrah
- Enchanted
- Have a Heart
- Another Great Sale
- Snap Shot
- Lost in Thought
- Mardi Gras
- Gone Fish'n
- Raggedy Love
- Sale!
- Sale!
- Fae Smiles
- Believe In Me
- Baby of Mine
- Choco-Lover
- Time for Spring
- Mama's Kitchen
- Dreams
- Spring Giggles
- Fruity-Licious
- Beary Luvable
- Nature's Beauty
- February(51)
- January(75)
- 2008 (13)
Colors of Spring
 All of my tutorials require a working knowledge of PSP!This tutorial was written by me on March 30,2009. It is of my own ideas and creation! Any other tutorials found to be similar is coincidental.
Supplies Needed
Scrapkit of Choice
I'm using a Wonderful kit called SpringTime Fun,Made by Lady Saphira. This is a PTU kit i cannot supply. You can purchase her kit here
Tube of Choice
I'm using the Wonderful work of Rion Vernon aka Pinuptoons. You must have a license to use his work! The tube i'm using is in Package E-2 . You can purchase that here
Let's Begin
Open new image 600x600
Flood fill white
Copy and paste frame2,Resize 70%
Duplicate,Pull this one down to the right of the canvas(See mine for placement)
Merge these 2 frames together
Copy and paste tube of choice,Place in the top left frame
Once happy with placement,Take your magic wand tool
Click on the inside of the frame,Selections,Modify by 5
Selections,Invert
Highlight your tube layer and hit delete on your keyboard
Selections,Select none
Move tube below the frame layer
Do the same as above for the frame on the right
Add dropshadow to both tubes
Copy and paste paper6,Move below all layers but above the white background
Resize paper @ 70%
Click inside of frames with magic wand
Selections,Modify,Expand by 5
Selections,Invert
Highlight paper layer,Hit delete on your keyboard
Selections,Select none
Add a dropshadow to the frame layer
Copy and paste flowerpot 1,3
Resize 50%
(See mine for placement),Add a dropshadow to both
Copy and paste flower 5,8
Resize 30%,Place in the middle of the 2 frames,(see mine for reference)
Add a dropshadow to both
Copy and paste flower7,Resize 30%
Place in the middle of flower 5,8
Add dropshadow
Copy and paste ribbon1,Resize 30%
(See mine for placement),Duplicate,Move this one over to the right side
(See mine for reference on the 2),Add a light dropshadow of choice
Find ribbon1 again,Image,Rotate,Rotate Clockwise 90
Copy and paste,Resize 60%
Place to your liking behind all layers except for the white background
Add a dropshadow to both
Pick out 1 or 2 more ribbons,Do the same as above except resize 55% and 50%
Copy and paste caterpillar,Resize 40%
Place on top left frame,Add dropshadow
Duplicate,Image,Mirror,Move this one to the bottom right frame,(See mine for reference)
Copy and paste the chick,Resize 30%
Place on top right frame,so it looks like it's sitting on the frame,Add a dropshadow of choice
Copy and paste bow3,Resize 30%
Image,Rotate,Free Rotate 30.00 left
Place on top left corner of frame
Add a dropshadow,Duplicate,Image,Mirror
Place on right corner of frame
Add Your Name and CopyRight Info now!
That's it,Hope you enjoyed my tutorial!
Labels:
MY TUTORIALS
|
0
comments
Hippity Hop Blog Train Starts March 30th!!

The Hippity Hop Blog Tain takes off on March 30th! You can download my part HERE
Make sure you show some Love when downloading! We have an awsome list of Designers who have joined this train! Make sure you check them all out :)
Rest of the train~
Angel's Designz~YOU ARE HERE
Aussie Scrap Designs
Country Girl Creations
Digi Cats
Captivated Visions
3 + 1 Scrapping
VanJo Designs
Queen Brat Designs
Jaded Delusions
Purple Dragonfly Creations
Creative Intentionz
Morgaine Creations©
Crystals Crazy PSP
Rockins Ruckus
Heartfelt Perfections
Marlenies Scraps
The Maltese Scrapper
Ann's Scrap
Patz Scrapz
The Cats Meow
Connie's Creative Chaos
Linda's Dream Designs
Designs by TeriCandy's Treasures
Foxylady Creations
Blue Velvet DeZigns
Rachel's Expressionz
Designs by Kelly
Marsha's ScrapsBits n Bobs
Twin Mom Scraps
Sugar Kissed Scraps
GBL Creations
Digi Scrapbook Mania
Kolor Scapez Freebies
Damsel Designs
Colleen's Creative Scraps
Tiggs Scrap Designz
Baby Cakes Scraps
Scrapper Girl Designs
Lady Snowflake
Sharon's Creations
Bel Vidotti Scraps
DMK Designs
jbs2designs
Scrappy Deesignz
Graphics by Poka Dot
Badazz Designs
Desejos & Sonhos
ASwtlyre Creation
Labels:
Freebies
|
8
comments
Another New Blinkie 3/29/09
For all you Animal Lovers. Check out this store
Labels:
CUSTOM SERVICES
|
1 comments
Easter Surprise Tagger Size Kit
 My First PTU,Tagger Size Kit. Available only @ Scrappin Bratz. This awesome kit has 12 papers,37 elements! Easter is right around the corner. You can purchase my easter kit HERE
Labels:
ScrapKits
|
0
comments
Easter Surprise Alpha Freebie!!
 Here is the FREEBIE i promised you all!! This is all Upper Case Alpha from A-Z. Just a little freebie that goes with my Easter Surprise Kit. All alpha is in png format. Hope ya like! Please leave some Luv when downloading! You can get it HERE
Labels:
Freebies
|
1 comments
Summer Fun
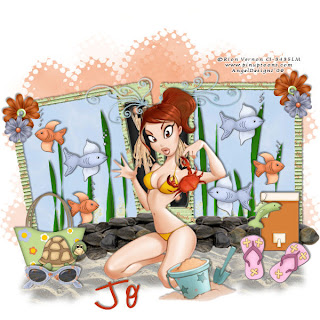 All of my tutorials require a working knowledge of PSP!This tutorial was written by me on March 25,2009. It is of my own ideas and creation! Any other tutorials found to be similar is coincidental.
Supplies Needed
Scrapkit of Choice
I'm using a Wonderful kit called Beach Bum,made by Jo @ Creationz by Jo.. This is a PTU kit i cannot supply. You can purchase her kit here
Tube of Choice
I'm using the Wonderful work of Rion Vernon aka Pinuptoons. You must have a license to use his work! The tube i'm using is in Package P. You can purchase that here
Mask of Choice
Let's Begin
Open new image 600x600
Flood fill white
Copy and paste tube of choice,Resize 80%
Add a light dropshadow of choice
Copy and paste Rafia tie frame2,Resize 50%
Move to the right of canvas,Duplicate,Image,Mirror
Image,Rotate,Free Rotate 10.00,Left
Merge both frames together
Copy and paste paper5,Move below frame layer
Highlight frame layer,Click inside both frames with magic wand
Selections,Modify by 4
Selections,Invert
Higlight paper layer,Hit delete on your keyboard
Selections,select none
Add a dropshadow to the frame layer
Copy and paste fish1,2
Resize 20% on both,Place in frame(See mine for reference)
Add a dropshadow of choice
Duplicate both a few times,and image,Mirror them,(see mine for reference)
Copy and paste doodle2,Resize 50%
Image,Rotate,Free Rotate,20.00 Left
Add a dropshadow,(See mine for placement)
Copy and paste turtle,Resize 20%
Place to your liking and add a dropshdow
Copy and paste beach bag,Resize 30%
(See mine for placement),Add dropshadow of choice
Copy and paste pebbles,Resize 30%
(See mine for placement),Duplicate 6 or 7 times,Place next to eachother,and on other side of frame
Copy and paste drink cooler,Resize 30%
(See mine for placement),add dropshadow
Copy and paste flipflops,Resize 20%
Place by cooler,add dropshadow
Copy and paste fish hanger,resize 15%
Hang on corner of cooler,add dropshadow
Copy and paste sun glasses,Resize 10%
Place by the beach bag,turtle,add dropshadow
Copy and paste Flowerbutton3,Resize 20%
Place on corner of frame,add dropshadow
Duplicate,Image,Mirror,Move into placement
Copy and paste Flower button2,Resize 15%(See mine for placement)
Copy and paste Sand paper
Resize 20%,Duplicate a few times,(see mine for placement and reference)
Copy and paste paper6,Resize 70%
Apply mask of choice,Merge group on mask layer
Duplicate,Image,Mirror
New Raster layer,Click on your Picture tube tool,find the blades of grass
Add a few to to yor picture,(see mine for reference)
Add Your Name and CopyRight Info!
All Done,Ty for trying my tut :)
Labels:
MY TUTORIALS
|
0
comments
Newest Blnkie 3/25/09
These 2 blinkie were made for LuluDesignz. The top one i used a freebie kit called Happy Time made by Bea @ Bea Creations,Check out her blog HERE
The bottom blinkies kit used is called Roses are Red made by Katie @ Crazed Creations. You can purchase Katie's kit HERE
Labels:
CUSTOM SERVICES
|
0
comments
Creative Team Call
 Check out Designs by Pebbles HERE, If your looking to be on a CT. Stop by and check her out,You won't be disappointed,Her kits are fabulous!
Newest Blinkie 3/24/09
This Blinkie was made for Jacki @ Scrap U. Kit used is called It's my life. Made by Jacki herself. Check out this awesome freebie kit HERE
Labels:
CUSTOM SERVICES
|
0
comments
More New Blinkies 3/21/09
Top one is Donna's Designer Blinkie,and the bottom one is for her Team! It was a pleasure making these!!
Labels:
CUSTOM SERVICES
|
0
comments
Egg-tastic
 All of my tutorials require a working knowledge of PSP!This tutorial was written by me on March 21,2009. It is of my own ideas and creation! Any other tutorials found to be similar is coincidental.
Supplies Needed
Scrapkit of Choice
I'm using a Wonderful kit called Hippity-Hoppity,made by Cindy @ Scrappin With Lil Ole Me. This is a PTU kit i cannot supply. You can purchase her kit here
Tube of Choice
I'm using the Wonderful work of Elias Chatzoudis. You must have a license to use his work! You can purchase that here
Let's Begin
Open new image 600x600
Flood fill white
Copy and paste sticker1,Add dropshadow of choice
Copy and paste tube of choice,Resize if needed
(See mine for placement)
Add dropshadow of choice
Copy and paste sticker2,Resize 50%
(See mine for placement),Add dropshadow
Copy and paste wirebeads,Move below sticker1
Duplicate,Image,Mirror,Image,Flip
Copy and paste peep 6,7
Resize 50%,(see mine for placement)
Add dropshadow to both
Copy and paste egg 5,6,7
Resize 30%
(See mine for placement),Add dropshadow of choice to all 3
Copy and paste flower 1,2
Resize 15%
Place at the bottom of the basket
Add dropshadow of choice to all 3
Copy and paste jellybeans
Resize 15%
Place by the peeps,Add light dropshadow to them
Copy and paste CandyFlower 1,2
Resize 15%
(See mine for placement)
Add dropshadow of choice
Add Your Name and CopyRight Info now!
All done,Thanks for trying my tutorial!
Labels:
MY TUTORIALS
|
0
comments
Newest Banner 3/19/09
Banner was made for Donna @ Moo Two Designs! Check out her store here
Labels:
CUSTOM SERVICES
|
0
comments
Time Stands Still
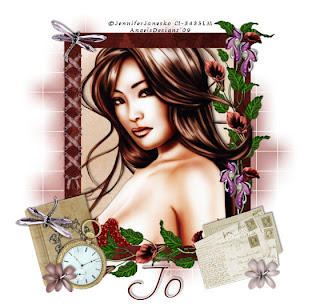 All of my tutorials require a working knowledge of PSP!This tutorial was written by me on March 16,2009. It is of my own ideas and creation! Any other tutorials found to be similar is coincidental.
Supplies Needed
Scrapkit of Choice
I'm using a Wonderful kit called Days Gone By,made by Jo @ Creationz by jo. This is a PTU kit i cannot supply. You can purchase her kit here
Tube of Choice
I'm using the Wonderful work of Jennifer Janesko. You must have a license to use her work! You can purchase that here
Mask of Choice
Let's Begin
Open new image 600x600
Flood fill white
Copy and paste flowerframe,Resize 70%
Copy and paste tube of choice,Resize around 80-85%
Move this layer below frame layer
Copy and paste paper12,Resize 70%
Move below flowerframe,tube
Highlight your frame layer
Click inside with your magic wand tool,pay close attention around the flowers
Selections,Modify,Expand by 6
Selections,Invert
Highlight paper layer,Hit delete on your keyboard
Selections none
On your tube layer,Duplicate,Move this layer above all layers
Take your eraser tool and eraser the top of the tube,around a few flowers at the bottom and on the right side
Eraser the bottom of your tube on the original layer
Add drop shadow to the original tube layer
Copy and paste paper11,Resize 70%
Apply mask of choice,Merge Group on mask layer
Copy and paste Vintage Postcards,Resize 40%
Adjust,Sharpness,Sharpen
Add dropshadow,Place down on bottom right corner
Image,Rotate,Free Rotate 15.00 Left
Copy and paste Gem Pin,Resize 40%
Place on top right corner of frame
Take your eraser tool,Remove a little bit of the middle,so it looks like it's going through the frame
Add dropshadow,Duplicate,Drag this layer down to the postcards,(See mine for placement)
Copy and paste watch,Resize 40%
Add dropshadow
Image,Rotate,Free Rotate 15.00 Right,(See mine for placement)
Copy and paste Book,Resize 20%
Image,Rotate,Free Rotate 15.00 Left
Add a dropshadow,Place under the watch,(see mine for reference)
Copy and paste cross ribbons2,Resize 20%
Place on left side of frame,(See mine for reference)
Copy and paste flower3,4,Resize 40%
Place flower 4 by the watch,Add dropshadow
Place flower3 by the postcards,Add dropshadow
Copy and paste glass dragonfly,Resize 40%
Image,Mirror,Place on top left corner of frame,Add dropshadow
Duplicate,Image,Flip,Place on book at the bottom
Add Your name and Copyright info!
All Done,Thanks for trying my tutorial!
Labels:
MY TUTORIALS
|
0
comments
Easter Bunny
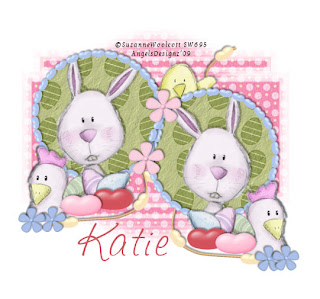 All of my tutorials require a working knowledge of PSP!This tutorial was written by me on March 16,2009. It is of my own ideas and creation! Any other tutorials found to be similar is coincidental.
Supplies Needed
Scrapkit of Choice
I'm using a Wonderful kit called Easter Eggs,made by Katie @ Crazed Creations. This is a PTU kit i cannot supply. You can purchase her kit here
Tube of Choice
I'm using the Wonderful work of Suzanne Woolcott. You must have a license to use her work! You can purchase that here
Mask of Choice
Let's Begin
Open new image 600x600
Flood fill white
Copy and paste frame1,Resize 50%
Duplicate,Move to the right,(See mine for placement of the 2)
Copy and paste flower2,Resize 20%
Place in the center of the frames where they meet
Add dropshadow
Duplicate,Move this one to other side,(See mine for reference)
Copy and paste tube of choice,Resize to your liking
Move below frame,Duplicate,Image,Mirror,Place in other frame
Copy and paste paper11,Resize 65%
Move this layer below all layers but above white background
Highlight frame layer
Take your magic wand tool,Click on the inside of both frames
Selections,Modify,Expand by 3
Selections,Invert
Highlight each tube tool and paper tube,each time hitting delete on your keyboard
Selections,Select none
Add a dropshadow to both tubes,both frames
Copy and paste paper17,Resize 65%
Apply mask of Choice,Merge Group on mask layer
Move this below all layers but above white background
Copy and paste a few eggs of choice,or if using the same tube as me there will be eggs in with it
Resize to your liking,Merge the 3 together,Add dropshadow
Place on bottom of the frame,(see mine for placement)
Duplicate,Image,Mirror,Move to other side of frame
Copy and paste chick,Resize to your liking,Place behind frames,but make it stick out of the top(My chick is different,b/c i'm using a suzanne woolcott tube)
Copy and paste 2 jellybeans of choice,Resize 55%
Place below the eggs,(See mine for reference)
Add dropshadow to both,Duplicate,Image,Mirror both and move to other side of frame
(See mine for reference)
Hide the mask and white background layer by Xing the eye out on the layer palette on the right of your psp
Merge all other layers Visible
Unhide mask,white background layer by clicking on the eye again
Move your merged layer down a bit
Copy and paste jellybeandoodle2,Resize 80%
Move below frame layer,Add dropshadow
Duplicate,Image,Mirror,Place to your liking
I added a woolcott chicken to my tag,but you can add anything from the kit you want or the same chicken
Copy and paste flower1,Resize 15%
Add dropshadow,(See mine for placement)
Duplicate this 3x's and place like mine
Add your name and Copyright info!
All done,Hope you enjoyed my tutorial!
Labels:
MY TUTORIALS
|
0
comments
Egg Hunt
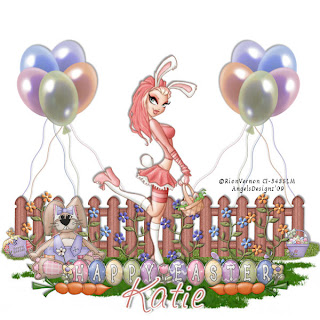 All of my tutorials require a working knowledge of PSP!This tutorial was written by me on March 16,2009. It is of my own ideas and creation! Any other tutorials found to be similar is coincidental.
Supplies Needed
Scrapkit of Choice
I'm using a Wonderful kit called Easter Eggs,made by Katie @ Crazed Creations. This is a PTU kit i cannot supply. You can purchase her kit here
Tube of Choice
I'm using the Wonderful work of Rion Vernon-Pinuptoons. You must have a license to use his work! You can purchase that here
Let's Begin
Open new image 600x600
Flood fill white
Copy and paste fence,Leave it be we will move it in minute
Add a light dropshadow
Add a New Raster layer
Click on your picture tube tool,look for the lawn tube
On your new raster layer,add a little more grass to the tag,(See mine for reference)
Copy and paste tube of choice,Resize around 80-85%
Add a dropshadow of choice
Copy and paste sticker2,Resize 70%
Now move you fence down towards the bottom of your tube like mine
Place sticker2 at the bottom of your tubes feet,(See mine for reference)
Add dropshadow
Copy and paste sticker1,Resize 40%
Place on the left side of sticker2,Add a dropshadow
Copy and paste balloons,Resize 85%
Place behind the fence layer
Add a dropshadow of choice
Duplicate,Image,Mirror
Copy and paste carrot,Resize 50%
Place down by the sticker2,(See mine for placement)
Add a dropshadow
Duplicate,Image,Mirror
Copy and paste floraldoodle1,Resize 40%(See mine for placement)
Add a dropshadow
Duplicate,Image,Mirror
Move behind sticker1,2
Copy and paste floraldoodle 2,3,Resize 40%
Do the same as you did with floraldoodle1
Add your name and copyright info!
All done,ty for trying my tutorial!
Labels:
MY TUTORIALS
|
0
comments
Coffee Shop
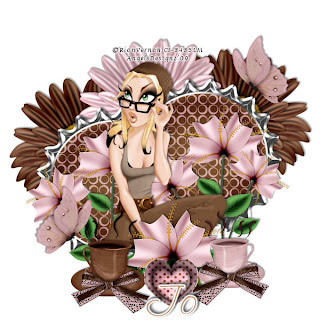 All of my tutorials require a working knowledge of PSP!This tutorial was written by me on March 15,2009. It is of my own ideas and creation! Any other tutorials found to be similar is coincidental.
Supplies Needed
Scrapkit of Choice
I'm using a Wonderful kit called Mocha Latte,made by Jo @ Creationz by Jo. This is a PTU kit i cannot supply. You can purchase her kit here
Tube of Choice
I'm using the Wonderful work of Rion Vernon-Pinuptoons. You must have a license to use his work! You can purchase that here
Let's Begin
Open new image 600x600
Flood fill white
Copy and paste BottleCap2,Resize 60%
Add dropshadow of choice
Duplicate,Pull over and up and bit(See mine for reference)
Copy and paste tube of choice,Resize around 70-75%
Add same dropshadow as above
Copy and paste cup of coffee2,Resize 15%
Add a dropshadow,(See mine for placement)
Copy and flower,Resize 30%
Add dropshadow,(See mine for placement)
Copy and paste flowerbunch,Resize 30%
Place on left side of bottlecaps below tube,flower,coffee cup
Add a dropshadow
Duplicate,Move this one to the right,(See mine for reference)
Copy and paste flower2,Resize 30%
Place behind bottlecaps,Add dropsahdow
Copy and paste Flower1,Resize 30%
Place behind bottlecaps next to flower2,(See mine for reference)
Duplicate flower2,Image,Mirror
Copy and paste Double Bow2,Resize 20%
Place on the bottom of the coffeecup
Add dropshadow of choice
Copy and paste coffeecup,Resize 15%
Place on the other side of the flower,(See mine for reference)
Add a dropshadow
Duplicate Double Bow2,Image,Mirror
Copy and paste Heart Box,Resize 15%
Place in the center of the 2 coffee cups
Copy and paste butterfly2,Resize 10%
Place top right corner,(see mine for reference)
Add dropshadow
Duplicate,Image,Mirror,Move down to bottom left
Add Your Name and CopyRight Info!
All done,Hope you enjoyed my tutorial!
Labels:
MY TUTORIALS
|
0
comments
Key To My Heart
 All of my tutorials require a working knowledge of PSP!This tutorial was written by me on March 13,2009. It is of my own ideas and creation! Any other tutorials found to be similar is coincidental.
Supplies Needed
Scrapkit of Choice
I'm using a Wonderful kit called Lilac Dreams,made by Helga @ Classie Creations. You can purchase her kit here
Tube of Choice
I'm using the Wonderful work of Keith Garvey. You must have a license to use his work! You can purchase that here
Let's Begin
Open new image 600x600
Flood fill white
Copy and paste doodle1,Resize 30%
Duplicate,Image,Mirror
Copy and paste writing temp,Resize 20%
Add a dropshadow of choice
Copy and paste tube of choice,Resize 85%
Add a dropshadow
Copy and paste delicate envelope,Resize 15%
Image,Rotate,Free Rotate 15.00 Left
Add dropshadow,(See mine for placement)
Copy and paste bottle,Resize 10%
Move to right side of tag,(See mine for reference)
Copy and paste paper3,Resize 15%
Move this layer below all layers but above the white background layer
Apply mask of choice,Merge Group on mask layer
Copy and paste flower1,2,3
Resize 10%(See mine for placement)
Add dropshadow of choice to all 3
Merge these 3 together
Duplicate,Image,Mirror
Copy and paste butterfly1Resize 10%,Add dropshadow
(See mine for placement)
Copy and paste lockandkey,Resize 10%
(See mine for placement),Add a dropshadow of choice
Copy and paste pin,Resize 10%
Place on envelope,Add dropshadow
Copy and paste bead string,Resize 10%
(See mine for placement)
Add Your Name and CopyRight Info!!
All Done,Hope you liked my tutorial!!
Labels:
MY TUTORIALS
|
0
comments
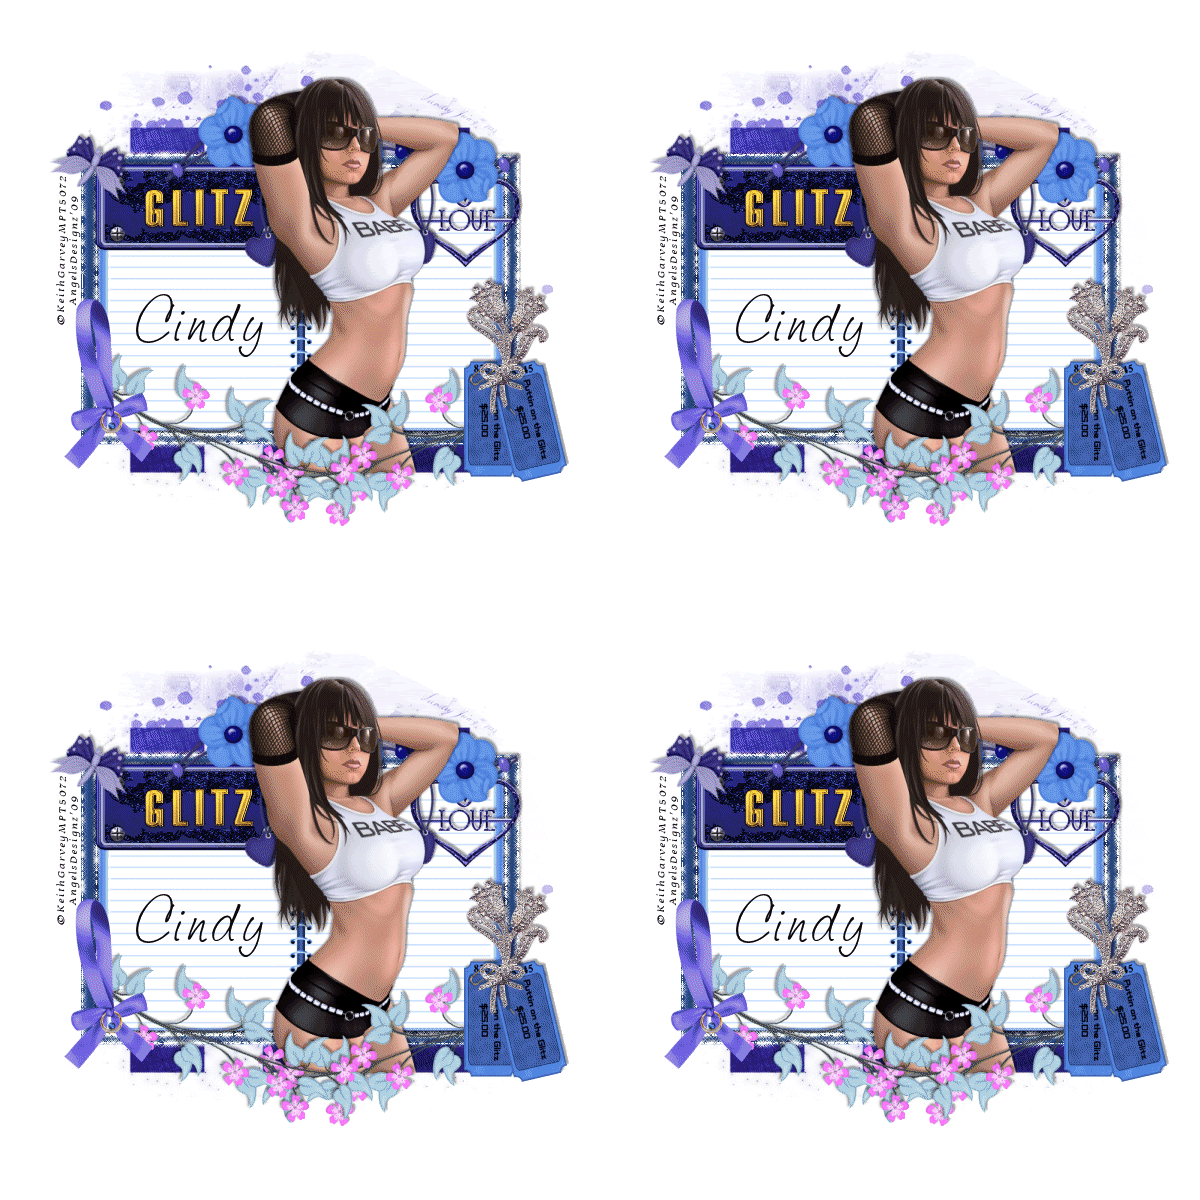
Glitz & Glam
All of my tutorials require a working knowledge of PSP!This tutorial was written by me on March 13,2009. It is of my own ideas and creation! Any other tutorials found to be similar is coincidental.
Supplies Needed
Scrapkit of Choice
I'm using a Wonderful kit called Puttin on the Glitz,made by Cindy @ Scrappin with lil ole me. You can purchase her kit here
Tube of Choice
I'm using the Wonderful work of Keith Garvey. You must have a license to use his work! You can purchase that here
Animation Shop3
2 Masks of choice-Opitonal
Plugins-XenoFex2-You can find this here
Let's Begin
Open new image 600x600
Flood fill white
Copy and paste notebook,Resize 70%
Add a light dropshadow of choice
Copy and paste tube of choice(If using the same as me,Resize 70%)
Add dropshadow of choice
Place in the center of the notebook
Copy and paste licenseplate,Resize 60%
Place on the left side of the notebook(See mine for reference)
Copy and paste loveheart2,Resize 50%
Place on top right corner of notebook
Add a light dropshadow of choice
Copy and paste paper7,Resize 70%
Apply mask of choice,Merge Group on mask layer
Copy and paste paper9,Resize 65%
Apply another mask of choice,Merge group on mask layer
Copy and paste tickets,Resize 40%
Place on bottom right corner of notebook
Add dropshadow
Copy and paste ribbon-gem2,Resize 30%
(See mine for placement),Add dropshadow
Copy and paste flower pendant,Resize 60%
Place to your liking or see mine for placement
Add a light dropshadow of choice
Copy and paste flower3,Resize 50%
Image,Rotate,Free Rotate 22.50 Right
Image,Mirror,Image,Flip
(See mine for placement),Add a dropshadow
Duplicate,Image,Mirror
Copy and paste flowergem,Resize 50%
Place on the tickets,Add a dropshadow
Add any extra elements of choice
Add any wording or wordart to the notebook page on the left
Add Your Name and Copyright Info Now!!
Time to Animate
Take your Magic wand tool,Click on the the the outside of the notebook
Effects,Plugins,Xenofex2-With these settings
2.00
0
100
0
100
75
Twinkle Rotation: 45
Background Fill: Keep original image checked
Hit ok
Selections,Select none
Copy Merge over to animation shop
Paste as new animation
Back to PSP,Hit undo 2x's,(You should still see marching ants)
Effects,Plugins,Xenofex2
Same settings,Only this time hit Random Seed 1x
Selections,Select none
Copy Merge over to Animation Shop
Edit paste after current frame
Back to PSP,Hit undo 2x's
Effects,Plugins,Xenofex2
Same settings,Only this time hit Random Seed 1x
Selections,Select none
Copy Merge over to Animation Shop
Edit paste after current frame
Check animation,(2nd button from the right at the top)
Save as a GIF
That's it,Ty for trying my tut!
Labels:
MY TUTORIALS
|
0
comments
Sexy Leprechaun
 All of my tutorials require a working knowledge of PSP!This tutorial was written by me on March 13,2009. It is of my own ideas and creation! Any other tutorials found to be similar is coincidental.
Supplies Needed
Scrapkit of Choice
I'm using a Wonderful kit called St-Patricks Day,made by Annie @ Annie's Design. You can purchase her kit here
Tube of Choice
I'm using the Wonderful work of Tom Hoover. You must have a license to use his work! You can purchase that here
Mask of choice
Let's Begin
Open new image 600x600
Flood fill white
Copy and paste gold diamond bling,Resize 70%
Copy and paste tube of choice,Resize 80%
Add dropshadow,Place tube in circle like mine
Copy and paste WS3,Resize 40%
Place behind diamondbling,tube
Add a dropshadow of choice
Copy and place diamondbling2,Resize 60%
Place inside of gold diamondbling(See mine for reference)
Add a dropshadow of choice to both diamondblings,WS3
Copy and paste frame,Resize 30%
Image,Rotate,Free Rotate 22.50 Left
Place below all other layers but above white background
Do the same with frame2,only Rotate to the right
Add dropshadow to both
Copy and paste paper6,Resize 70%
Apply mask of choice,Merge Group on mask layer
Copy and paste paper5,Resize 65%
Apply the same mask again or another of your choice
Merge Group on mask layer
Copy and paste gold,Resize 50%
Place to your liking,Add a dropshadow of choice
Duplicate,Image,Mirror
Copy and paste Buckle,Resize 30%
Place on bottom left side,(See mine for placement)
Add dropshadow
Duplicate,Image,Mirror
Copy and paste clover2,Resize 50%
Place on top left side of diamondbling
Duplicate,Image,Mirror
Move this one down a little bit
Add Your Name and CopyRight Info now!
All Done,Hope you like my tutorial!
Labels:
MY TUTORIALS
|
0
comments
Country Music
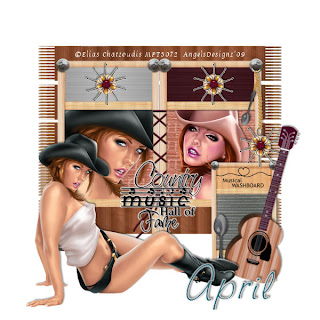 All of my tutorials require a working knowledge of PSP!This tutorial was written by me on March 13,2009. It is of my own ideas and creation! Any other tutorials found to be similar is coincidental.
Supplies Needed
Scrapkit of Choice
I'm using a Wonderful kit called Bluegrass Style,made by April @ Reece's Pieces Scraps. You can purchase her kit here
Tube of Choice
I'm using the Wonderful work of Elias Chatzoudis. You must have a license to use his work! You can purchase that here
Mask of choice
Mask of choice
Let's Begin
Open new image 600x600
Flood fill white
Copy and paste frame2
Resize 70%
Copy and paste tube of choice,I'm using 2 closeup tubes made by Elias Chatzoudis
Resize 70%,Place below frame
Once happy with placement,Grab your magic wand tool
Click inside the left frame
Selections,Modify,Expand by 6
Selections,Invert
On the tube you have in the left frame,Hit delete on your keyboard
Selections,Select none
Add dropshadow to tube
Do the same thing again for the right side of the frame
Copy and paste paper(3)
Move below frame and tubes
Take your magic wand tool,Click inside each frame
Selections,Modify,Expand by 6
Selections,Invert
On the paper layer,Hit delete on your keyboard
Selections,Select None
(See mine for reference)
Copy and paste a tube of choice,Resize 70%
Add a dropshadow
Copy and paste paper8,Resize 85%
Apply mask of choice,Merge group on mask layer
Copy and paste paper5,Resize 85%
Apply the same mask as before,Merge Group on mask layer
Copy and paste Wordart2,Resize 50%
Place in center of frame,(See mine for reference)
Add a gradient glow or white dropshadow
Copy and paste guitar,Resize 50%
Place on right side of frame
Image,Rotate,Free Rotate 15.50 Right
Add a dropshadow of choice
Copy and paste musical washboard,Resize 40%
Place by guitar,Add dropshadow
Copy and paste spoon for washboard,Resize 40%
Place by the washboard,Add dropshadow
Copy and paste flowergem,Resize 40%
Place on top right corner of frame,Add dropshadow
Take your eraser tool,remove parts of the ring on the flowergem
(You want it to look like the ring is under the bolt on the frame)
Copy and paste Banjo flower,Resize 20%
(See mine for placement),Add dropshadow
Duplicate,Image,Mirror
Add Your Name and Copyright Info!
Hope you enjoyed my tutorial!
Labels:
MY TUTORIALS
|
0
comments
Sweet As Sugar
 All of my tutorials require a working knowledge of PSP!This tutorial was written by me on March 13,2009. It is of my own ideas and creation! Any other tutorials found to be similar is coincidental.
Supplies Needed
Scrapkit of Choice
I'm using a Wonderful kit called Sweet Tart,made by Loyal KD. You can purchase her kit here
Tube of Choice
I'm using the Wonderful work of Elias Chatzoudis. You must have a license to use his work! You can purchase that here
Mask of choice
Let's Begin
Open new image 600x600
Flood fill white
Find Frames_001Image,Rotate,CounterClockWise 90
Copy and paste onto white canvas as new layer
Copy and paste tube of choice,Resize 80%
Place to your liking and add a dropshadow
Copy and paste paper_009,Resize 70%
Take your Selection tool,Draw a box on the frame_001
On the paper layer,Selections,Invert
Hit delete on your keyboard,Selections,Select none
Move paper below your frame(See mine for reference)
Copy and paste paper_003,Resize 70%
Apply mask of choice,Merge Group on mask layer
Move below frame and paper_009
Copy and paste Accent-Doodles_004,Resize 40%
Place on left side of frame,Add dropshadow
Duplicate,Image,Mirror
Copy and paste Floral_001,Resize 60%
Place on top left corner,Add dropshadow
Duplicate,Image,Mirror
Copy and paste candies_001
Move this layer below your tube,(See mine for placement)
Add a dropshadow of choice
Copy and paste candies_001 again,Resize 30%
Place down at the bottom right side of frame
Add a dropshadow of choice
Duplicate,Image,Rotate,Free Rotate 15.50 Right
Move this one over slightly
Copy and paste candies_004,Resize 30%
Add a dropshadow
Move down by candies_001
Duplicate,Image,Mirror
Move over by the other candies_004
Merge down on the 4 pieces of candy
Duplicate,Image,Mirror,(See mine for reference)
Copy and paste Accents-Doodles_006,Resize 30%
Place on the floral_001,Add a light dropshadow
Duplicate,Image,Mirror
Copy and paste ribbon_001,Resize 60%(See mine for placement)
Duplicate,(See mine for placement)
Add a light dropshadow on both
Add Your Name and Copyright Info!
That's it,Hope you enjoyed my tut!
Labels:
MY TUTORIALS
|
1 comments
Newest Blinkies 3/9/09
Both blinkies was made for Christy @ Silent Dreamer's Designs. Both kits are hers. The top blinkie's kit is called Don't Tread On Me. The bottom blinkie's kit used is called Fairy Utopia.
Labels:
CUSTOM SERVICES
|
0
comments
Hopes and Dreams for Farrah
Many of you know Farrah as Farrah's Creations or Farrah's Designer Scraps. She is known to many and loved by many more. She is always willing to give and give and never asks for a thing in return.Not only is she a fabulous designer but she is a Wonderful person. So with all she gives,it is now our turn to give back to her! With that being said Scrappin'Bratz Designers is making a HUGE collab for the "Hopes and Dreams for Farrah". Many more Designers will be involved in this as well. So let's all please show Farrah that we love her by buying the collab or donating. There is a Donating button on the top right of my blog. All proceeds from the collab kit will go to Farrah. She is in need of many prayers and some donations too. As many of you know Doctors and tests are very expensive these days. Expecially for a single mother of 3 boys. I'll be posting a preview of the collab as soon as it is finished.
We Love You Farrah!
Enchanted
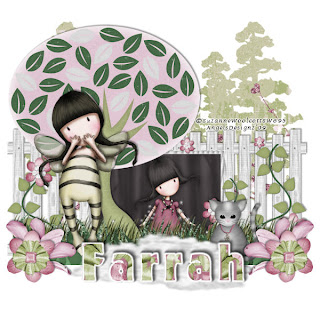 All of my tutorials require a working knowledge of PSP!This tutorial was written by me on March 6,2009. It is of my own ideas and creation! Any other tutorials found to be similar is coincidental.
Supplies Needed
Scrapkit of Choice
I'm using a Wonderful kit called Enchanted Garden,made by Farrah @ Farrah's Creations. This is a PTU kit! You can purchase it here
Tube of Choice
I'm using the Wonderful work of Suzanne Woolcott. You must have a license to use her work! You can purchase this here
Mask of Choice
Let's Begin
Open new image 600x600
Flood fill white
Copy and paste fence,Resize 80%
Copy and paste image of choice,Resize if needed
Place below fence layer
Once happy with placement,Take your magic wand tool
Click on the inside of the fence
Selections,Modify,Expand by 4
Selections,Invert
Highlight image of choice,Hit delete on your keyboard
Selections,Select none
Copy and paste tree2,Resize 70%
Place to the Left side of the canvas
Add a dropshadow of choice
Copy and paste Grass,Resize 75%
Place on the bottom of the fence
Take your deform tool and stretch the grass out a bit to fit evenly with the length of then fence
Copy and paste tube of choice,Resize to your liking
Add a dropshadow,(See mine for placement)
Copy and paste paper6,Resize 80%
Apply mask of choice,Merge group on mask layer
Copy and paste cat,Resize 30%
Place on right side of fence,Add dropshadow
Copy and paste flower3,Resize to your liking
(See mine for placement),Add a dropshadow
Duplicate,Image,Mirror
Copy and paste flower2,Resize 40%
(See mine for placement)
Add dropshadow,Duplicate,Image,Mirror
Choose a fat font for the name
Copy and paste the cloud,Resize 60%
Place behind name,Use the deform tool the thin it out a bit
Add your Name and Copyright Info!
That's it,Hope you enjoyed my tutorial:)
Labels:
MY TUTORIALS
|
0
comments
Have a Heart
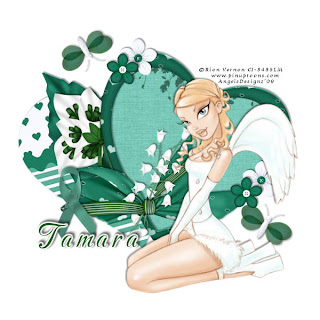 All of my tutorials require a working knowledge of PSP!This tutorial was written by me on March 6,2009. It is of my own ideas and creation! Any other tutorials found to be similar is coincidental.
Supplies Needed
Scrapkit of Choice
I'm using a Wonderful kit called Organ Donor Awareness,made by Just a Girl's Designs. This is a FTU Charity kit! You can find it here
Tube of Choice
I'm using the Wonderful work of Rion Vernon. You must have a license to use his work! You can purchase that here
Let's Begin
Open new image 600x600
Flood fill white
Copy and paste heartframe,Resize 60%
Image,Rotate,Free Rotate 20.00 Right
Copy and paste heart01
Image,Rotate,Free Rotate 15.00 Left
Add a dropshadow of choice
Copy and paste tube of choice,Resize around 80%
Add a dropshadow of your choice
Copy and paste background11,Resize 60%
Place this layer under the frame layer
Take your magic wand tool,Click inside the heart frame
Selections,Modify,Expand by 5
Selections,Invert
Hightlight the paper layer,Hit delete on your keyboard
Selections,Select None
Copy and paste FrameWrapFlowers,Resize 80%
(See mine for placement)
Carefully take your eraser tool and remove the parts hanging over(See mine for reference)
Add a light dropshadow
Copy and paste Leaf1,Resize 20%
(See mine for placement),Add dropshadow
Copy and paste flower bouquet,Resize 45%
(See mine for placement),Add a dropshadow
Copy and paste flower2,Resize 5%
Place on the heartframe,(See mine for reference)
Add a dropshadow
Copy and paste flower1,Resize 10%
Place next to the other one,Add dropshadow
Copy and paste butterly2,Resize 20
Duplicate both flowers and place on other side of the heartframe
Image,Rotate,Free Rotate 30.00 Right
Image,Flip,Add a dropshadow
Duplicate,Image,Mirror,Image,Flip
Copy and paste survivor ribbon,Resize 60%(See mine for placement)
Add your name and Copyright info!
That's it,Hope you enjoyed my tutorial:)
Labels:
MY TUTORIALS
|
0
comments
Snap Shot
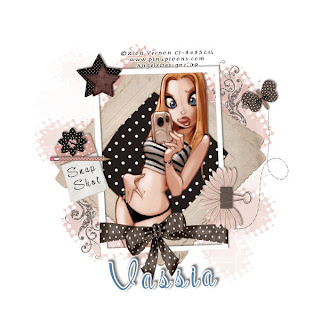 All of my tutorials require a working knowledge of PSP!This tutorial was written by me on March 6,2009. It is of my own ideas and creation! Any other tutorials found to be similar is coincidental.
Supplies Needed
Scrapkit of Choice
I'm using a Wonderful kit called Stay In Touch,made by Vassia's Designs. You can purchase her kit here
Tube of Choice
I'm using the Wonderful work of Rion Vernon. You must have license to use his work! You can purchase that here
Mask of Choice
Let's Begin
Open new image 600x600
Flood fill white
Copy and paste frame5,Resize 90%
Copy and paste tube of choice,Resize around 70%
Add a dropshadow to your tube
Copy and paste paper7,Resize 70%
Highlight frame,Click inside it with your magic wand tool
Selections,Modify,Expand by 5
Selections,Invert
On your paper layer,Hit delete on your keyboard
Selections,Select none
Move paper below frame layer
Copy and paste paper14,Resize 70%
Apply mask of choice,Merge group on mask layer
Move this layer below all other layers but above white background
Copy and paste wrap1,Resize 40%
Take your deform tool,Move the wrap in so it fits nicely on the frame
Copy and paste starbox3,Resize 20%
Place on corner of frame(See mine for reference)
Copy and paste starbox2,Resize 15%
Place next to starbox3,Add light dropshadow to both
Find the binderclip3,Image,Rotate,Rotate ClockWise 90
Copy and paste as new layer on canvas,Resize 40%
(See mine for placement),Add dropshadow
Copy and paste butterfly2,Resize 20%
Adjust,Shaprness,Sharpen
Add a light dropshadowImage,Rotate,Free Rotate 30.00,Left
(See mine for placement)
Take your pen tool,Line Style-Small dash
Make a line coming from your butterfly(See mine for reference)
Copy and paste doodle,Resize 30%
(See mine for placement)
Duplicate,Image,Mirror,Image,Flip
Copy and paste Journal2,Resize 30%
Image,Rotate,Free Rotate 15.00,Left,(see mine for placement)
Add dropshadow
Write anything you want on the paper
Copy and paste flower5,Resize 20%
Place on top of Journal,Add light dropshadow
Copy and paste pencil2,Resize 20%
Place on Journal,Add dropshadow
Add your name and Copyright info!
That's it,Ty for trying my tut:)
Labels:
MY TUTORIALS
|
0
comments
Lost in Thought
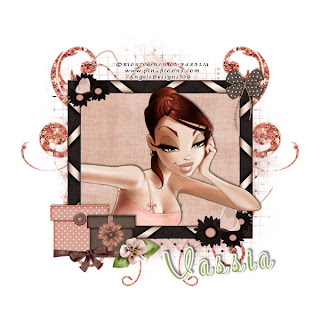 All of my tutorials require a working knowledge of PSP!This tutorial was written by me on March 6,2009. It is of my own ideas and creation! Any other tutorials found to be similar is coincidental.
Supplies Needed
Scrapkit of Choice
I'm using a Wonderful kit called Stay In Touch,made by Vassia's Designs. You can purchase her kit here
Tube of Choice
I'm using the Wonderful work of Rion Vernon. You must have license to use his work! You can purchase that here
Mask of Choice
Let's Begin
Open new image 600x600
Flood fill white
Copy and paste frame2,Resize 70%
Copy and paste tube of choice,Resize if needed
Duplicate,Drag original under frame layer
Take your eraser tool and remove any parts of the tube hanging over the bottom
(See mine for reference),Add dropshadow to original layer
Copy and paste paper1,Resize 70%
Highlight frame layer,Click inside with magic wand tool
Selections,Modify,Expand by 4
Selections,Invert
Highlight paper layer,Hit delete on your keyboard
Selections,Select none
Move paper below tubes but above white background layer
Copy and paste paper6,Resize 70%
Apply mask of choice,Merge Group on mask layer
Copy and paste doodle2
Place below frame,tube,paper,(See mine for placement)
Duplicate,Image,Mirror
Copy and paste box1,Resize 30%
(See mine for placement),add a dropshadow
Copy and paste box2,Resize 25%
Place next to the other box,Add a dropshadow
Copy and paste bow4,Resize 25%
Place on top right corner,Add dropshadow
Copy and paste wrap2,Resize 15%
Place on the bottom of the boxes
Grab your deform tool and stretch it across the boxes,(See mine for reference)
Copy and paste flower1,Resize 25%
Image,Mirror
Place on corner of the box2,Add a dropshadow
Add your name and copyright info!
All done,Ty for trying my tut:)
Labels:
MY TUTORIALS
|
0
comments
Mardi Gras
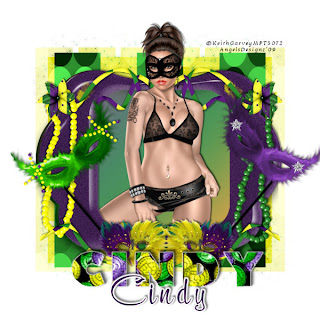 All of my tutorials require a working knowledge of PSP!This tutorial was written by me on March 5,2009. It is of my own ideas and creation! Any other tutorials found to be similar is coincidental.
Supplies Needed
Scrapkit of Choice
I'm using a Wonderful kit called It's Mardi Gras,made by Cindy @ Southern Scrapz. You can purchase her kit here
Tube of Choice
I'm using the Wonderful work of Keith Garvey. You must have a license to use his work! You can purchase that here
2 Masks of Choice
Let's Begin
Open new image 600x600
Flood fill white
Copy and paste ele63,Resize 70%
Copy and paste ele62,Resize 70%
Copy and paste tube of choice,Resize around 85%
Duplicate,Move original below ele62
Take your eraser tool,remove parts of tube hanging below ele62 only
Add dropshadow to original tube layer
Copy and paste ele37,Resize 70%
Place on left side of tag,Add dropshadow
Copy and paste ele35,Resize 70%
Image,Mirror,Add dropshadow
Copy and paste ele40,Resize 30%
Add dropshadowDuplicate,Image,Mirror
Place on bottom of frame
Copy and paste ele27,Resize 60%
(See mine for placement),Add dropshadow
Copy and paste paper11,Resize 70%
Apply mask of choice,Merge Group on mask layer
Copy and paste paper12,Resize 70%
Apply mask of choice,Merge Group on mask layer
Copy and paste ele26,Resize 50%
Image,Rotate,Free Rotate 90.00 Left
(See mine for placement),Add dropshadow
Do the same as above for ele27
Copy and paste ele61,Resize 20%
(See mine for placement),Add dropshadow
Duplicate,Image,Mirror
Copy and paste ele41,Resize 50%
Add dropshadow,Duplicate,Image,Mirror
Merge these 2 together
Duplicate,Image,Flip
Add your Name and Copyright info!!
That's it,Hope you liked my tut:)
Labels:
MY TUTORIALS
|
0
comments
Gone Fish'n
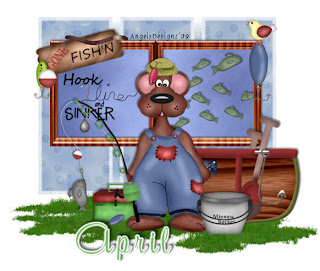
All of my tutorials require a working knowledge of PSP!This tutorial was written by me on March 5,2009. It is of my own ideas and creation! Any other tutorials found to be similar is coincidental.
Supplies Needed
Scrapkit of Choice
I'm using a Wonderful kit called Fishin with ole Rover,made by April @ Reece's Pieces Scraps.You can purchase her kit here
Tube of Choice-I'm using the clipart from the kit
Mask of Choice
Let's Begin
Open new image 600x600
Flood fill white
Copy and paste wood frame,Resize 40%
Duplicate,Image,Mirror
Copy and paste ready to go fishing,Resize 60%
Place in center of the 2 frames
Add a dropshadow
Copy and paste paper1,Resize 70%
Highlight frame layer
Click inside with magic wand on both frames
Selections,Modify,Expand by 4
Selections,Invert
Highlight paper1 layer,hit delete on your keyboard
Selections,Select none
Move paper1 layers below frames
Copy and paste boat,Resize 60%
(See mine for placement),Add a dropshadow
Copy and paste school of fish,Resize 60%
Place below frame on the right side
Add dropshadow
Copy and paste sign,Resize 60%
Image,Rotate,Free Rotate 15.00 Left
Place on the right corner of frame,Add a dropshadow
Copy and paste minnow pail,Resize 40%
Place like mine,Add dropshadow
Copy ans paste lure,Resize 20%
Place on the sign,add dropshadow
Copy and paste wordart2,Resize 20%(See mine for placement)
Copy and paste hook,Resize 60%
Place on the boat
Copy and paste dew worm2,Resize 30%
Place ontop of
Copy and paste bobber,blue lure,Resize 30%
Place bobber on sign and blue lure on right side of frame
Copy and paste birdy,Resize 25%
Place to your liking
Copy and paste paper5,Resize 80%
Place below all layers but above white background
Apply mask of choice,Merge Group on mask layer
Add new raster layer,Find your tube tool
Look for lawn tube,add some lawn to your tag,(See mine for reference)
Add your name and Copyright info!
All Done,Ty for trying my tut:)
Raggedy Love
All of my tutorials require a working knowledge of PSP!This tutorial was written by me on March 5,2009. It is of my own ideas and creation! Any other tutorials found to be similar is coincidental.
Supplies Needed
Scrapkit of Choice
I'm using a Wonderful kit called Raggedy Valentine,made by Missy @ Scraps with Attitude. This is a PTU kit! You can purchase it here
Tube of Choice-I'm using the clipart from the kit
2 Masks of Choice
Let's Begin
Open new image 600x600
Open new image 600x600
Flood fill white
Copy and paste frame2,Resize 60%
Copy and paste paper2 under the frame layer,Resize 60%
Take your magic wand tool and click inside each frame
(Make sure you click inside the loop on the bow also)
Selections,Modify,Expand by 4
Selections,Invert
Highlight your paper layer,hit delete on your keyboard
Selections,Select none
Now copy and paste tube of choice,or you can use the clipart like i am.
Copy and paste raggedy ann couple,Resize 60%
Place the girl in the middle frame,Once happy with placement
Grab your magic wand tool again,Click in the middle frame only
(Make sure you click inside the loop on the bow as well)
Selections,Modify,Expand by 4
Selections,Invert
Highlight Raggedy Ann,Hit delete on your keyboard
Selections,Select none
Move this layer below the frame layer but above the paper
Add a dropshadow of choice
Do the same thing for the other 2 parts of the frame(See mine for reference)
Add dropshadow to all 3,the frame layer
Hide the white background layer by clicking on the eye in the layers palette to the right of your psp
Merge all other layers-Visible
Rename this layer-Frame
UnHide white background by clicking on the eye again
Copy and paste paper9,Resize 60%
Apply mask of choice,Merge group on mask layer
Copy and paste paper3,Resize 60%
Apply another mask of choice,Merge group on mask layer
Copy and paste the balloons,Resize 40%
(See mine for placement),Add a dropshadow of choice
Copy and paste Annie,Resize 10%
Adjust,Sharpness,Sharpen
Place at the bottom of the balloons,Add a dropshadow
Do the same as above for Andy2,place on the right side of the frame
Copy and paste butterfly2,Resize 10%
Adjust,Sharpness,Sharpen more
Add dropshadow,Image,Rotate,Free Rotate 15.00,Right
Place to your liking
Copy and paste beadstring2,Resize 50%
Place below the frame,(See mine for placement)
Copy and paste Heart SaftyPin 3,Resize 20%
Image,Rotate,Free Rotate 15.00,Left
Add dropshadow
Copy and paste heart SaftyPin 1,Resize 20%
Place below frame in center,Add dropshadow
Copy and paste heart SaftyPin 2,Resize 20%
Image,Rotate,Free Rotate 15.00,Right
Add dropshadow and move below frame layer
Add your name and Copyright info!!
That's it,Hope you enjoyed my tutorial!!
Subscribe to:
Posts (Atom)
Blog Archive
-
▼
2009
(333)
-
▼
March
(54)
- Colors of Spring
- Hippity Hop Blog Train Starts March 30th!!
- Another New Blinkie 3/29/09
- Newest Blinkie 3/29/09
- Easter Surprise Tagger Size Kit
- Easter Surprise Alpha Freebie!!
- Newest Blinkies 3/27/09
- Sneek Peak-Easter Surprise
- Summer Fun
- Newest Blnkie 3/25/09
- Creative Team Call
- Designer Call
- Newest Blinkie 3/24/09
- More New Blinkies 3/21/09
- Egg-tastic
- Newest Blinkie 3/21/09
- Newest Blinkies 3/20/09
- Newest Banner 3/19/09
- Newest Blinkies 3/19/09
- Time Stands Still
- Easter Bunny
- Egg Hunt
- Coffee Shop
- Key To My Heart
- Glitz & Glam
- Sexy Leprechaun
- Country Music
- Sweet As Sugar
- Newest Banner 3/11/09
- Newest Banner 3/10/09
- Newest Banner 3/9/09
- Newest Blinkies 3/9/09
- Hopes and Dreams for Farrah
- Enchanted
- Have a Heart
- Another Great Sale
- Snap Shot
- Lost in Thought
- Mardi Gras
- Gone Fish'n
- Raggedy Love
- Sale!
- Sale!
- Fae Smiles
- Believe In Me
- Baby of Mine
- Choco-Lover
- Time for Spring
- Mama's Kitchen
- Dreams
- Spring Giggles
- Fruity-Licious
- Beary Luvable
- Nature's Beauty
-
▼
March
(54)
