


New Kit~She's a Diva 2-25-2019

My newest kit out. Well not out in stores yet. But i'm working on uploading it now. This kit has 61 Elements,15 Papers and 5 Frames. PU Only! Tagger Size kit. It's all about a Diva! Diamonds,Shoes, and so much more.


Vegas Desires

All of my tutorials require a working knowledge of PSP! This tutorial was written by me on February 20,2010. It is of my own ideas and creation! Any other tutorials found to be similar is coincidental.
Supplies Needed
Scrapkit of Choice
I'm using a Wonderful kit called Sin City,made by Gothic Inspirations. This is a PTU kit i cannot supply. You can grab this awesome kit here
Tube of Choice
I'm using the Wonderful work of Ismael Rac. You must have a license to use his work! You can purchase that here
Let's Begin
Open new image 600x600,Flood fill white
Copy and paste Tagback1,Resize 40%
Copy and paste sincityCircle,Resize 40%,Place over the tagback1
Copy and paste a closeup tube of choice,Resize 60%
Place to your liking on the tagback
Take your magic wand,Click on the tagback,once you get marching ants all the way around it
Selections,Invert
Highlight your closeup tube,Take your Eraser tool,Remve parts hanging over the bottom of the tagback
Selections,Select none
Add dropshadow to tube
Copy and paste Roulette,Resize 30%,See mine for placement,Add dropshadow
Copy and paste mesh,Resize 60%,Place below the tagback
Copy and paste Beer,Resize 30-40%,Place by the roulette,Add dropshadow
Copy and paste moneybag,Resize 40%,See mine for placement,Add dropshadow
Copy and paste PokerChips,Resize 30%,See mine for placement,Add dropshadow
Copy and paste Dice2,Resize 30%,Place in front of the moneybag,Add dropshadow
Copy and paste WordartTab,Resize 20-30%,See mine for placement
Image,Rotate,Free Rotate,10.00,Left
Add dropshadow
Copy and paste ChainWCharm,Resize 30%,See mine for placement,Add dropshadow
Copy and paste a bow of choice,Resize 25-30%,Add dropshadow and place on top of the chainWCharm
Copy and paste paper3,Apply mask of choice,Merge group on mask layer
Take your deform tool and make the mask layer smaller like mine
Copy and paste paper11,Apply the same mask as before,Merge group on mask layer
Take your deform tool again and move this layer in just a little bit
Add Your Name and CopyRight Info!!
All done.
Birthday Tears
 All of my tutorials require a working knowledge of PSP! This tutorial was written by me on February 20,2010. It is of my own ideas and creation! Any other tutorials found to be similar is coincidental.
Supplies Needed
Scrapkit of Choice
I'm using a Wonderful kit called Birthday Blues,made by Gothic Inspirations. This is a PTU kit i cannot supply. You can grab this awesome kit here
Tube of Choice
I'm using the Wonderful work of Barbara Jensen. You must have a license to use her work! You can purchase that here
Let's Begin
Open new image 600x600,Flood fill white
Copy and paste Frame1,Resize 40%
Copy and paste tube of choice,Resize 80%,Place to your liking in the frame
Copy and paste paper11,Resize 40%,Place behind your tube
Take your magic wand tool and click inside the frame layer
Selections,Modify,Expand by 4
Selections,Invert
Now Highlight your tube layer and hit delete on your keyboard,Do the same for the paper layer
Selections,Select none
Add a dropshadow to your tube layer
Merge Frame,Tube,Paper layer together
Image,Rotate,Free Rotate. 10.00 to the right. Make sure all layers is unchecked
Add dropshadow to frame layer
Copy and paste tube of choice,Resize 80%,See mine for placement,add dropshadow
Copy and paste birthdaypillow,Resize 15%,Place on the bottom right of tube
Rotate a little to the left,Add dropshadow
Copy and paste balloon1,Resize 50%,Place on the side of the frame,Add dropshadow
Copy and paste Giftbox,Resize 25%,Place like mine,add dropshadow
Copy and paste NameBadge,Resize 25%,Place on the frame,add dropshadow
Copy and paste TagBack,Resize 40%,Place behind tube and frame layer,Add dropshadow
Open the Tearsdrops in psp,Take your selection tool and draw a box around the top tear drop
Copy and paste in psp as a new image
Copy and paste the tear drop onto your tag,Resize 20%
Carefully place the tear drop on your tube so it looks like she is crying
Copy and paste Streamers,Resize 20%,Place to your liking
Copy and paste Glitter,Resize 60%,Place below all layers but above whitebackground layer
Copy and paste Wordart3,Resize 50%
Image,Rotate,Free Rotate 10.00,Left
Add a gradient glow white and dropshadow 2x's
Copy and paste Skull,Resize 30%,Do the same as above but don't add the gradient glow
Copy and paste CornerDoodle,Resize 30%,Place on top of the Tagback,Add dropshadow
Duplicate,Image,Mirror
Copy and paste Bow of choice,Resize 25%,Place on the pillow. Add dropshadow
Copy and paste 2 papers of choice,Add the same mask to both layers,Merge group on mask layer
Now Add your name and Copyright Info!
All done.
CU FREEBIE~Wire Elements 2/19/2010

So i made 6 wired elements. I was a lil bored..I'm sure someone can use them for something lol. Anyway CU or PU. U can get them HERE
Underground Scraps Grand Opening Sale!!

Come and join us @ Underground Scraps for our Grand Opening sale starting tommorow!. We have some awesome designers who put together a wonderful collab called Heaven & Hell. From PTU to CU. Spend $7.50 to get it for free or buy it for $10.00. Go Here


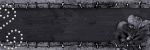
Newest Kit~Lover's Revenge 2/7/2010

This is a gothic/grungy type of kit. For all those people out there who have ever been hurt by the one they love. Everything is done in PNG Format and 300DPI. Packed full with lot's of elements and papers.
♥Kelly
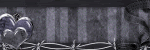
Gothic Grabbag Mix
 So i asked Leigh aka Heartfelt Perfections for a challenge on making a awesome gothic grabbag,and she did!! This grabbag is the bomb! For all the gothic/grunge lovers out there,this is the grabbag for u!! It has 44 elements in it,Leigh truely out did herself on this one,it's amazing! Right now this mix is on sale for $1.00 till tommorow,so grab it while u can for such a low price. Be sure to check out the rest of her goodies HERE
 Let Leigh know Kelly with Angel's Designz sent ya :)
♥Kelly
A Gorjuss Princess

All of my tutorials require a working knowledge of PSP! This tutorial was written by me on February 5,2010. It is of my own ideas and creation! Any other tutorials found to be similar is coincidental.
Supplies Needed
Scrapkit of Choice
I'm using a Wonderful kit called Fairy Princess,made by Chaos Priestess. This is a PTU kit i cannot supply. You can grab this awesome kit here
Tube of Choice
I'm using the Wonderful work of Suzanne Woolcott. You must have a license to use her work! You can purchase that here
Let's Begin
Open new image 600x600,Flood fill white
Copy and paste tree,Resize to your liking,Add dropshadow
Copy and paste planet,Move behind the tree,Resize 50%,Add dropshadow
Copy and paste the Ladder,Resize again to your liking,Add dropshadow
Place the ladder against the tree like mine
Copy and paste doodle1,Resize to your liking
Place on the ladder and add a dropshadow
Copy and paste butterfly2,Resize 30%,Place on the doodle like mine
Add a light dropshadow
Copy and paste tube of choice,Resize 75%,See mine for placement,Add dropshadow
Copy and paste border element1,Resize 40%,Place at the bottom of your tube
Copy and paste Glitter Heart Trail2,Resize to your liking and place at the bottom of the border
Copy and paste Button element1,Resize 25%,Place on the end of the border
Add dropshadow,Duplicate,Image,Mirror,Move into place
Copy and paste Flower element 4,Resize 15%,I placed mine on the bow in the little girls hair
Add dropshadow
Copy and paste paper11,Apply a mask of choice,Merge Group on mask layer
Add your Name and CopyRight Info!!
All done.
Cupids Sweetheart

All of my tutorials require a working knowledge of PSP! This tutorial was written by me on February 5,2010. It is of my own ideas and creation! Any other tutorials found to be similar is coincidental.
Supplies Needed
Scrapkit of Choice
I'm using a Wonderful kit called Cupids Arrow,made by KC Kits. This is a PTU kit i cannot supply. You can grab this awesome kit here
Tube of Choice
I'm using the Wonderful work of Keith Garvey. You must have a license to use his work! You can purchase that here
Let's Begin
Open new image 600x600,Flood fill white
Change your background color to paper11
Draw out a long rectangle using your preset tool,See mine for reference
Duplicate,Image,Flip.
Duplicate again and move into place
Merge these 3 layers together,Add dropshadow
Copy and paste TagLacedDoily2,Resize 30%
Take your deform tool and rotate it to the left,Add dropshadow
Copy and paste TagLacedDoily4,Resize 25%,Take your deform tool and rotate to the right
Add dropshadow and move into place
Copy and paste tube of choice,Resize 80%,Add dropshadow
Copy and paste GlitterDrops,Resize 25%,Place behind your tube
Copy and paste paper14,Apply mask of choice,Merge Group on mask layer
Copy and paste hanging heart2,Resize 20%,Place on the right side of canvas,Add dropshadow
Copy and paste bow1,Resize 20%,Place on top of the hanging heart
Copy and paste 2 candy hearts of choice,Resize 40%,Place to your liking
Add dropshadow on both
Now Add Your name and Copyright Info!
All done.
Devilish Valentine

All of my tutorials require a working knowledge of PSP! This tutorial was written by me on February 5,2010. It is of my own ideas and creation! Any other tutorials found to be similar is coincidental.
Supplies Needed
Scrapkit of Choice
I'm using a Wonderful kit called Bloody Valentine,made by Gothic Inspirations. This is a PTU kit i cannot supply. You can grab this awesome kit here
Tube of Choice
I'm using the Wonderful work of Ted Hammond. You must have a license to use his work! You can purchase that here
Let's Begin
Open new image 600x600,Flood fill white
Change your background color to grey
Take your preset shape-Rectangle,Draw out a nice size,See mine for reference
Convert to a raster layer,Take your magic wand and click inside the rectangle
Selections,Modify,Expand by2
Selections,Invert
Copy and paste paper6,Resize 70%,Hit delete on your keyboard
Selections,Select none
Now change your preset shape to a Circle,Draw out a circle like mine
Do the same as above using your magic wand tool only this time using paper19
Now draw out a long rectangle,See mine for reference
Do the same as above again using your magic wand,use paper20 this time
Duplicate 2x's,Move into place
Merge these 3 together,Duplicate,Image,Mirror
Move into position,Add dropshadow to everything
Copy and paste paper11,Apply mask of choice,Merge group on mask layer
Duplicate and move to the other side of canvas
Copy and paste paper1,Resize 50%,Take your deform tool and tilt it,See mine for placement
Copy and paste PlayingCard,Resize 50%,Place by the paper,Use your deform tool to tilt to the right
Add dropshadow to both
Copy and paste ChalkBoard,Resize 40-50%,See mine for placement,add dropshadow
Copy and paste book,Resize 40%,See mine for placement,add dropshadow
Copy and paste tube of choice,Resize 80%,Place to your liking,Add dropshadow
Copy and paste necklace,Resize 30-40%,Place like mine
Copy and paste bow3,Resize 30%,Place on top of necklace,Add dropshadow
Copy and paste jar,Resize 30%,Place on the right side of your tag,Add dropshadow
Copy and paste wine,Resize 30%,Place by the jar and add a dropshadow
Copy and paste wordart2,Resize 25%,Place ont he chalkboard
Copy and paste BloodSplatter3,Resize 30%,Place on the chalkboard and wordart2
Now Add your name and Copyright info!!
All done.
Playful
 All of my tutorials require a working knowledge of PSP! This tutorial was written by me on February 4,2010. It is of my own ideas and creation! Any other tutorials found to be similar is coincidental.
Supplies Needed
Scrapkit of ChoiceI'm using a Wonderful kit called Playful Lover,made by Chaos Priestess. This is a PTU kit i cannot supply. You can grab this awesome kit here
Tube of Choice
I'm using the Wonderful work of Keith Garvey. You must have a license to use his work! You can purchase that here
Let's Begin
Open new image 600x600,Flood fill white
Copy and paste frame3,Resize 40%,Take your deform tool and rotate it slightly
Duplicate,Image,Mirror
Place the heart to where the are touching
Merge both frames together
Copy and paste paper7,Resize 60%,Place under the frame layer
Highlight your frame layer,Click inside using your magic wand tool
Selections,Modify,Expand by 4
Selections,Invert
Highlight the paper and hit delete on your keyboard
Selections,Select none
Merge the frame layer and paper layer together,Add dropshadow
Copy and paste frame1,Resize 50%
Take your magic wand and click inside the frame
Selections,Modify,Expand by 4
Selections,Invert
Copy and paste paper12 below the frame1 layer
Hit delete on your keyboard,Selections,Select none
Now move the paper layer towards the top left side of canvas,See mine for reference
Do the same thing above with 2 more papers of your choice
Copy and paste paper5,Resize 65%,Move below frame layer
Selections,Modify,Expand by 4
Selections,Invert
Highlight paper5 layer and hit delete on your keyboard
Selections,Select none
Copy and paste tube of choice,Resize 80%,Place to your liking on the frame
Duplicate,Move original under the frame layer
Click inside the frame layer again with your magic wand tool
Selections,Modify,Expand by 4
Take your eraser tool,remove the bottom part of your tube on both tube layers that is hanging over the bottom of the frame layer
Selections,Select none,Add dropshadow to original
Add dropshadow to the frame layer also
Copy and paste 2 papers of choice and place below all layer but above white background
Apply the same mask to both layers and merge group on each mask layer
Copy and paste doodle7,Resize to your liking,See mine for placement,Duplicate,Move into place
Copy and paste hanging gems1,Resize 35%,See mine for placement,Add dropshadow
Copy and paste standing lantern_silver,Resize to your liking,Place like mine and add dropshadow
Copy and paste Ribbon N Droplet2,Resize 35-40%,Place on the lantern
Copy and paste flower4,Resize 20-25%,Place on the top of the droplet,Add dropshadow
Copy and paste butterfly1,Resize 30%,Place like mine and add dropshadow
Add your name and copyright info now!!
All done.
Subscribe to:
Posts (Atom)


