CHAT TO ME
MY TERMS
All of my ideas are copyrighted to me as they are my original designs. Any resemblence to any other tutorial is purely coincidental.
Do Not Translate, copy, email, download (ie; save to your own hard drive) distribute and/or make scripts/ quick guides from my tutorials.
Do Not hot link to my images or files.
Do Not upload my files to any other site. Do not share my files with others, as some of the contents require permission from thier creators to be shared.
If you are a group manager & wish to use my tutorials in your challenges, you must email me for permission BEFORE you link to my site. I reserve the right to join any group that links to my site.
VISITORS
Labels
- Awards (12)
- CT TUTORIALS (312)
- CUSTOM SERVICES (148)
- Freebies (64)
- MY TUTORIALS (299)
- PTU CU (12)
- ScrapKits (152)
- TAGS (9)
Blog Archive
- 2012 (60)
- 2011 (308)
- 2010 (375)
-
2009
(333)
- December(17)
- November(15)
- October(18)
- September(5)
- August(10)
- July(25)
- June(15)
- May(18)
- April(30)
- March(54)
-
February(51)
- More New Blinkies 2/28/09
- Newest Blinkie 2/28/09
- Flutterbies
- Another Blinkie 2/27/09
- Newest Banner 2/27/09
- Another New Blinkie 2/26/09
- Perfect Match
- My Newest Blinkie 2/26/09
- Newest Banner 2/26/09
- Newest Blinkie 2/25/09
- Little Girls
- Stars n' Stripes
- Lucky Treasures
- Girl Thing
- Newest Blinkies 2/23/09
- Award!!
- Easter Greetings
- Lacy Valentine
- Apple Orchid
- Simple Pleasures
- Check This Out!!
- Newest Blinkie 2/18/09
- Newest Blinkie 2/17/09
- One Love
- I have been challenged by Donna @ http://donnasscr...
- Peyton Matthew 2/12/09
- Grand Opening!!
- Newest Blinkie 2/15/09
- Newest Blinkie 2/13/09
- Fairy Garden
- Cupid's Crush
- New Blinkie 2/11/09
- Newest Blinkie 2/10/09
- Newest Blinkie 2/10/09
- Diamond Lover
- Best Friends
- Pink Crush
- Refreshing
- The Diva
- Grunge Princess
- Jeans Kinda Girl
- Sexy Angel
- Cats Rule
- A Gorjuss New Life
- Wishing Star
- Designer Call
- CT Call
- Another New Blinkie 2/2/09
- Newest Blinkie 2/2/09
- Award
- Newest Blinkies Made 2/1/09
- January(75)
- 2008 (13)
More New Blinkies 2/28/09
This Blinkie was made for Designers @ Digi-Shoppe. Check out the store here
~~~~~~~~~~~~~~~~~~~~~~~~~~~~~~~~~~~~~
This Blinkie was made for I Don't Give A Scrap! Check out her blog here
Labels:
CUSTOM SERVICES
|
0
comments
Flutterbies
 All of my tutorials require a working knowledge of PSP!This tutorial was written by me on February 28,2009. It is of my own ideas and creation! Any other tutorials found to be similar is coincidental.
Supplies Needed
Scrapkit of Choice
I'm using a Beautiful kit called Butterfly Love,made by Sassy Scraps. This is a PTU kit,you can purchase it here
Tube of Choice
I'm using the Wonderful work of Suzanne Woolcott. You must have a license to use her work! You can purchase that here
2 masks of Choice
Let's Begin
Open new image 600x600
Flood fill white
Copy and paste flowertag
Resize 80%
Add a dropshadow of choice
Copy and paste tube of choice(Preferably once sitting)
Resize around 80%
Add a dropshadow of choice
Place your tube at the top of the flowertag(See mine for reference)
Copy and paste paper6
Apply mask of choice,Merge group on mask layer
Copy and paste mauvepaper
Apply mask of choice,Merge group on mask layer
Move this layer below the other mask
Copy and paste scrapflower
Resize 20%
(See mine for placement)
Add a dropshadow
Copy and paste softbow
Resize 40%
Place on the right side of the flowertag
Add a dropshadow of choice
Copy and paste butterflies of choice
Resize to your liking
Add a dropshadow of choice to them
Copy and paste layeredbutterfly
Resize 3%
Image,Rotate,Free Rotate 30.00 Left
Add a dropshadow of choice
Place at the bottom left of the flowertag
Duplicate,Image,Mirror
Place to your liking
Add your Name and Copyright info!!
All Done,Ty 4 trying my tutorial!
Labels:
MY TUTORIALS
|
0
comments
Newest Banner 2/27/09
This banner is 728x90 made for Pebbles @ Designs by Pebbles. Check out her blog here
Click on the banner to see the full size!
Labels:
CUSTOM SERVICES
|
0
comments
Another New Blinkie 2/26/09
This blinkie is 150x150. Made for Pebbles @ Designs by Pebbles. Check out her blog here
Labels:
CUSTOM SERVICES
|
0
comments
Perfect Match
 All of my tutorials require a working knowledge of PSP!This tutorial was written by me on February 26,2009. It is of my own ideas and creation! Any other tutorials found to be similar is coincidental.
Supplies Needed
Scrapkit of Choice
I'm using a Beautiful kit called Mix & Match made by Ronda @ All My Scrap. This is a PTU kit that you can purchase here
Tube of Choice
I'm using the Wonderful work of Jamie Kidd. You must have a license to use her work! You can purchase that here
Mask of Choice
Let's Begin
Open new image 600x600
Flood fill white
Copy and paste frame 3
Resize 30%
Copy and paste paper10
Resize 15%
Move below frame
Highlight frame layer
Using your magic wand tool,Click inside the frame
(Make sure you get under the bow too)
Selections,Modify,Expand by 4
Selectons,Invert
Higlight paper layer,Hit delete on your keyboard
Selections,Select none
Copy and paste a close up tube of choice
Move below frame layer but above paper layer
Highlight frame layer click inside it
Selections,Modify,Expand by 4
Selections,Invert
Highlight closeup tube,Hit delete on your keyboard
Selections,Select none
Hide your white background layer by clicking on the eye in the layer palette
Merge all layers Visable
Unhide white background by clicking on the eye again
Add a dropshadow of choice to the frame layer
Image,Resize 80%
Image,Rotate,Free rotate 15.00,Left
Adjust,Sharpness,Sharpen
Copy and paste tube of choice
Resize to your liking,Add a dropshadow
Copy and paste paper8,Resize 15%
Add a mask of choice,Merge group on mask layer
Copy and paste paper11
Apply another mask of choice,Merge mask group
Copy and paste bow4,Resize 20%
Add a dropshadow,Place at the bottom of your tube
Copy and paste flower3,4,5
Resize 15%
Place flower3 on top of frame(See mine for placement)
Add dropshadow,Duplicate,Image,Mirror
Move down to bottom of frame
Do the same thing for flower4 and 5(See mine for reference)
Copy and paste flowers,1,2
Resize the green one at 15,brown at 20, and blue at 25(See mine for placement)
Add a dropshadow to all 3 and duplicate them
Image,Mirror all 3
Add your name and copyright info!!
All Done,Hope you liked my tutorial!
Labels:
MY TUTORIALS
|
0
comments
Newest Banner 2/26/09
This Banner was made for Pebbles @ Designs by Pebbles,You can check her blog out here
Labels:
CUSTOM SERVICES
|
0
comments
Newest Blinkie 2/25/09
This blinkie was made for Pebbles @ Designs by Pebbles,Check out her blog here
Labels:
CUSTOM SERVICES
|
0
comments
Little Girls
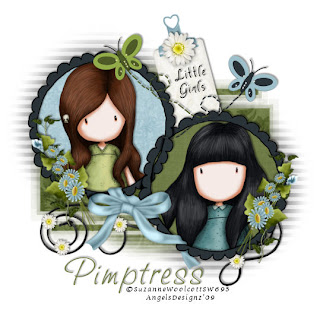 All of my tutorials require a working knowledge of PSP!This tutorial was written by me on February 25,2009. It is of my own ideas and creation! Any other tutorials found to be similar is coincidental.
Supplies Needed
Scrapkit of Choice
I'm using a Wonderful kit called Emerald Sky,made by Pimp'd Dezigns. You can purchase her kit here
Tube of Choice
I'm using the Wonderful work of Suzanne Woolcott. You must have a license to use her work! You can puchase that here
Mask of Choice
Let's Begin
Open new image 600x600
Flood fill white
Copy and paste Circle frame1
Resize 80%
Copy and paste 2 tubes of choice and place to your liking in the frame
Highlight the frame,Take your magic wand and click on the inside of the frame
Selections,Modify,Expand by 4
Selections,Invert
Now select your first tube and hit delete on your keyboard
Do the same for the 2nd tube
Selections,Select none
Move both tubes below your frame layer
Add a dropshadow to both tubes
Copy and paste paper08,Resize 60%
Highlight the frame layer again
Using your magic wand,Do the same as above(See mine for reference)
Do the same thing again with paper20
Copy and paste paper12,Resize 80%
Apply mask of choice(Round one will work best)
Merge Group on mask layer
Take your Deform tool,and make your circle mask smaller
Duplicate mask layer,Move over to right part of frame(See mine for reference)
Copy and paste paper13
Resize 80%
Apply another mask of choice
Merge Group on mask layer
Move this layer above the other 2 masks
Copy and paste butterfly01,Resize 30%
Place to your liking or see mine for placement
Add dropshadow
Copy and paste butterfly02,Resize 30%
Image,Mirror
Place to your liking again or see mine for placement
Add dropshadow
Copy and paste flora-02,Resize 30%
Image,Rotate,Free Rotate 30.00 Left(See mine for placement)
Add a dropshadow
Duplicate,Image,Mirror(See mine for placement)
Copy and paste paper-tag,Resize 40%(See mine for placement)
Image,Rotate,Free Rotate 15.00 Left
Copy and paste flower-01,Resize 40%
Place on top of tag
Add dropshadow
Copy and paste vintage-flower,Resize 30%
Image,Rotate,Free Rotate 15.00 Left(See mine for placement)
Add a dropshadow
Duplicate,Image,Mirror
Place by the flora(See mine for reference)
Copy and paste heart-binder-01,Resize 30%
Image,Rotate,Free Rotate 15.00 Left(See mine for placement)
Copy and paste string-01,Resize 70%
(See mine for placement)
Add dropshadow
Add your Name and Copyright Info!!
All Done,Ty for trying my tutorial!!
Labels:
MY TUTORIALS
|
0
comments
Stars n' Stripes
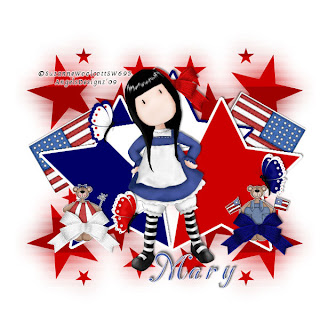 All of my tutorials require a working knowledge of PSP!This tutorial was written by me on February 24,2009. It is of my own ideas and creation! Any other tutorials found to be similar is coincidental.
Supplies Needed
Scrapkit of Choice
I'm using a Beautiful kit called American Spirit,made by Mary @ DragonflyDreams Designs. This is a PTU kit that you can purchase here
Tube of Choice
I'm using the Wonderful work of Suzanne Woolcott. You must have a license to use her work! You can purchase that here
Mask of Choice
Let's Begin
Open new image 600x600
Flood fill white
Copy and paste Red,blue,white star
Place to your liking
Add a dropshadow to all 3
Copy and paste your tube of choice
Resize if needed
Add a dropshadow
Copy and paste paper4
Resize 70%
Apply mask of choice,Merge mask group
Copy and paste Red,white,blue bow
Resize 30% on both(See mine for placement)
Add a dropshadow to both
Copy and paste flagbear
Resize 20%
Place to your liking
Add a dropshadow
Copy and paste sparklerbear
Resize 20%
Add dropshadow and place to your liking
Copy and paste butterfly5
Resize 40%
Image,Mirror,Place on right side of canvas
Copy and paste butterfly3
Resize 40%
Place to your liking
Copy and paste butterfly4
Resize 40%
Place to your liking
Add a dropshadow to all 3 butterflies
Copy and paste americanflag
Resize 60%
Place this layer below your star layers,but have it sticking out a bit so you can see it
Add a dropshadow
Duplicate,Image,Mirror
Now add your name and copyright info!!
All Done,Ty for trying my tutorial!
Labels:
MY TUTORIALS
|
0
comments
Lucky Treasures
 All of my tutorials require a working knowledge of PSP!This tutorial was written by me on February 23,2009. It is of my own ideas and creation! Any other tutorials found to be similar is coincidental.
Supplies Needed
Scrapkit of Choice
I'm using a Beautiful kit called Lucky Clover,made by Chili Designz. You can purchase her kit here
Tube of Choice
I'm using the Wonderful work of Tom Hoover. You must have a license to use his work! You can purchase it here
Mask of Choice
Let's Begin
Open new image 600x600
Flood fill white
Copy and paste clover,Move to the left
Add dropshadow
Duplicate,Image,Mirror
Copy and paste tube of choice(If using the same as me resize 80%)
If using a different tube,Resize to your liking
Place tube in the middle of the 2 clovers
Add a dropshadow
Copy and paste pot of gold,Resize 40%(See mine for placement)
Add a dropshadow
Copy and paste paper5,Resize 70%
Apply mask of choice,Merge Group on mask layer
Copy and paste mimose,Resize 40%
Place below your tube,pot of gold layers
Add a dropshadow
Copy and paste leaves,Resize 40%(See mine for placement),Add a dropshadow
Duplicate,Image,Mirror
Copy and paste horseshoe
Place behind your tube,(See mine for reference)
Add a dropshadow of choice
Copy and paste ribbon3,Resize 50%
Place at the top of the mask like mine
Add a dropshadow
Duplicate,Image,Flip
Copy and paste splotches of choice,Resize to your liking
Move below mask layer,Duplicate,Image,Mirror
Copy and paste butterfly,Resize 30%
Place on bottom left side(See mine for reference)
Add a dropshadow
Duplicate,Image,Mirror,Move this one up to top right
Copy and paste clover3,Resize 70%
Image,Rotate,Free Rotate 15.00,Left
Add dropshadow,(See mine for placement)
Add Happy St. Patty's Day to your clover
Now add your name and copyright info!!
All Done,Ty for trying my tutorial!
Labels:
MY TUTORIALS
|
0
comments
Girl Thing
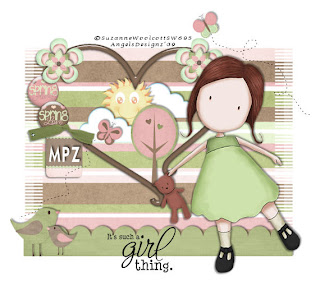 All of my tutorials require a working knowledge of PSP!This tutorial was written by me on February 23,2009. It is of my own ideas and creation! Any other tutorials found to be similar is coincidental.
Supplies Needed
Scrapkit of Choice
I'm using a Beautiful kit called Spring Love,made by Mpz @ So Tempting Scraps. This is a PTU! You can purchase it here
Tube of choice
I'm using the Fabulous work of Suzanne Woolcott. You must have a license to use her work! You can purchase that here
Mask of Choice
Wordart-Here
Let's Begin
Open new image 600x600
Flood fill white
Copy and paste Heart(2),Resize 60%
Copy and paste tube of choice,Resize to your liking
Add a dropshadow(See mine for placement)
Copy and paste paper(4),Resize 15%
Move this layer below the Heart(2) layer
Apply mask of Choice,Merge Group
Copy and paste flower(1),Resize 15%(See mine for placement)
Add dropshadow of choice
Duplicate,Image,Mirror,Move into place
Copy and paste button(8),Resize 10%
Place below flower(1)
Add dropshadow of choice
Copy and paste button(6),Resize 10%
Place along side of button(8)(See mine for reference)
Add a dropshadow
Copy and paste tag(1),Resize to your liking(See mine for placement)
Copy and paste knotribbon(3),Resize 5%
Place on the circle on the top of tag(1)
Add a dropshadow to both
Copy and paste tree(2),Resize 5%(See mine for placement)
Add a dropshadow
Copy and paste cloud(1),Resize 10%(See mine for placement)
Add dropshadow of choice
Duplicate,Move to the right slightly(See mine for reference)
Copy and paste Sunclipart,Resize 5%(See mine for placement),Add a dropshadow
Copy and paste bird,Resize 5%
Place down towards bottom of tag,Add a dropshadow
Copy and paste butterfly,Resize 3%
Image,Rotate,Free Rotate 30.00,Left
Place by your tube,Add a dropshadow
Copy and paste butterflytrace,Resize 10%(See mine for placement)
Copy and paste flower(7),Resize 5%
Place on top of other flowers,Add dropshadow
Duplicate,Image,Mirror(Place on top of other flower)
Copy and paste butterfly(1),Resize 3%
Image,Rotate,Free Rotate,30.00,Right
Add a dropshadow of choice
Copy and paste butterflytrace(1),Resize 10%
Place under the butterfly
Copy and paste bird(1),Resize 3%
Add a dropshadow of choice,Place down by the other bird
Copy and paste Headers,Resize 20%
Place at bottom of tag(See mine for reference)
Add a dropshadow
Now add your name and copyright info!
All done,Thanks for trying my tutorial!!
Labels:
MY TUTORIALS
|
0
comments
Newest Blinkies 2/23/09
I changed this one up a bit from the previous one i made. But this is made for Karen @ Scrappin 4my King!
This one was also made for Karen @ Jewels 4my Jesus.
Labels:
CUSTOM SERVICES
|
0
comments
Award!!
 This award was given to me by Annie @ Annie's Designs,Kicki @ Kimadecreations and Marta @ MartasMayhem. Thanks Ladies for this awesome award. I feel so loved!! So i am to pass this on to only 5?? Yikes,this is tough,so many awesome ppl. But here goes.
1. Cazie @ Cazie's Designs
2. Leigh @ HeartFelt Perfections
3. Toni @ Toni's Scraparoni
4. Mpz @ So Tempting Scraps
5. Jillann @ Jillann's Creations
Labels:
Awards
|
1 comments
Easter Greetings
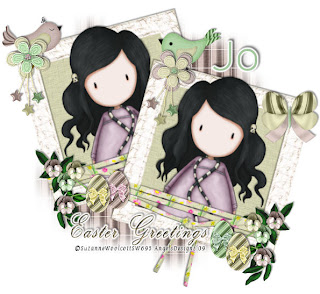 All of my tutorials require a working knowledge of PSP!This tutorial was written by me on February 21,2009. It is of my own ideas and creation! Any other tutorials found to be similar is coincidental.
Supplies Needed
Scrapkit of Choice
I'm using a Beautiful kit called Here Comes Easter,made by Jo @ Creationz by Jo. You can purchase her kit here
Tube of Choice
I'm using the Wonderful work of Suzanne Woolcott. You must have a license to use her work! You can purchase it here
Mask of Choice-Optional
Let's Begin
Open new image 600x600
Flood fill white
Copy and paste frame2,Resize 70%
Copy and paste paper5,Resize 70%
Move this layer below the frame layer
Highlight frame layer
Using your magic wand tool,Click on the inside of the frame
(Make sure u get inbetween the ribbon as well)
Selections,Modify,Expand by 3
Selections,Invert
Highlight paper layer,Hit delete on your keyboard
Selections,Selection None
Copy and paste tube of choice(If using the same as me resize 85%)
Duplicate tube layer,Move original below frame but above paper
Take your eraser tool and remove the bottom and across the ribbon of the tube hanging over on the duplicated tube layer
Add a dropshadow to your original tube layer and the frame layer
Hide the white background layer but clicking on the eye
Merge all other layers visable
UnHide the white background layer by clicking on the eye again
Copy and paste paper12,Resize 70%
Move this layer below the frame and paper layer but above the white background layer
Apply mask of choice,Merge Group on mask layer
Highlight the merged frame and tube layer
Image,Rotate,Free Rotate,15.00 Left,Resize 85%
Duplicate,Image,Mirror. Move down slightly(See mine for reference)
Copy and paste beadflower,resize 20%
Place on the top right of frames
Copy and paste bird1,Resize 15%
Place to your liking,Add dropshadow
Copy and paste beadflower3,Resize 15%
Place on top of beadflower,Add dropshadow
Copy and paste beadflower3,Resize 20%
Place on top left corner
Copy and paste beadflower2,Resize 15%
Place on top of the other one in the top left
Add dropshadow to both
Copy and paste star string,Resize 35%
Place under beadflower on left
Duplicate,Move over to beadflowers on right,Image,Rotate,Free Rotate 15.00 Right
Add dropshadow to both
Copy and paste butterfly2,Resize 35%(See mine for placement)
Copy and paste bird2,Resize 15% (See mine for reference)
Add a dropshadow of choice
Copy and paste leaves and flowers,Resize 15%
Adjust-Sharpness-Sharpen More,Add a dropshadow
Place on bottom left corner of left frame
Duplicate,Image,Mirror(See mine for placement)
Copy and paste green,pink and yellow striped eggs,Resize 40% on all 3
(See mine for placement)
Adjust,Sharpness,Sharpen More
Duplicate the yellow egg and place by the pink one,Add dropshadow to all 4
Add any extra elements of your choice
Add a wordart of choice and place to your liking
Now add your name and copyright info!
All Done,Thanks for trying my tutorial!!
Labels:
MY TUTORIALS
|
0
comments
Lacy Valentine
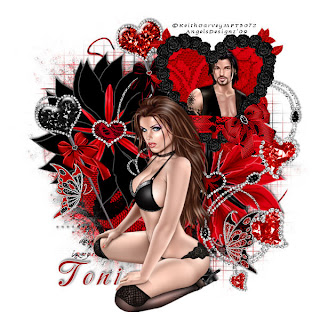 All of my tutorials require a working knowledge of PSP!This tutorial was written by me on February 20,2009. It is of my own ideas and creation! Any other tutorials found to be similar is coincidental.
Supplies Needed
Scrapkit of Choice
I'm using a Awesome kit called My Lacy Valentine,made by Toni @ Toni's Scraparoni. You can purchase her kit here
Tube of Choice
I'm using the Wonderful work of Keith Garvey. You must have a license to use his work. You can purchase that here
Mask of Choice-Optional
Let's Begin
Open new image 600x600
Flood fill white
Copy and paste flower03,04(See mine for placement)
Add a dropshadow to both
Copy and paste frame2
Resize 50%(See mine for placement)
Copy and paste paper02
Resize 70%
Move this layer below the frame layer
Using your magic wand,Click inside the frame
Selections,Modify,Expand by 3
Selections,Invert
Highlight paper layer
Hit delete on your keyboard
Selections,Select None
Copy and paste your main tube
Resize to your liking
Place in the middle of the flowers
Add a dropshadow
Copy and paste another tube of choice
Place below frame layer but above paper layer
Place to your liking
Take your magic wand tool again,Click on the inside of the frame
Selections,Modify,Expand by 3
Selections,Invert
Highlight your tube layer
Hit delete on your keyboard
Selections,Select None
Add dropshadow of choice
Copy and paste paper1
Resize 70%
Apply mask of choice,Merge Group on mask layer
Copy and paste pin06
Resize 80%
Image,Rotate,Free Rotate 15.00,Left(See mine for placement)
Add a dropshadow
Copy and paste pin05
Resize 80%
Image,Rotate,Free Rotate 25.00,Left
Adjust,Sharpness,Sharpen
Add dropshadow and place to your liking
Copy and paste doodle06
Resize 50%(See mine for placement)
Add dropshadow
Copy and paste 2 butterflies of choice
Resize 1 of them at 40%
Place to your liking
Add dropshadow
On the 2nd butterfly
Resize 35%
Place to your liking
Add a dropshadow
Add your name and copyright info now!!!
That's it,Hope you enjoyed my tutorial!
Labels:
MY TUTORIALS
|
0
comments
Apple Orchid
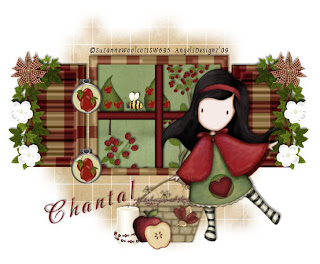 All of my tutorials require a working knowledge of PSP!This tutorial was written by me on February 20,2009. It is of my own ideas and creation! Any other tutorials found to be similar is coincidental.
Supplies Needed
Scrapkit of Choice
I'm using a Awesome kit called Country Style,made by Chantal @ ChaDesignz. You can purchase her kit here
Tube of Choice
I'm using the Wonderful work of Suzanne Woolcott. You must have a license to use her work! You can purchase it here
Mask of Choice-Optional
Let's Begin
Open new image 600x600
Flood fill white
Copy and paste window
Resize 40%
Copy and paste tube of choice(If using the same as me resize 70%)
Add dropshadow of choice
Copy and paste paper3
Resize 70%
Apply mask of choice,Merge group on mask layer
Copy and paste basket1
Resize 30%(See mine for placement)
Add dropshadow
Now copy and paste a scenery image(I'm using another gorjuss tube)
Place below window
Take your magic wand tool and click inside each square on your window
Selections,Modify,Expand by 3
Selections,Invert
Highlight scenery layer,Hit delete on your keyboard
Selections,Select none
Copy and paste berry2
Resize 30%
Place behind window but above scenery
Add a dropshadow
Copy and paste apple2
Resize 10%
Image,Rotate,Free Rotate 15.00,Left
Place by the basket,add dropshadow
Copy and paste charm2
Resize 10%(See mine for placement)
Take your eraser tool,remove a little bit of the top of the charm so it looks like the charm is hanging on the hinge of the window
Add dropshadow to both
Copy and paste ivy
Resize 30%
Place on the corner of the window(See mine for reference)
Add dropshadow
Duplicate,Image,Mirror
Copy and paste apple1
Resize 3%
Place on the trees in the background
Copy and paste bug1
Resize 15%
Adjust,Sharpness,Sharpen
Image,Mirror,Place to your liking
Add a light dropshadow
Copy and paste berry
Resize 20%
Place behind window,towards the bottom
Take your eraser tool and remove any hanging below the frame
Add a dropshadow
Copy and paste bee1
Resize 10%
Place to your liking,Add a dropshadow
Copy and paste button,Resize 20%
Place to your liking
Copy and paste flower12
Resize 15%
Place on top corner of ivy
Add a dropshadow
Duplicate,Image,Mirror
Copy and paste flower1
Resize 10%
Add a dropshadow
Duplicate,Move up a bit
Duplicate 2 more times,Image,Mirror(See mine for placement)
Copy and paste candle2
Resize 15%(See mine for placement)
Adjust,Sharpness,Sharpen
Add a dropshadow
Add your name and copyright info!
All Done,Thanks for trying my tutorial!!
Labels:
MY TUTORIALS
|
1 comments
Simple Pleasures
 All of my tutorials require a working knowledge of PSP!This tutorial was written by me on February 20,2009. It is of my own ideas and creation! Any other tutorials found to be similar is coincidental.
Supplies Needed
Scrapkit of Choice
I'm using a Awesome kit called Country Style,made by Chantal @ ChaDesignz. You can purchase her kit here
Tube of Choice
I'm using the Wonderful work of Suzanne Woolcott. You must have a license to use her work! You can purchase it here
Mask of Choice-Optional
Let's Begin
Open new image 600x600
Flood fill white
Copy and paste bowl
Resize 60%
Add dropshadow
Copy and paste tube of choice
Duplicate,Drag original below the bowl
Take ur eraser tool and remove the part hanging over the bowl on the duplicated layer
Add dropshadow on original tube layer
Copy and paste paper2
Resize 70%
Apply mask of choice,Merge Group on mask layer
Copy and paste wordart resize to your liking
Add a dropshadow
Copy and paste lace
Move behind tube
Add a dropshadow
Copy and paste grapes2
Resize 30%(See mine for placement)
Add a dropshadow
Duplicate,Image,Mirror
Copy and paste shelf
Resize 30%
Place on bottom of bowl
Add dropshadow
Copy and paste blossoms
Resize 30%
Place on the shelf
Add dropshadow
Copy and paste bug4
Resize 20%
Place to your liking
Add dropshadow
Copy and paste bug3
Resize 15%
Plave to your liking
Add dropshadow
Add your name and copyright info!
That's it,Hope you enjoyed my tut!!
Labels:
MY TUTORIALS
|
0
comments
Newest Blinkie 2/17/09
This blinkie was made for Karen @ Scrappin 4my king! You can visit her blog here
Labels:
CUSTOM SERVICES
|
0
comments
One Love
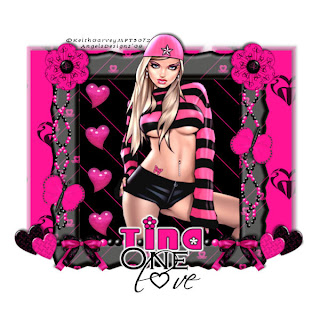 All of my tutorials require a working knowledge of PSP!This tutorial was written by me on February 16,2009. It is of my own ideas and creation! Any other tutorials found to be similar is coincidental.
Supplies Needed
Scrapkit of Choice
I'm using a Wonderful kit called Black and Pink Valentine,Made by Lady Saphira. You can purchase this kit here
Tube of Choice
I'm using the Wonderful work of Keith Garvey. You must have a license to use his work! You can purchase it here
Mask of Choice-Optional
Let's Begin
Open new image 600x600
Flood fill white
Copy and paste frame3
Resize 55%
Copy and paste paper9
Resize 55%
Image,Mirror
Click the inside of the frame using your magic wand
Selections,Modify,Expand by 10
Selections,Invert
Highlight your paper9 layer,Hit delete on your keyboard
Selections,Select none
Move paper below frame
Copy and paste tube of choice
Place to your liking,Duplicate
Move original layer below the frame
Using your magic wand tool,Remove parts of the tube at the bottom
(See mine for reference)
Add dropshadow to the original tube layer
Copy and paste paper5 above white background layer
Resize 70%
Apply mask of choice,Merge Group on mask layer
Copy and paste beads1
Resize 70%,(See mine for placement)
Copy and paste heart1
Resize 40%
Place on end of bead,Image,Rotate,Free Rotate,20.00 Left
Add Dropshadow if choice
Duplicate,Image,Mirror
Copy and paste heart2
Resize 35%
Place by heart1,Image,Rotate,Free Rotate,20.00 Left
Add a dropshadow
Duplicate,Image,Mirror
Copy and paste bow2
Resize 35%
Place down by heart1,2
Add dropshadow,Duplicate,Image,Mirror
Copy and paste flower1
Resize 35%,Place on top left corner
Add dropshadow,Duplicate,Image Mirror
Find beads2,Image,Rotate,CounterClockWise90
Copy and paste as new layer
Resize 35%
Place on left side of frame
(See mine for reference)
Duplicate,Image,Mirror,Pull over to left with other one
Duplicate both of these and Image,Mirror them both
Copy and paste butterfly
Resize 35%
Place to your liking,Duplicate,Image,MirrorImage,Flip.Place this one to your liking
Copy and paste heart16
Resize 35%,Duplicate 3x's,Image,Mirror 2 of them
(See mine for placement)
Add your name and copyright info!
That's it,Hope you enjoyed my tutorial!
Labels:
MY TUTORIALS
|
0
comments
I have been challenged by Donna @
These are the challenge instructions:Go to your photo folder in your computer.Go to the 6th folder of the photos.Go to the sixth picture.Put the picture on your blog and description of it.Invite six friends to join the challenge.Link them in your blog and let them know they have been challenged.
Here's what I came up with!
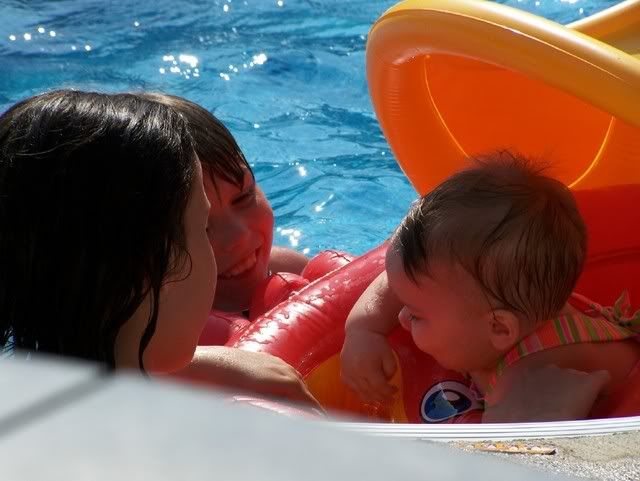
This is a picture of my daughter Presley @ the pool. She is under a year old. Having a blast in her blown up crab tube LOL. Her brother Allen is smiling @ her,and the other girl is my neice Marissa.
Fairy Garden
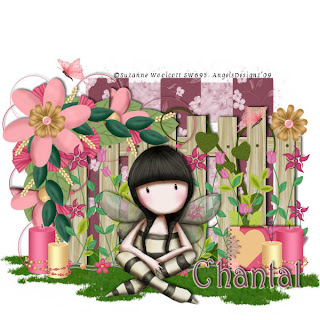 All of my tutorials require a working knowledge of PSP!This tutorial was written by me on February 12,2009. It is of my own ideas and creation! Any other tutorials found to be similar is coincidental.
Supplies Needed
Scrapkit of Choice
I'm using a Awesome kit called Silly Flowers,made by Chantal @ ChaDesignz. You can purchase this here
Tube of Choice
I'm using the Wonderful work of Suzanne Woolcott. You must have a license to use her work! You can purchase that here
Mask of Choice-Optional
Let's Begin
Open new image 600x600
Flood fill white
Copy and paste the fence
Resize 80%
Copy and paste flower4
Resize 50%
Place on left corner of fence
Add a dropshadow
Copy and paste the doodle branch
Resize 40%
Place to your liking on the fence
Duplicate,Drag original below the fence
Take your eraser tool,remove parts of the branch so it looks like it's around the fence
(See mine for reference)
Take your Selection tool,Make a box around the part sticking out at the top and bottom,Hit delete on your keyboard
Selections,Select none
Add dropshadow to the original
Copy and paste tube of choice
Resize to your liking
(See mine for placement)
Add a dropshadow
Copy and paste flowers19
Resize 40%
Place on bottom right corner of fence
Duplicate 3x's,(See mine for placement)
Move your tube in front of the flowers(See mine for reference)
Copy and paste candle2
Resize 20%,(See mine for placement)
Duplicate,Image,Mirror
Copy and paste candle1
Resize 15%,(See mine for placement)
Duplicate,Image,Mirror
Copy and paste bowflower4
Resize 20%,(See mine for placement)
Duplicate,place this one on the flower on the left
Copy and paste butterfly4
Resize 20%,(See mine for placement)
Duplicate,Image,Mirror,Place to your liking
Copy and paste metalribbon
Resize 30%,Place on bottom of fence(See mine for reference)
Copy and paste journaling
Resize 30%,(See mine for placement)
Add a dropshadow
Copy and paste paper4
Resize 70%
Apply mask,Merge Group on mask layer
Add a New Raster layer
Click on your picture tube tool
Find the lawn tube and add a little bit of grass to your tag(See mine for reference)
Add You Name and CopyRight Info!
All Done,Hope you enjoyed my tutorial!!
Labels:
MY TUTORIALS
|
0
comments
Cupid's Crush
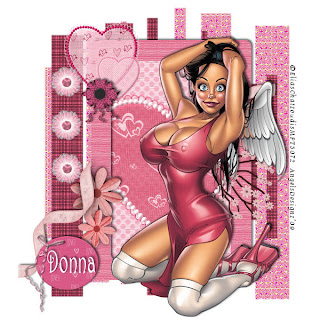 All of my tutorials require a working knowledge of PSP!This tutorial was written by me on February 11,2009. It is of my own ideas and creation! Any other tutorials found to be similar is coincidental.
Supplies Needed
Scrapkit of Choice
I'm using a Beautiful kit called Pink Love, Made by Donna's Scrappin Designz. You can purchase this kit here
Tube of Choice
I'm using the Wonderful work of Elias Chatzoudis. You must have a license to use his work! You can purchase that here
Mask of Choice-Optional
Let's Begin
Open new image 600x600
Flood fill white
Copy and paste frame1
Copy and paste paper7,Move below frame
Take your magic wand,Click on the inside of the frame
Resize 70%
Selections,Modify,Expand by4
Selections,Invert
Highlight paper layer,Hit delete on your keyboard
Selections,Select None
Copy and paste tube of choice
Resize as needed
Add a dropshadow
Copy and paste heart2
Move behind tube layer(See mine for placement)
Copy and paste heart3
Reszie as needed
Place on the top left side of frame
Copy and paste heart1
Resize 30%, Place next to heart3
Copy and paste paper4
Apply mask of choice,Merge group on mask layer
Apply another paper of choice add same mask,Image,Mirror
Copy and paste ribbonbow3
Resize 30%
Place on the bottom of heart3,4
Add a dropshadow of choice
Copy and paste roundtag2
Resize 50%
Add a dropshadow
Move to bottom left side of tag
Copy and paste branch 1
Resize 50%(See mine for placement)
Copy and paste flower1
Resize 20%
Place on left side of tag
Duplicate 2x's,(See mine for placement)
Add You Name and Copyright info!
All done,Thanks for trying my tutorials!!
Labels:
MY TUTORIALS
|
0
comments
Newest Blinkie 2/10/09
The top blinkie was made for Marta @ Marta's Mayhem using ChaDesignz kit called Silly Flowers. The bottom blinkie was made for Chantal @ ChaDesignz, the kit used is called Soir De Gala.
Labels:
CUSTOM SERVICES
|
0
comments
Diamond Lover
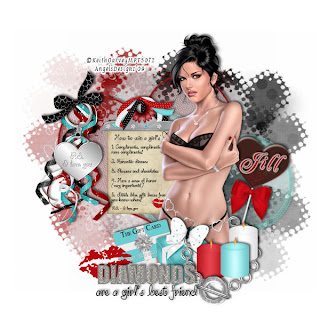 All of my tutorials require a working knowledge of PSP!This tutorial was written by me on February 9,2009. It is of my own ideas and creation! Any other tutorials found to be similar is coincidental.
Supplies Needed
Scrapkit of Choice
I'm using a Beautiful kit called P.S I Love you,made by Jill @ Created by Jill. You can purchase this kit here
Tube of Choice
I'm using the Wonderful work of Keith Garvey. You must have a license to use the artwork. You can purchase that here
Mask of Choice-Optional
Let's Begin
Open new image 600x600
Flood fill white
Copy and paste tulleheart2
Resize 60%
Image,Rotate,Free Rotate 15.00,Left
Add a dropshadow
Copy and paste tulleheart1
Resize 70%
Image,Rotate,Free Rotate 15.00,Right
Add a dropshadow
Copy and paste tube of choice
Resize around 90%
Place in the middle of the hearts
Add a dropshadow
Copy and paste ribbon1
Resize 50%
Place on the left side of the red heart
Copy and paste gift1
Resize 30%
Add a dropshadow
Place in front of your tube
Copy and paste giftcard
Resize 30%(See mine for placement)
Add dropshadow of choice
Image,Rotate,Free Rotate 15.00,Left
Copy and paste heartringkeychain
Resize 40%
Place on top of ribbon1
Add dropshadow
Copy and paste bow3
Resize 30%
Place on top of keychain
Add a dropshadow
Copy and paste paper3
Resize 70%
Apply mask of choice
Merge Group on mask layer
Copy and paste paper12
Resize 70%
Apply the same mask as above
Merge Group on mask layer
Copy and paste paper10
Resize 70%
Do the same as above
Copy and paste bracelet
Resize 40%(See mine for placement)
Take your eraser tool and remove part of the bracelet so it looks like it's going around your tube
Add dropshadow
Copy and paste chocolatepop
Resize 40%(See mine for placement)
Add dropshadow
Copy and paste candle 1,2,3
Resize 20%(See mine for placement)
Add dropshadow to all 3
Copy and paste wordart3
Place to your likingFind the lips
Image,Mirror
Copy and paste
Resize 30%(See mine for placement)
Copy and paste butterfly1
Resize 20%
Image,Rotate,Free Rotate 15.00,Right(See mine for placement)
Add a dropshadow
Copy and paste love note
Resize 40%(See mine for placement)
Add dropshadow
Copy and paste clip1
Resize 40%
Place on top of love note
Add dropshadow
Add your name and copyright info!
All done,Hope your enjoyed my tutorial!
Labels:
MY TUTORIALS
|
0
comments
Best Friends
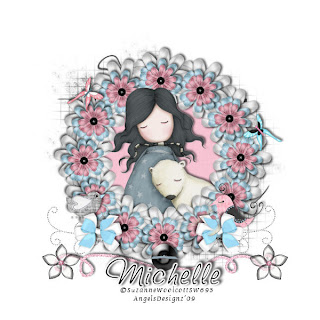 All of my tutorials require a working knowledge of PSP! This tutorial was written by me on February 8,2009. It is of my own ideas and creation! Any other tutorials found to be similar is coincidental.
Supplies Needed
Scrapkit of Choice
I'm using a Beautiful kit called So Refresh,made by So Tempting Scraps. You can purchase this kit here
Tube of Choice
I'm using the Wonderful work of Suzanne Woolcott, You must have a license to use her work! You can purchase that here
Mask of Choice-Optional
Plugins-Mura Meisters-Copies
Let's Begin
Open new image 600x600
Open new image 600x600
Flood fill white
Copy and paste flower3
Resize 15%
Add dropshadow
Effects,Plugins,Mura Meisters-Copies. With these settings
Encircle
Circle
Tile Mode
Behind
With default settings
Hit ok
Copy and paste flower2
Resize 10%
Using the same instructions as above with the plugin
Copy and paste flower3
Resize 20%
Same settings as above
Copy and paste paper7
Using your Magic wand,Click inside the flowers
Selections,Modify,Expand by 18
Selections,Invert
Highlight paper7 layer,Hit delete on your keyboard
Selections,Select none
Move paper layer below flowers layer
Copy and paste tube of choice
Resize around 50%
Add dropshadow of choice
Duplicate tube
Move the original below the flowers layer
On the duplicated version,using your eraser tool,remove the bottom part of tube
(See mine for reference)
Copy and paste paper4
Resize 60%
Apply mask of choice,Merge Group on mask layer
Move this layer below flowers and paper7
Copy and paste bird1 and 2
Resize 20%,Add a dropshadow to both
Copy and paste bow1
Resize 20%
Place on bottom left of flowers
Add dropshadow
Duplicate,Image,Mirror
Move bird1,2 below the bows(See mine for reference)
Copy and paste doodle2
Resize 30%(See mine for placement)
Duplicate,Image,Mirror
Copy and paste doodle3,Place at the bottom of the tag
Copy and paste doodle3,Place at the bottom of the tag
Grab your Deform tool,Move in on both sides
Add dropshadow of choice
Copy and paste button3
Resize 20%,Place in the center of doodle3
Add dropshadow
Copy and paste butterfly2
Resize 5%,Place on left of the flower frame
Add dropshadow
Copy and paste butterfly1
Resize 10%,Image,Mirror,Place to your liking
Add dropshadow
Copy and paste clearflower4
Place on bottom left end of doodle
Resize 20%
Duplicate,Image,Mirror
Add your name and copyright info!
All done! Thanks for trying my tutorial!
Labels:
MY TUTORIALS
|
0
comments
Pink Crush
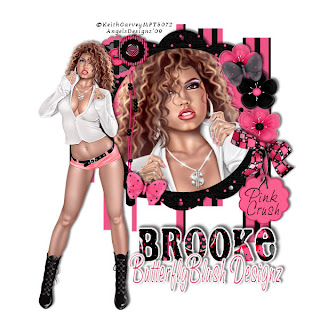 All of my tutorials require a working knowledge of PSP! This tutorial was written by me on February 8,2009. It is of my own ideas and creation! Any other tutorials found to be similar is coincidental.
Supplies Needed
Scrapkit of Choice
I'm using a Beautiful kit called Funky Girl,Made by Brooke @ Butterfly Blush Designz. You can purchase this kit here
Tube Of Choice
I'm using the Fabulous work of Keith Garvey. You must have a license to use his work! You can purchase that here
Mask of Choice-Optional
Let's Begin
Open new image 600x600
Flood fill white
Copy and paste frame2
Resize 60%
Copy and paste paper13,Place below frame2
Using your magic wand tool,Click on the inside of the frame2
Selections,Modify,Expand by 4
Selections,Invert
Highlight paper13 layer,Hit delete on your keyboard
Selections,Select none
Copy and paste closeup tube of choice
Resize to your liking
Place below frame2 but above paper13
Once happy with placement and size,Click on the inside of the frame using your magic wand tool
Selections,Modify,Expand by 4
Selections,Invert
Highlight your closeup tube,Hit delete on your keyboard
Selections,Select none
Dropshadow of choice on your tube
Hide the whitebackground by clicking on the eye in your layers palette
Merge all other layers Visable
Unhide your white background layer
Add a dropshadow on your frame layer
Copy and paste your tube of choice
Place to your liking
Add a dropshadow of choice
Copy and paste paper3
Resize 60%
Apply mask of choice
Merge Group on mask layer,Move below frame layer but above white background layer
Copy and paste organzaflower 1,2
Resize 60% on both(See mine for placement)
Duplicate organzaflower1,Move down like mine
Add a dropshadow of choice to all 3
Copy and paste bow4
Resize 60%
Place below organzaflowers
Copy and paste beadedropehanger1
Resize 40%(See mine for placement)
Copy and paste tagandrope
Resize 40%(See mine for placement)
Add a dropshadow
Copy and paste buttonflower2
Resize 40%,Place above your tube on the frame
Copy and paste buttonflower1
Resize 30%,Place next to the buttonflower2
Dropshadow on both
Copy and paste butterfly1
Resize 30%
Image,Rotate,Free Rotate 15.00,Right
Place on the bottom of the frame
Add a dropshadow
Copy and paste butterfly 2
Resize 30%
Image,Rotate,Free Rotate 15.00,Left
Place on top right flower
Add dropshadow of choice
Add your Name and Copyright info!
All Done,Hope you enjoyed my tutorial!
Labels:
MY TUTORIALS
|
0
comments
Refreshing
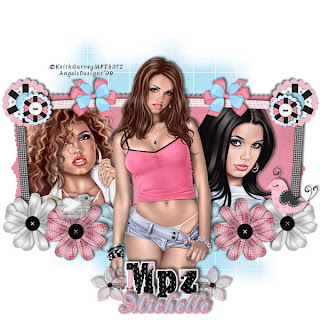 All of my tutorials require a working knowledge of PSP! This tutorial was written by me on February 8,2009. It is of my own ideas and creation! Any other tutorials found to be similar is coincidental.
Supplies Needed
Scrapkit of Choice
I'm using a Beautiful kit called So Refresh,made by So Tempting Scraps. You can purchase this kit here
Tube of Choice
I'm using the Wonderful work of Keith Garvey. You must have a license to use his work! You can purchase that here
Mask of Choice-Optional
Let's Begin
Open new image 600x600
Flood fill white
Copy and paste Frame
Resize 50%,Add dropshadow
Duplicate,Image,Mirror(See mine for placement)
Copy and paste frame2
Resize 40%
Duplicate,Image,Mirror
Pick 2 closeup tubes of choice
Resize to your liking
Place 1 inside each frame
Position to your liking
Once happy with placement, Drag both below frame2
Merge frame2 and the duplicate together
Take your magic wand,Click inside both frames
Selections,Modify,Expand by 4
Selections,Invert
Highlight 1st closeup tube, Hit delete on your keyboard
Do the same for the other closeup tube
Selections,Select none
Add a dropshadow to both tubes
Copy and paste your main tube
Resize 85%
Place in middle of both frames(See mine for reference)
Add a dropshadow
Add a dropshadow to frame2
Copy and paste flower5
Resize 15%
Add a dropshadow(See mine for placement)
Duplicate,Image,Mirror
Copy and paste flower4
Resize 10%
Add dropshadow
Place on the corner of the frame
Duplicate, Image,Mirror
Copy and paste flower1,2,3
Resize 20%(See mine for placement)
Add a dropshadow
Duplicate,Image,Mirror all 3(See mine for reference)
Copy and paste bird1
Resize 20%
Place on the bottom right flower
Add a dropshadow
Copy and paste bird2
Resize 20%
Place on the 2nd flower on the bottom left
Add a dropshadow
Copy and paste laceribbon3
Resize 30%
Place at the bottom of your main tube
Copy and paste flower2
Resize 20%
Place on the end of laceribbon3
Add dropshadow of choice
Duplicate,Image,Mirror
Copy and paste bow2
Resize 20%(See mine for placement)
Dropshadow,Duplicate,Image,Mirror
Copy and paste paper5
Resize 50%
Apply mask of Choice
MergeGroup on mask layer
Add Name and CopyRight Info!
All Done,Thanks for trying my tutorial!
Labels:
MY TUTORIALS
|
0
comments
The Diva
 All of my tutorials require a working knowledge of PSP! This tutorial was written by me on February 3,2009. It is of my own ideas and creation! Any other tutorials found to be similar is coincidental.
Supplies Needed
Scrapkit of Choice
I'm using a Fabulous kit called Girly Pink,made by Brooke @ Butterfly Blush Designz. You can purchase this kit here
Tube of Choice
I'm using the Wonderful work of Keith Garvey. You must have a license to use his work! You can purchase that here
Mask of Choice-Optional
Wordart of Choice-Optional
Let's Begin
Open new image 600x600
Flood fill white
Copy and paste laceframe2
Resize 90%
Add a dropshadow
Copy and paste laceframe
Resize 90%,Image,Rotate,Free Rotate 5.00 Left
Move this layer behind the laceframe2
Copy and paste paper1
Resize 70%
Move this layer below the frame layer
Take your magic wand and click inside the frame
Selections,Modify,Expand by 4
Selections,Invert
Highlight the paper layer,Hit delete on your keyboard
Selections,Select none
Copy and paste tube of choice
Resize 90%
Add dropshadow,Move to the Right side of the frame
Copy and paste ribboncharm1,Move this between the laceframe layers
Using your eraser tool,Remove any part of the ribboncharm hanging on the outside of the frames
Add a dropshadow
Copy and paste flowerswirls1,Move to the top right of the canvas
Add a dropshadow,Place this layer below all layers but above white background
Copy and paste flowerswirls2,Image,Mirror,Drag to the bottom left of canvas,Move below all layers
Copy and paste Ribbon1
Resize 55%(See mine for placement)
Duplicate this layer,Move the original below the laceframe2
Take your eraser tool and remove any hanging over the sides of the frame on the duplicated layer(See mine for reference)
Remove any on the original as well
Copy and paste heart1
Resize 50%,Place at the bottom of your tube(See mine for reference)
Copy and paste heart2
Resize 40%,Place next to heart 1
Duplicate both layer(See mine for placement)
Copy and paste singleflower2
Resize 50%,Place in the middle of the ribbon1
Add a dropshadow
Copy and paste wordart of choice
Copy and paste paper9,Apply mask of choice,MergeGroup
Add your name and Copyright info!
All done,Thanks for trying my tutorial!
Labels:
MY TUTORIALS
|
0
comments
Grunge Princess
 All of my tutorials require a working knowledge of PSP! This tutorial was written by me on February 3,2009. It is of my own ideas and creation! Any other tutorials found to be similar is coincidental.
Supplies Needed
Scrapkit of Choice
I'm using a Awesome kit called Grunge Love,made by Tammygirl0 @ Voodoo Scraps. You can purchase this kit here
Tube of Choice
I'm using the Fabulous work of Jennifer Janesko. You must have a license to use her work! You can purchase that here
Mask of Choice
Let's Begin
Open new image 600x600
Flood fill white
Copy and paste 002
Resize 70%
Duplicate,Image,Mirror
Copy and paste your tube of choice
Place in the middle of 002
Add a dropshadow(See mine for placement)
Copy and paste 022
Place behind 002,Move down slightly
Copy and paste 034
Resize 80%
Image,Rotate,Free Rotate,20.00,Left(See mine for placement)
Add a dropshadow
Duplicate,Image,Mirror, Move down slightly
Copy and paste 037
Resize 50%
Place on bottom right side of the tag
Copy and paste 041
Resize 15%
Add a dropshadow
Place this in the middle of 037
Copy and paste 034
Resize 50%
Place at the bottom of your tube
Copy and paste 023
Resize 30%
Image,Rotate,Free Rotate 30.00,Right
Duplicate,Image,Mirror,Image,Flip
Place to your liking
Copy and paste 034
Resize 30%
Image,Rotate,Free Rotate,15.00,Left
Duplicate,Image,Mirror (See mine for placement)
Copy and paste 034
Resize 20%,Place under the red butterfly 023
Add a dropshadow
Duplicate,Image,Mirror(Place under the other butterfly 023)
Copy and paste 055
Resize 20%, (See mine for placement)
Add a dropshadow
Copy and paste paper014
Apply mask of choice,MergeGroup
Add your Name and Copyright Info!
That's it,Thanks for trying my tutorial!
Labels:
MY TUTORIALS
|
0
comments
Subscribe to:
Posts (Atom)
Blog Archive
-
▼
2009
(333)
-
▼
February
(51)
- More New Blinkies 2/28/09
- Newest Blinkie 2/28/09
- Flutterbies
- Another Blinkie 2/27/09
- Newest Banner 2/27/09
- Another New Blinkie 2/26/09
- Perfect Match
- My Newest Blinkie 2/26/09
- Newest Banner 2/26/09
- Newest Blinkie 2/25/09
- Little Girls
- Stars n' Stripes
- Lucky Treasures
- Girl Thing
- Newest Blinkies 2/23/09
- Award!!
- Easter Greetings
- Lacy Valentine
- Apple Orchid
- Simple Pleasures
- Check This Out!!
- Newest Blinkie 2/18/09
- Newest Blinkie 2/17/09
- One Love
- I have been challenged by Donna @ http://donnasscr...
- Peyton Matthew 2/12/09
- Grand Opening!!
- Newest Blinkie 2/15/09
- Newest Blinkie 2/13/09
- Fairy Garden
- Cupid's Crush
- New Blinkie 2/11/09
- Newest Blinkie 2/10/09
- Newest Blinkie 2/10/09
- Diamond Lover
- Best Friends
- Pink Crush
- Refreshing
- The Diva
- Grunge Princess
- Jeans Kinda Girl
- Sexy Angel
- Cats Rule
- A Gorjuss New Life
- Wishing Star
- Designer Call
- CT Call
- Another New Blinkie 2/2/09
- Newest Blinkie 2/2/09
- Award
- Newest Blinkies Made 2/1/09
-
▼
February
(51)
