CHAT TO ME
MY TERMS
All of my ideas are copyrighted to me as they are my original designs. Any resemblence to any other tutorial is purely coincidental.
Do Not Translate, copy, email, download (ie; save to your own hard drive) distribute and/or make scripts/ quick guides from my tutorials.
Do Not hot link to my images or files.
Do Not upload my files to any other site. Do not share my files with others, as some of the contents require permission from thier creators to be shared.
If you are a group manager & wish to use my tutorials in your challenges, you must email me for permission BEFORE you link to my site. I reserve the right to join any group that links to my site.
VISITORS
Labels
- Awards (12)
- CT TUTORIALS (312)
- CUSTOM SERVICES (148)
- Freebies (64)
- MY TUTORIALS (299)
- PTU CU (12)
- ScrapKits (152)
- TAGS (9)
Blog Archive
- 2012 (60)
- 2011 (308)
-
2010
(375)
- December(22)
- November(31)
- October(54)
- September(67)
- August(50)
- July(21)
- June(25)
- May(10)
- April(19)
- March(23)
- February(20)
-
January(33)
- Tickle My Heart
- Dark Obessesions
- Vanity
- Jealousy
- Scrappin Bratz Collab
- Edacity
- Desire
- Apathy
- Anger Issues
- CU FREEBIE~Marbled Objects
- Chrome Hearts CU
- Devil's Pride
- Stunner
- Lucky Star
- CU FREEBIE~Chrome Brads 1/20/2010
- Love Game
- Moonlight Charm
- My Teddy and Me
- NEW KIT~Cheatin Heart 1/15/2010
- CU FREEBIE~BloodSplatters Part 2
- CU FREEBIE~Blood Splatters
- CU FREEBIE~Glitter Splats
- New CU FREEBIE~Oval Diamonds
- NEW KIT~Party Girl 1/9/2010
- Eternally Alone
- Inspiration
- NEW KIT~Broken Halo
- New Beginnings~Toxik Blogtrain
- CU Marble Frames
- Gothic Princess
- Lick You Like A Lollipop
- Punk Princess
- I Don't Care
- 2009 (333)
- 2008 (13)
Tickle My Heart

This kit is loaded with all the things that tickle your heart. From Feather to diamond rings,this is the kit for you. Red's and Black w/ a touch of white to make any project turn out beautiful. This kit has 61 Elements,13 Papers and 5 Frames. This kit is now available in all my stores,just click on a blinkie to be taken to it. ♥Kelly
Labels:
ScrapKits
|
0
comments
Dark Obessesions
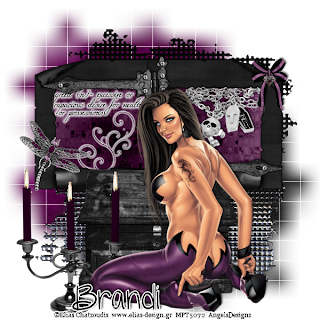
All of my tutorials require a working knowledge of PSP! This tutorial was written by me on January 18,2010. It is of my own ideas and creation! Any other tutorials found to be similar is coincidental.
Supplies Needed
Scrapkit of Choice
I'm using a Wonderful kit called DeadlySins-Greed,made by Grunge and Glitter Scraps. This is a PTU kit i cannot supply. You can grab this awesome kit here
Tube of Choice
I'm using the Wonderful work of Elias Chatzoudis. You must have a license to use his work! You can purchase that here
Let's Begin
Open new image 600x600,Flood fill white
Copy and paste mesh,Resize to your liking
Copy and paste frame2,Resize 70%,Duplicate,Image Mirror
Merge the 2 frames together
Take your magic wand tool,Click inside each frame
Selections,Modify,Expand by 5
Selections,Invert
Copy and paste paper4,Hit delete on your keyboard
Selections,Select none
Copy and paste hinge,Resize to your liking
Place on the top left side of frame,Duplicate,Image,Mirror,Move to the bottom of the right frame
Copy and paste skullchain,Resize 25%,Place on the right side of the frame,Add dropshadow
Copy and paste Definition-Greed,Resize to your liking,Add a gradient glow or white dropshadow
Place this on the left frame
Copy and paste flourish1,Resize to your liking again,Apply a white gradient glow or dropshadow
Copy and paste Tube of choice,Resize 80%,See mine for placement and add a dropshadow
Copy and paste dragonfly,Resize 25%,Place anywhere you want on the tag,Add light dropshadow
Copy and paste woodenbox,Resize 60%,Place behind the tube,add dropshadow
Copy and paste Candalabra,Resize to your liking,Place by your tube and add a dropshadow
Copy and paste bow4,Resize 35%,Place on the right side of the frame
Now i added some flames to the candalabra,Not sure who owns them so i am unable to share.(Sorry)
Copy and paste paper5,Apply mask of choice,Merge group on mask layer
Copy and paste paper7,Apply same mask as before,and merge this mask layer
Now move the purple 1 up and to the left and the black one to the bottom right
Now Add Your Name and CopyRight Info!!!!
All Done.
Labels:
MY TUTORIALS
|
0
comments
Vanity
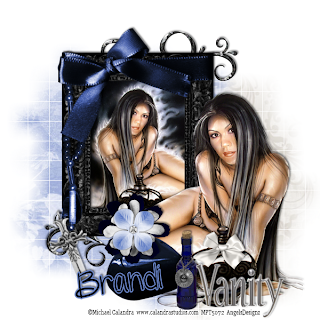
All of my tutorials require a working knowledge of PSP! This tutorial was written by me on January 21,2010. It is of my own ideas and creation! Any other tutorials found to be similar is coincidental.
Supplies Needed
Scrapkit of Choice
I'm using a Wonderful kit called DeadlySins-Pride,made by Grunge and Glitter Scraps. This is a PTU kit i cannot supply. You can grab this awesome kit here
Tube of Choice
I'm using the Wonderful work of Michael Calandra. You must have a license to use his work! You can purchase that here
Let's Begin
Open new image 600x600,Flood fill white
Open Frame2 in psp,Image,Rotate,Rotate Clockwise 90
Copy and paste the frame,Resize 60%
Copy and paste your image of choice and place behind the frame layer,Resize 60%
Add a dropshadow to your frame layer
Copy and paste your main tube of choice,80%
Copy and paste stone,Resize 60%,See mine for placement,Add dropshadow
Copy and paste flower2,Resize 30%,Place on top of the stone
Copy and paste bottle1,Resize 30%,See mine for placement,add dropshadow
Copy and paste doodle4,Resize 30%,Place at the top right under frame a image
Add dropshadow,Duplicate,Image,Mirror
Move to the bottom left of frame
Copy and paste charm1,Resize 60%,place on left side of frame
Copy and paste dagger,Resize 40%,Place to your liking
Copy and paste Bow3,Resize 40%,Place to your liking
Add dropshadow
Copy and paste bow4,Resize 60%,Place across the top of the frame
Add dropshadow
Copy and paste Vanity wordart,Resize 30%,Place to your liking,Add a white dropshadow
Copy and paste paper12,Apply mask of choice,Merge group on mask layer
Copy and paste paper10,Apply same mask as before,Merge group on mask layer
Now Add Your Name and CopyRight Info!!
All done.
Labels:
MY TUTORIALS
|
0
comments
Jealousy
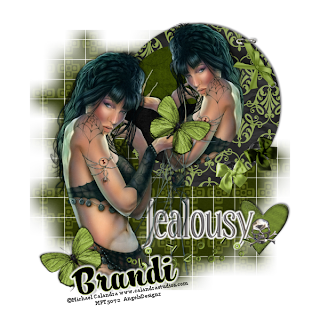
All of my tutorials require a working knowledge of PSP! This tutorial was written by me on January 19,2010. It is of my own ideas and creation! Any other tutorials found to be similar is coincidental.
Supplies Needed
Scrapkit of Choice
I'm using a Wonderful kit called DeadlySins_Envy,made by Grunge and Glitter Scraps. This is a PTU kit i cannot supply. You can grab this awesome kit here
Tube of Choice
I'm using the Wonderful work of Michael Calandra. You must have a license to use his work! You can purchase that here
Let's Begin
Open new image 600x600,Flood fill white
Copy and paste frame1,Resize 60%
Copy and paste a tube of choice and on the frame,Duplicate,Move the original under the frame
Take your Eraser tool and remove the parts hanging over the bottom of the frame
Add a dropshadow to the original layer
Now copy and paste 2 papers of choice,Resize 60%,Place them half and half behind both tubes and frame
Highlight the frame layer,Click inside using your magic wand tool
Selections,Modify,Expand by 3
Selections,Invert
Highlight each paper and hit delete on your keyboard
Selections,Select none
Copy and paste your main tube,Resize to your liking,Add dropshadow
Copy and paste butterfly,Resize 40%
Duplicate butterfly,Place one at the bottom of your tube and the other like mine
Add dropshadow to both layers
Copy and paste button1 and button2,Resize 20 or 30%,Place along the frame
Copy and paste bowpin2,Resize 30%,Place at the top of your frame,Add dropshadow
Now copy and paste the Jealousy wordart,Resize to your liking,Add a dropshadow or gradient glow in the color white
Copy and paste the heart,Resize 30 or 40%,See mine for placement
Copy and paste Skull,Resize 20%,Place on top of heart
Open ScatterBeads up in your psp
Image,Rotate,Rotate Clockwise 90
Copy and paste ScatterBeads and place under the Jealousy wordart
Copy and paste Paper5,Resize 65%
Apply mask of choice. Merge group on mask layer
Now add Your Name and CopyRight Info!!
All done.
Labels:
MY TUTORIALS
|
0
comments
Scrappin Bratz Collab

This is my part for the Feburary Collab @ Scrappin Bratz. Be sure to check it out,there's a bunch of fabulous designers joining together to make an awesome collab. I promise you won't be disappointed.♥Kelly
Edacity
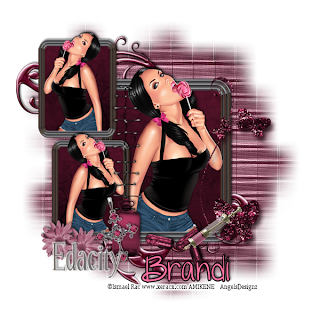
All of my tutorials require a working knowledge of PSP! This tutorial was written by me on January 2,2010. It is of my own ideas and creation! Any other tutorials found to be similar is coincidental.
Supplies Needed
Scrapkit of Choice
I'm using a Wonderful kit called DeadlySins~Gluttony,made by Grunge and Glitter Scraps. This is a PTU kit i cannot supply. You can grab this awesome kit here
Tube of Choice
I'm using the Wonderful work of Ismael Rac. You must have a license to use his work! You can purchase that here
Let's Begin
Open new image 600x600,Flood fill white
Copy and paste frame1,Resize 60%
Copy and paste tube of choice,Resize 70%,Place on frame to your liking
Duplicate,Move Original below frame
Take your Eraser tool and remove the bottom part of the tube hanging over the frame on both tube layers
Add dropshadow to the original layer
Copy and paste Paper7,Resize 40%,Place to your liking in the frame
Click on the inside of the frame with your magic wand tool
Selections,Modify,Expand by 5
Selections,Invert
Highlight the paper layer and hit delete on your keyboard
Selections,Select none
Hide the white background by clicking on the eye Merge all other layers visible
Unhide white background
Duplicate the frame layer,Resize 60%
Place like mine,Duplicate again and pull down to bottom of the larger frame
Add dropshadow to all 3 frames
Copy and paste stitches,Resize 70%,Place in the middle of the frames,(See mine for reference)Copy and paste butterflyaccent,Resize 60%,Place on the right side of the large frame
Copy and paste bottle,Resize 40%,Place like mine,add dropshadow
Copy and paste cross,Resize 40%,Place in front of bottle
Tilt it a little using your deform tool,add dropshadow
Copy and paste syringe and pills,Resize both at 30%
Image,Mirror both layers,Place to your liking,add dropshadow
Copy and paste flower2,Resize 30%,Duplicate,Add dropshadow to both and place like mine
Copy and paste doodle3,Resize 50%,Place to your liking,duplicate
Now Add Your Name and Copyright Info!!
All done.
Labels:
MY TUTORIALS
|
0
comments
Desire
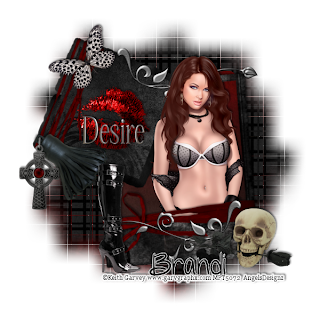 All of my tutorials require a working knowledge of PSP! This tutorial was written by me on January 2,2010. It is of my own ideas and creation! Any other tutorials found to be similar is coincidental.
Supplies Needed
Scrapkit of Choice
I'm using a Wonderful kit called DeadlySins~Lust,made by Grunge and Glitter Scraps. This is a PTU kit i cannot supply. You can grab this awesome kit here
Tube of Choice
I'm using the Wonderful work of Keith Garvey. You must have a license to use his work! You can purchase that here
Let's Begin
Open new image 600x600,Flood fill white
Copy and paste frame2,Resize 60%,Rotate it slightly using your deform tool
Copy and paste tube of choice,Resize 70%
Place on top of frame like mine,Duplicate
Move the original layer under the frame
Take your Eraser Tool and remove the bottom part of your tube on the duplicated layer
Add dropshadow on the orginal tube layer
Copy and paste frame1,Resize 40%,Use your deform again to rotate it
See mine for placement
Take your freehand tool,Easily trace around the frame
Copy and paste a paper of choice,Resize 60%
On the frame layer,Selections,Invert
On the paper layer hit delete on your keyboard
Selections,Select none,Move the paper under the frame
Copy and paste Lipprint,Resize 50%,Place inside the frame
Rotate it a little,Add dropshadow
Copy and paste paper3,Resize 60%,Place right above your white background layer
Highlight the frame layer,Click inside w/ your magic wand too
lSelections,Modify,Expand by 21
Selections,Invert
On the paper3 layer,Hit delete on your keyboard
Selections,Select none
Copy and paste boot,Resize 45%,See mine for placement,Add dropshadow
Copy and paste the LeatherTassel,Resize 45%,Rotate using your deform tool
Place on the smaller frame,Add dropshadow
Copy and paste CrossCharm,Resize 25%,Place on the tassel like mine,add dropshadow
Copy and paste ironelement1,Resize 25%,Place to your liking
Copy and paste butterfly,Resize 20%,Place to your liking,add dropshadow
Copy and paste Desire wordart,Resize 20%,Place on the lipprint,Add dropshadow
Copy and paste 2 papers of choice,add the same mask to both and Merge group on each layer
Add Your Name and CopyRight Info!!
All done.
Labels:
MY TUTORIALS
|
0
comments
Apathy
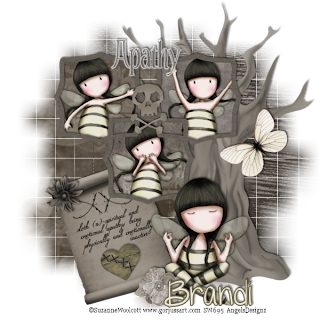
All of my tutorials require a working knowledge of PSP! This tutorial was written by me on January 24,2010. It is of my own ideas and creation! Any other tutorials found to be similar is coincidental.
Supplies Needed
Scrapkit of Choice
I'm using a Wonderful kit called DeadlySins-Sloth,made by Grunge and Glitter Scraps. This is a PTU kit i cannot supply. You can grab this awesome kit here
Tube of Choice
I'm using the Wonderful work of Suzanne Woolcott. You must have a license to use her work! You can purchase that here
Let's Begin
Open new image 600x600,Flood fill white
Copy and paste frame2,Resize 40%
Duplicate 2x's,And place like mine
Once happy w/ placement,Merge the frame layers together
Copy and paste 3 tubes of choice,Resize 70%
Arrange to your liking in the frames
Take your Magic wand tool and click inside each frame
Selections,Modify,Expand by 4
Selections,Invert
Highlight each tube and hit delete on your keyboard
Selections,Select none
Now Copy and paste paper of choice
I am going to choose 3 different papers for each frame
Do the same thing as above with modify,expand and so on
Now merge the tube,frames layers with your paper layer or layers
Add dropshadow to the frame layer
Copy and paste paintedtree,Resize to your liking and place behind your frame layer,add dropshadow
Copy and paste skull resize 20%,See mine for placement,Add dropshadow
On your merged layer,Resize 80%
Copy and paste paper1,Place behind the merged layer,tree,skull
Apply mask of choice,Merge group on mask layer
Copy and paste paper12,Apply same mask as before,Merge group
Copy and paste butterfly,Resize 20%,Use your deform tool to rotate it
Add dropshadow
Copy and paste another tube if you want of your choice
Resize to your liking,Place at the bottom of the tree,Add dropshadow
Copy and paste scroll,Resize 40%
Copy and paste defintion-sloth,Resize 20%,Place on scroll and merge these 2 layers together
Use your deform tool to rotate the scroll,Add dropshadow
Move this layer below your tube and frame layer
Copy and paste flower2 and flower3,Resize 20%
Place flower 2 at the bottom of your scroll,Add dropshadow
Place flower 3 at the top and add a dropshadow
Copy and paste doodle1,Resize 20%,Use your deform tool and place on the scroll
Copy and paste broken heart,Resize 25%,Place on the scroll,Add dropshadow
Now Add Your Name and CopyRight Info!!
All done.
Labels:
MY TUTORIALS
|
0
comments
Anger Issues
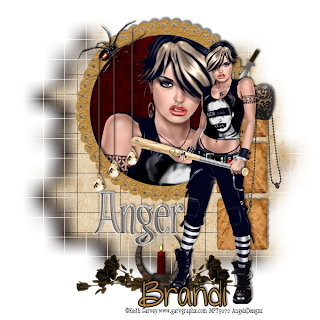
All of my tutorials require a working knowledge of PSP! This tutorial was written by me on January 21,2010. It is of my own ideas and creation! Any other tutorials found to be similar is coincidental.
Supplies Needed
Scrapkit of Choice
I'm using a Wonderful kit called DeadlySins-Wrath,made by Grunge and Glitter Scraps. This is a PTU kit i cannot supply. You can grab this awesome kit here
Tube of Choice
I'm using the Wonderful work of Keith Garvey. You must have a license to use his work! You can purchase that here
Let's Begin
Open new image 600x600,Flood fill white
Copy and paste frame1,Resize 60%
Copy and paste closeup tube of choice and paper4,Place below your frame layer
Take your magic wand tool and click inside your frame
Selections,Modify,Expand by 4
Selections,Invert
Now highlight your closeup tube and hit delete on your keyboard
Do the same thing for paper4
Selections,Select none
Add dropshadow to closeup tube,frame
Merge closeup tube,paper4 and frame together
Copy and paste sign,Resize 60%,Place on the right side of frame
Add dropshadow
Copy and paste another tube of choice,Resize to your liking,Add dropshadow
Copy and paste sword,Resize 20%,Place at the top of your sign,add light dropshadow
Take your Deform Tool and rotate the sword a little
Copy and paste candle,Resize 40%,Place at the bottom of your tube and add a dropshadow
Copy and paste Chain,Resize 40%,Hang on the right side of the frame
Copy and paste crystaldrop,Resize 40%,Place on the frame,Duplicate 2x's,and arrange to your liking
Add dropshadow to all 3
Copy and paste spider,Resize 40%
Take your deform tool and rotate it,Place on top of your frame,Add dropshadow
Copy and paste Anger wordart,Resize 30%,Place like mine
Add a white gradient glow,Then a dropshadow
Copy and paste charm,Resize 20%,Place on top of chain,Add dropshadow
Open the deadroses up in psp,Image,Rotate,Rotate Clockwise 90
Copy and paste deadroses,Resize 40%,Place by the candle,Duplicate,Image,Mirror
Copy and paste paper2 above the white background layer
Apply mask of choice,Merge group on mask layer
Copy and paste paper7,Apply same mask as before
Merge group on mask layer
Now Add Your Name and CopyRight Info!!
All done.
Labels:
MY TUTORIALS
|
0
comments
CU FREEBIE~Marbled Objects

I have 5 Marbled objects made by me for you all as a freebie today. These are CU so do as you wish just please follow my TOU. Hope you can use them for something. U can get them HERE
♥Kelly
Labels:
Freebies
|
0
comments
Chrome Hearts CU

11 Chrome Hearts all in PNG Format. Add these to some of your kits for that special touch. These are Commercial/Personal Use elements. These are going into stores today!. I'm uploading them now. Hope you like
♥Kelly
Labels:
PTU CU
|
0
comments
Devil's Pride
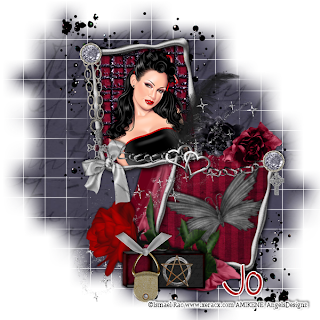
All of my tutorials require a working knowledge of PSP! This tutorial was written by me on January 24,2010. It is of my own ideas and creation! Any other tutorials found to be similar is coincidental.
Supplies Needed
Scrapkit of Choice
I'm using a Wonderful kit called Devil's Advocate,made by Creationzbyjo. This is a PTU kit i cannot supply. You can grab this awesome kit here
Tube of Choice
I'm using the Wonderful work of Ismael Rac. You must have a license to use his work! You can purchase that here
Let's Begin
Open new image 600x600,Flood fill white
Copy and paste metalframe,Resize to your liking,Move to the right side of the canvas
Copy and paste tube of choice,Resize to your liking
Place inside the top part of the frame
Take your magic wand tool and click inside the frame
Selections,Modify,Expand by 11
Selections,Invert
Highlight your tube layer and hit delete on your keyboard
Selections,Select none
Add a dropshadow to your tube only
Copy and paste the glittermesh,Place behind your tube
Take your magic wand tool,Click inside the frame again
Selections,Modify,Expand by 11
Selections,Invert
Highlight the glittermesh layer and hit delete on your keyboard
Selections,Select none
Copy and paste flutter4,Resize 30%,Use your deform tool to rotate the flutter
Place inside the frame,If any hangs out of the frame,take your Eraser tool,remove them
Add a dropshadow of choice
Copy and paste Paper6,Resize 70%
Place the paper below all layers but above the white background layer
Take your magic wand tool,Click inside the frame
Selections,Modify,Expand by 11
Selections,Invert
Highlight the paper layer and hit delete on your keyboard
Selections,Select none
Copy and paste CrossChain,Resize 20%,Place on the corner of the top frame
Add dropshadow
Copy and paste drapes2,Use your deform tool to rotate it a little
Place on the bottom frame
Duplicate,Move original under the paper layer
Take your eraser tool and remove the parts hanging over the frame on the duplicated layer
See mine for reference,Add dropshadow to both layers
Copy and paste feather,Resize 30%,See mine for placement
Copy and paste matchbox,Resize 30%,See mine for placement,Add dropshadow
Copy and paste Redrose,Resize 30%,Rotate using your deform tool
Place behind the match box,Add dropshadow
Copy and paste gem,Resize 30%,Place to your liking,Duplicate,Move into place
Now add any extra elements of choice,Add dropshadow to them
Add Your Name and CopyRight Info!
All done.
Labels:
MY TUTORIALS
|
0
comments
Stunner
 All of my tutorials require a working knowledge of PSP! This tutorial was written by me on January 21,2010. It is of my own ideas and creation! Any other tutorials found to be similar is coincidental.
Supplies Needed
Scrapkit of Choice
I'm using a Wonderful kit called IDK,made by Grunge and Glitter Scraps. This is a PTU kit i cannot supply. You can grab this awesome kit here
Tube of Choice
I'm using the Wonderful work of Keith Garvey. You must have a license to use his work! You can purchase that here
Let's Begin
Open new image 600x600,Flood fill white
Copy and paste Frame2,Resize 55%
Copy and paste ColoredChromeBracket,Resize 60%
Use your deform tool and rotate this a little
Duplicate. Image,Mirror. Image,Flip. Move into placment,Merge these 2 together
Copy and paste paper7,Resize 80%,Move below frame layer
Take your magic wand tool and click inside the frame layer
Selections,Modify,Expand by 4
Selections,Invert
On the paper layer hit delete on your keyboard
Selections,Select none
Copy and paste heartframe,Resize 30%,Place in the frame,Add dropshadow
Take your magic wand tool again,Click inside each bracket
Selections,Modify,Expand by 3
Selections,Invert
Copy and paste paper8,Resize 65%,Move to cover both brackets
Hit delete on your keyboard,Move this paper layer below the bracket layer
Add dropshadow to brackets
Copy and paste Startrail,Resize 65%,Place below all layers but above the white background layer
Add dropshadow
Copy and paste buttonstring1,Resize 20%,Place on the center of bracket
Duplicate,Move to other bracket
Add Your tube of choice,Resize 80%,Add dropshadow
Copy and paste paper1,Apply mask of choice,Merge Group on mask layer
Copy and paste paper11,Apply same mask as before and merge group
Now Add Your Name and CopyRight Info!!
All done.
Labels:
MY TUTORIALS
|
0
comments
Lucky Star
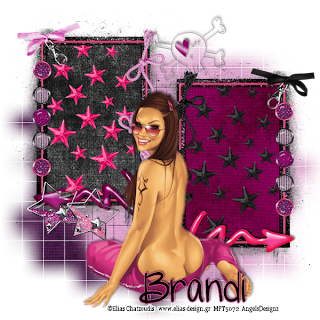
All of my tutorials require a working knowledge of PSP! This tutorial was written by me on January 21,2010. It is of my own ideas and creation! Any other tutorials found to be similar is coincidental.
Supplies Needed
Scrapkit of Choice
I'm using a Wonderful kit called Miss Understood,made by Grunge and Glitter Scraps. This is a PTU kit i cannot supply. You can grab this awesome kit here
Tube of Choice
I'm using the Wonderful work of Elias Chatzoudis. You must have a license to use his work! You can purchase that here
Let's Begin
Open new image 600x600,Flood fill white
Copy and paste Frame5,Duplicate,Image,Mirror and see mine for placement
Merge these 2 frames together
Copy and paste paper14 and 17,Resize each at 70%
Place paper14 behind 1 frame and the other paper for the other frame
Highlight the frames layer,Click inside each using your magic wand
Selections,Modify,Expand by 4
Selections,Invert
Now highlight the 1st paper layer and hit delete on your keyboard
Do the same thing for the other paper
Selections,Select none
Copy and paste startrail5 and startrail3,Resize both to your liking
Place 1 inside each frame like mine
Click inside each frame again using your magic wand tool
Selections,Modify,Expand by 4
Selections,Invert
Highlight the first set of startrails and hit delete on your keyboard
Do the same for the other set
Selections,Select none
Copy and paste your choice of brads,Resize 20%,Place like mine
*Note* You will have to duplicate the brads a few times.
Copy and paste funkyarrow 1 and 5,Resize 30%,See mine for placement
Add dropshadow on both
Copy and paste bow1 and 4,Resize 40%,See mine for placement,Add light dropshadow
Copy and paste StarCharm1 and 2,Resize 35%,See mine for placement
Copy and paste Skull3,Resize to your liking,See mine for placement,Add light dropshadow
Copy and paste String 3 and 4,Resize 40%,Place in the center of the 2 frames
Copy and paste your tube of choice,Add dropshadow
Copy and paste paper20,Apply mask of choice,Merge group on mask layer
Move this layer towards the bottom right side of the canvas
Copy and paste paper18,Apply the same mask you used before
Merge Group on mask layer
Now Add Your Name and CopyRight Info!!
All done.
Labels:
MY TUTORIALS
|
0
comments
CU FREEBIE~Chrome Brads 1/20/2010

So i finally had some time to actually be able to sit back and relax and make some CU freebies!! Here's one new freebie for u all. 3 Chrome Brads. PNG Format. Credit is required! If u like these,I have 10 more in different colors that will be up in stores tommorow for $1.50. These are perfect for a extra something in your kit. I hope u enjoy them. U can download them HERE
♥Kelly
Labels:
Freebies
|
0
comments
Love Game
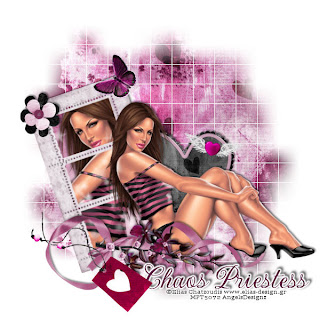
All of my tutorials require a working knowledge of PSP! This tutorial was written by me on January 18,2010. It is of my own ideas and creation! Any other tutorials found to be similar is coincidental.
Supplies Needed
Scrapkit of Choice
I'm using a Wonderful kit called Love and Kisses,made by Chaos Preistess. This is a PTU kit i cannot supply. You can grab this awesome kit here
Tube of Choice
I'm using the Wonderful work of Elias Chatzoudis. You must have a license to use his work! You can purchase that here
Let's Begin
Open new image 600x600,Flood fill white
Copy and paste frame5,Resize 65%
Copy and paste Closeup tube of choice,Resize if needed,Place inside frame
Copy and paste Paper15,Resize 40%
Click inside each part of the frame using your magic wand
Selections,Modify,Expand by 3
Selections,Invert
Highlight your closeup tube and hit delete on your keyboard
Now highlight paper15 and hit delete on your keyboard again
Selections,Select none
Copy and paste tube of choice,Resize to your liking,Add dropshdow
Copy and paste frame01,Resize 50%
Copy and paste paper14,Resize 50%,Place under frame01
Take your magic wand tool again and on the frame01 layer click the inside of the frame
Selections,Modify,Expand by 3
Selections,Invert
Highlight paper14 and hit delete on your keyboard
Selections,Select none
Move behind your tube,See mine for reference
Copy and paste frame02,Resize to your liking and place at the bottom of your tube like mine
Add dropshadow
Copy and paste Tag02,Resize 50%,See mine for placement
Copy and paste Flower04,Resize 40%,Place on the frame,Add dropshadow
Copy and paste Butterfly01,Resize 30%,Take your Deform tool and rotate it,See mine for placement
Copy and paste Winged_Heart_03,Resize 40%,Place on the heart frame
Copy and paste paper7,Resize 65%,Apply mask of choice
Merge Group on mask layer
Now Add Your Name and CopyRight Info!
All done.
Labels:
MY TUTORIALS
|
0
comments
Moonlight Charm
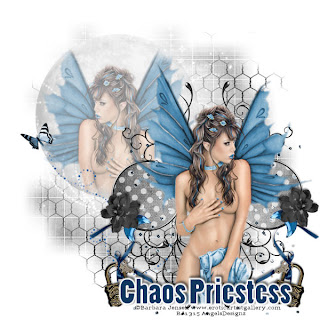
All of my tutorials require a working knowledge of PSP! This tutorial was written by me on January 18,2010. It is of my own ideas and creation! Any other tutorials found to be similar is coincidental.
Supplies Needed
Scrapkit of Choice
I'm using a Wonderful kit called Midnight Magick,made by Chaos Preistess. This is a PTU kit i cannot supply. You can purchase her kit here
Tube of Choice
I'm using the Wonderful work of Barbara Jensen. You must have a license to use her work! You can purchase that here
Let's Begin
Open new image 600x600,Flood fill white
Open Frame7 in your psp,Image,Rotate,Rotate Clockwise 90
Now copy the frame and paste onto canvas,Resize 60%
Duplicate,Image,Mirror,Move into place
Merge these 2 frames together
Click inside each frame with your magic wand tool,Selections,Modify,Expand by 3
Selections,Invert
Copy and paste paper15,Resize 65%,Hit delete on your keyboard
Selections,Select none
Copy and paste tube of choice,Resize 90%,Add dropshadow and see mine for placement
Copy and paste Bright_FullMoon,Resize to your liking
Duplicate your tube layer,Resize 65%,Place on the moon,Change the Opacity to 65%
Take your Eraser tool and easily remove parts of tube hanging over the moon
Copy and paste ChickenWire,Resize to your liking
Take your Eraser tool again and remove parts of the wire,(See mine for reference)
Copy and paste Butterfly_N_Trail,Resize 60%,Place along side of the moon
Copy and paste Sequins Page Scatter,Resize 40%,Place behind your tube layer
Go ahead and add your name at the bottom of your tube
Copy and paste Padlock_N_Key,Resize 40%,Place on the left side of the name
Duplicate,Image,Mirror,Move to placement,Add light dropshadow
Copy and paste Flower_02,Resize 30%,See mine for placement,Add light dropshadow
Duplicate,Image,Mirror,Move into placment
Copy and paste Moon_Sequin_element_02,Resize 40%,Place under the flower,Duplicate,Image,Mirror
Copy and paste paper14,Resize 65%
Apply mask of choice,Merge group on mask layer
Now Add your name if your didn't already and your CopyRight Info
All done.
Labels:
MY TUTORIALS
|
0
comments
My Teddy and Me
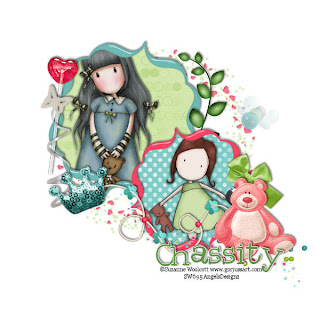 All of my tutorials require a working knowledge of PSP! This tutorial was written by me on January 18,2010. It is of my own ideas and creation! Any other tutorials found to be similar is coincidental.
Supplies Needed
Scrapkit of Choice
I'm using a Wonderful kit called My Doll,made by Polka Dot Scraps. This is a PTU kit i cannot supply. You can purchase her kit here
Tube of Choice
I'm using the Wonderful work of Suzanne Woolcott. You must have a license to use her work! You can purchase that here
Let's Begin
Open new image 600x600,Flood fill white
Copy and paste frame2,Resize 70%,Use your Deform tool and rotate it to the right
Copy and paste frame1,Resize 60%,Use your Deform tool again and rotate to the left
Take your magic wand tool and click inside frame2
Selections,Modify,Expand by 2
Selections,Invert
Copy and paste paper15,Resize 70%,Hit delete on your keyboard
Selections,Select none
Move the paper under frame2
Take your Magic wand tool again and this time click inside frame1
Selections,Modify,Expand by 2
Selections,Invert
Copy and paste paper8,Resize 70%,Hit delete on your keyboard
Selections,Select none
Move paper layer below frame1
Now pick 2 tubes of choice,Resize to your liking and place 1 in each frame
Once happy with placement,Take your magic wand and click inside each frame
Selections,Modify,Expand by 3
Selections,Invert
Highlight the first tube and hit delete on your keyboard
Do the same for the other tube
Move both tubes below the frame layers
Add dropshadow of choice to both tubes and frames
Copy and paste frame9,Resize 65%,Move below all layers except the white background layer
Copy and paste element37,See mine for placement
Duplicate,Move original below the frame1 and paper8 layer
Take your Eraser tool on the Duplicated layer
Erase the bottom part of element37,Add dropshadow
Copy and paste Element26 and 44,Resize to your liking and place at the bottom of the frame
Copy and paste Element45,Resize 40%,Place on the left side of the top left frame
Take your deform tool and tilt it a little,Add dropshadow
Copy and paste element53,Resize 40%,See mine for placement,Add dropshadow
Copy and paste element43,Resize 50%,Place under your element53 layer
Copy and paste element15,Resize 40%,See mine for placement,Add dropshadow
Copy and paste element34,Resize to your liking and place like mine
Copy and paste element8,Resize 40%,Place on top of the sucker element,Add dropshadow
Copy and paste element51,Resize 40%,Place at the bottom of frame2,Add dropshadow
Now Add Your Name and CopyRight Info!!
All done.
Labels:
MY TUTORIALS
|
0
comments
NEW KIT~Cheatin Heart 1/15/2010

So it seems i'm stuck on these colors for some reason lol. I'm pretty sure u'll see more of them,but purple will be a different color lol. Anyway,Here's my newest kit called Cheatin Heart. This is a Tagger Size kit and PU Only!! Going into stores later today!! This kit has 91 Elements,11 Frames and 16 Papers!! Hope you like!
♥Kelly
Labels:
ScrapKits
|
0
comments
CU FREEBIE~BloodSplatters Part 2

So it seems that the 1st set was successful lol. So i was a little bored tonight and decided to make some more hehe..I am so addicted to this gothic/grunge thing. So this is the 2nd set of blood splatters. This set includes 6 different splatters. Hopefully you can use them for something.
You can download them HERE
Enjoy♥Kelly
Labels:
Freebies
|
3
comments
CU FREEBIE~Glitter Splats
 Here's another freebie that you can put into a kit. CU ok! Glitter Splats in various colors. Can easily be resized for full size kits too.
You can download them HERE
♥Kelly
♥Kelly
Labels:
Freebies
|
1 comments
NEW KIT~Party Girl 1/9/2010
 This is perfect for all the party girls out there. Really pretty bright colors. This is a Tagger Size Kit and Personal Use Only! There is 91 Elements,9 Frames, 26 Papers in this kit. Going into stores today!.
♥Kelly
Labels:
ScrapKits
|
0
comments
Eternally Alone
 All of my tutorials require a working knowledge of PSP! This tutorial was written by me on January 8,2010. It is of my own ideas and creation! Any other tutorials found to be similar is coincidental.
Supplies Needed
Scrapkit of Choice
I'm using a Wonderful kit called Vampire Heart,made by Chaos Priestess. This is a PTU kit i cannot supply. You can purchase her kit here
Tube of Choice
I'm using the Wonderful work of Ted Hammond. You must have a license to use his work! You can purchase that here
Let's Begin
Open new image 600x600,Flood fill white
Copy and paste Frame6,Resize 60%
Copy and paste your tube of choice,Resize 80%,Add light dropshadow
Copy and paste paper6,Resize 65%,Move under the frame layer
Highlight your frame layer,Click on the inside using your magic wand
Selections,Modify,Expand by5
Selections,Invert
Highlight paper6 layer and hit delete on your keyboard
Selections,Select none
Now Highlight your tube layer,Duplicate,Image,Mirror
Move under your frame layer.
Once happy with placement,Take your magic wand and click inside the frame
Selections,Modify,Expand by 3
Selections,Invert
Hightlight your duplicated tube layer and hit delete on your keyboard
Selections,Select none
Now add a white gradient glow using eye candy4
Then add a black gradient glow
Add a dropshadow 2x's
Copy and paste paper24,Resize 60%,Apply mask of choice,Merge group on mask layer
Copy and paste Brad2,Resize 50%,See mine for placement,Add dropshadow
Copy and paste Candle_n_Holder_1,Resize 40%,Place by your tube,Add dropshadow
Copy and paste Heart Element4,Resize 40%,Place at the top right corner of the frame
Add dropshadow
Copy and paste Rose1,Resize 30%,Use your Deform tool to rotate the rose to the left
See mine for placement,Add dropshadow
Copy and paste Rose2,Resize 25%,Use your deform tool again
See mine for reference,Add dropshadow
Copy and paste Winged Heart_Element2,Resize 30%,Place at the top of the frame
Add dropshadow
Copy and paste Cross Element2,Resize 30%,Place like mine,Add light dropshadow
Copy and paste flower4,Resize 25%,Place at the bottom of the cross,Add dropshadow
Copy and paste Doodle2,Resize 50%,Place at the top under your frame
Copy and paste it again,Use your deform tool a little to tilt it and place under the frame on the right side of the frame
Adjust,Sharpness,Sharpen
Add dropshadow
Now Add Your Name and CopyRight Info!
All done.
Labels:
MY TUTORIALS
|
0
comments
Inspiration
 All of my tutorials require a working knowledge of PSP! This tutorial was written by me on January 8,2010. It is of my own ideas and creation! Any other tutorials found to be similar is coincidental.
Supplies Needed
Scrapkit of Choice
I'm using a Wonderful kit called The Silver Lining,made by Gothic Inspirations. This is a PTU kit i cannot supply. You can purchase her kit here
Tube of Choice
I'm using the Wonderful work of Jennifer Janesko. You must have a license to use her work! You can purchase that here
Let's Begin
Open new image 600x600,Flood fill white
Copy and paste Cluster2,Resize 50%
Copy and paste a closeup tube of choice,Resize 70%
Once Happy with placement,Duplicate,Move the original under the cluster layer
Take your Eraser Tool,Erase on the Duplicate tube layer anything hanging over the bottom
(See mine for reference)
Add dropshadow to both tube layers
Copy and paste Drink,Resize 50%,Place like mine,Add dropshadow
Copy and paste Feather,Resize 50%,Place behind the drink
Copy and paste GlitterSpill behind below all layers but above the white background layer
Add dropshadow
Copy and paste Wordart,Resize 50%,Take your deform tool and rotate Adjust,Sharpness,Sharpen
Place at the bottom of the cluster
Copy and paste Paper8,Resize 60%,Place above the GlitterSpill layer
Highlight your Cluster,Click inside the cluster with your magic wand,Pay close attention to the spots between the ribbon
Selections,Modify,Expand by 7
Selections,Invert
Highlight paper layer,Hit delete on your keyboard
Selections,Select none
Copy and paste paper17,Resize 60%,Place below all layers but above white background layer
Apply mask of choice,Merge group on mask layer
Copy and paste FairyCharms,Resize 50%,Place on left corner of cluster,Add dropshadow
Copy and paste Flower,Resize 20%,Place at the bottom of the drink,Add dropshadow
Copy and paste WordartInspiration2,Resize 40%,See mine for placement,Add light dropshadow
Now Add Your Name and CopyRight Info!!
All done.
Labels:
MY TUTORIALS
|
0
comments
NEW KIT~Broken Halo

Here's my newest kits. Will be available in all my stores listed on the right by tommorow. This kit is a Tagger Size kit and Personal Use Only!. This kit was so fun to make,and i just love the colors together. Yes it's gothic!! Huge thanks to Jessica aka Gothic Inspirations for making the awesome Halo's for me :) There is a bunch of elements,far to many to show in the preview. Hope you all like.~♥Kelly
Labels:
ScrapKits
|
0
comments
New Beginnings~Toxik Blogtrain
 Choo Choo! The blog train has arrived.. For my part i just through together a small Cu grab bag. Hope you can use it for something. Please be sure to leave some luv for each designer that you download from.
 You can download my part from HERE
Enjoy!♥Kelly
Labels:
Freebies
|
4
comments
CU Marble Frames
 So it's been a long time since i last gave a freebie out. So what better way to start the new year than to give a freebie out,and not just any old freebie but a CU-Commercial Use FREEBIE!!
 So what i have made here is...
5 Commercial Use Marble Frames. All in PNG Format. Dropshadow is on preview only!. Please send friends here to grab it for themselves. Be sure to leave some love either here or in my Chatbox upon downloading! U can grab these frames HERE
Enjoy♥Kelly
Labels:
Freebies
|
1 comments
Gothic Princess
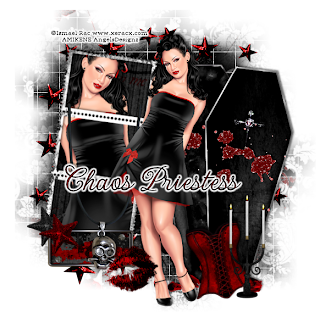
All of my tutorials require a working knowledge of PSP! This tutorial was written by me on January 3,2010. It is of my own ideas and creation! Any other tutorials found to be similar is coincidental.
Supplies Needed
Scrapkit of Choice
I'm using a Wonderful kit called Darkness Beholds Her,made by Chaos Priestess. This is a PTU kit i cannot supply. You can purchase her kit here
Tube of Choice
I'm using the Wonderful work of Ismael Rac. You must have a license to use his work! You can purchase that here
Let's Begin
Open new image 600x600,Flood fill white
Copy and paste Element45,Resize 70%
Copy and paste tube of choice,Resize to your liking
Place your tube behind element 45,Once happy with placement
Take your Magic wand tool and click inside each square on Element45
Selections,Modify,Expand by 1
Selections,Invert
Highlight your tube layer and hit delete on your keyboard
Selections,Select none
Do the same as above only this time using paper8,Resize paper 8 to 65%
Hide your white background layer
Merge all other layers visable
Unhide White Background
Take your Deform Tool,Rotate to the Right a bit,Add dropshadow of choice
Copy and paste Element38,Resize 70%,See mine for placement,Add dropshadow
Copy and paste Element36,Resize to your liking,Place at the bottom right side of elemnt38
Copy and paste Element48,Resize to your liking,Take your deform tool and rotate to the left
Add dropshadow,See mine for placement
Copy and paste Element17,Resize to your liking,Place at the bottom of Element45
Add a light dropshadow
Copy and paste Element16,Resize 40%,See mine for placement
Copy and paste Element15,Resize 35%,Place on element16
Copy and paste Element66,Resize 50%,See mine for placment
Copy and paste Element12,Resize 60%,Place on element45,Add dropshadow
Copy and paste Element 34,Resize 70%,Place behind all layers
Now copy and paste paper10,Resize 70%,Apply mask of choice
Merge Group on mask layer,Use your deform tool to stretch it out a bit
Copy and paste paper06,Resize 65%,Apply same mask as before
Merge Group on mask Layer
Copy and paste element 03,Resize 45%,Place behind tube but on the element38
Now add your Name and CopyRight Info!
All done.
Labels:
MY TUTORIALS
|
0
comments
Lick You Like A Lollipop
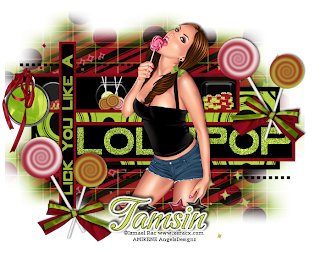
All of my tutorials require a working knowledge of PSP! This tutorial was written by me on January 2,2010. It is of my own ideas and creation! Any other tutorials found to be similar is coincidental.
Supplies Needed
Scrapkit of Choice
I'm using a Wonderful kit called The Sweet Factory: Gum Drop Juntion,made by Tamsin McAtee Studios. This is a PTU kit i cannot supply. You can purchase her kit here
Tube of Choice
I'm using the Wonderful work of Ismael Rac. You must have a license to use his work! You can purchase that here
Template 120 made by Beth @ Blissfullybeth..Thanks hun!! You can find the template HERE
Let's Begin
Open template276 in psp
Hold down Shift + D,delete the original one
Delete the bottom and top layer on the temp
Click on each outline that is in pink using your magic wand tool
Open paper2 in psp,Click on your foreground color,then the pattern tab and find paper2
Click ok
Flood fill all the outline layers with paper2
Selections,Select none
Using your magic wand tool again,Click on all the letters in pink
Find Paper3 and open it in your psp,Click on your background color,then pattern tab
Click ok
Flood fill each letter with paper3
Selections,Select none
Highlight the White Rectangle layer
Copy and paste paper4,Resize 65%
Highlight white rectangle layer,Selections,Invert
Highlight paper4 layer and hit delete on your keyboard
Selections,Select none
Move this layer above the white rectangle layer
Copy and paste Tag2,Resize 20%,See mine for placement
Take your Eraser Tool and remove a little part of the tag so it looks like it's hanging
Copy and paste sparkles1,Image,Mirror
Move this layer below all the layers
Place on the left side of the template
Copy and paste sparkles2,Place on the right side
Copy and paste paper9 below all layers,Resize 75%
Apply mask of choice,Merge group on mask layer
Copy and paste paper7,Resize 70%
Apply same mask as before,Merge group on mask layer
Copy and paste Star3,Star2,Star1,Resize each one at 30%
Highlight the green star,Image,Mirror
See mine fore placement,Duplicate each star and move into place
Copy and paste bow1,Resize 30%
Place to your liking,Add dropshadow
(I duplicated the bow layer and place on the right side also)
Now click on each letter in LOLLIPOP using your magic wand tool
Go to Adjust,Add/Remove Noise,Add Noise with these settings:
Uniform Checked
Monochrome Checked
Noise: 65%
Hit ok
Copy and paste of your choice jars of candy,Resize 10-20%,Place in the top skinny rectangle
(See mine for reference)
Copy and paste Sucker3,Resize 30%,Use your deform tool to rotate it to the left,Add dropshadow
Copy and paste Sucker1,Resize 25%,use your deform tool again to rotate to the right,Add dropshadow(See mine for placement)
Merge sucker1 and sucker3 together
Duplicate,Image,Mirror,See mine for reference
Copy and paste bow3,Resize 30%,Place on top of tag
Now Add Your Name and CopyRight Info!!
All Done.
Labels:
MY TUTORIALS
|
0
comments
Punk Princess
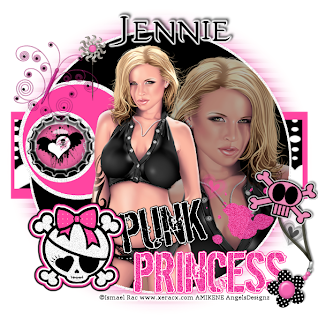
All of my tutorials require a working knowledge of PSP! This tutorial was written by me on January 2,2010. It is of my own ideas and creation! Any other tutorials found to be similar is coincidental.
Supplies Needed
Scrapkit of Choice
I'm using a Wonderful kit called Skull Candy,made by Jennie D Designs. This is a PTU kit i cannot supply. You can purchase her kit here
Tube of Choice
I'm using the Wonderful work of Ismael Rac. You must have a license to use his work! You can purchase that here
Template 276 made by Missy @ Divine Intentionz..Thanks hun!! You can find the template HERE
Let's Begin
Open template276 in psp
Hold down Shift + D,delete the original one
Delete the top layer on the temp
Copy and paste tube of choice,Resize 85%,See mine for placement
Highlight the Circle layer,Click inside using your magic wand tool
Selections,Invert
On Your tube layer hit delete on your keyboard
Selections,Select none
Add dropshadow to your tube layer
Copy and paste a close up tube of choice,Resize 80%
Once happy with placement,Click on the Circle layer again using your magic wand tool
Selections,Invert
Highlight your closeup tube layer and hit delete on your keyboard
Selections,Select none
Change the Opacity to 70% on your closeup tube
Copy and paste Heart Curtain,Resize 70%
Move this layer above the rectangle2 layer,Take your Deform tool and stretch it out like mine
Highlight the black rectangle layer by clicking on it
Click on this layer with your magic wand,Selections,Invert
Highligh the Heart Curtain layer,Hit delete on your keyboard
Selections,Select none
Copy and paste BottleCap1,Resize 50%,Place in the middle of the circle,See mine for reference
Add dropshadow
Copy and paste Skull4,Resize 30%,Place on the right side of your tag
Take your Deform tool and tilt the skull to the right,Add dropshadow
Copy and paste StickPin4,Resize 20%,See mine for placement
Copy and paste Butterfly2,Resize 7%,Place at the top left side of tag
Copy and paste Flower Pendant1,Resize 30%,Place under the skull4 layer,Add dropshadow
Now Add Your Name and CopyRight Info!
All Done.
Labels:
MY TUTORIALS
|
0
comments
I Don't Care
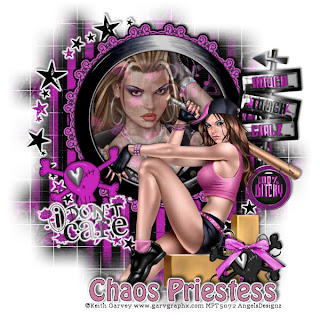
All of my tutorials require a working knowledge of PSP! This tutorial was written by me on January 2,2010. It is of my own ideas and creation! Any other tutorials found to be similar is coincidental.
Supplies Needed
Scrapkit of Choice
I'm using a Wonderful kit called Bad Girlz,made by Chaos Priestess. This is a PTU kit i cannot supply. You can purchase her kit here
Tube of Choice
I'm using the Wonderful work of Keith Garvey. You must have a license to use his work! You can purchase that here
Let's Begin
Open new image 600x600,Flood fill white
Copy and paste Frame3,Resize 65%
Find your tube of choice,Copy and paste and resize 80%,Place to your liking in the frame
Copy and paste Paper4 behind the frame,Resize 60%
Highlight the frame,Click inside using your Magic Wand
Selections,Modify,Expand by 5
Selections,Invert
On your paper layer hit delete on your keyboard
Selections,Select none
Copy and paste a closeup tube of choice,Resize 75%,Place under the frame layer
Change the Opacity on the 70%
Highlight the frame layer,Click inside using your magic wand tool
Selections,Modify,Expand by 5
Selections,Invert
Highlight the closeup tube layer and hit delete on your keyboard
Selections,Select none
Hide your tube and white background layer
Merge all other layers visable
Unhide your tube and white background layer
See mine for placement on the frame and tube layer
Copy and paste Paper6,Resize 70%,Move below frame and tube layer
Apply mask of choice,Merge group on mask layer
Copy and paste paper1,Resize 60%
Apply same mask as before,Merge Group on Mask Layer
Copy and paste Doodle3,Resize 60%Place behind the tube and frame layer,Add a white dropshadow x2
Add regular dropshadow of choice
Copy and paste Skull Element2,Resize 40%,See mine for placement
Take your Deform Tool and tilt it a little,Add dropshadow of choice
Copy and paste sign post,Resize 40%,See mine fore placement
Take your Deform Tool and rotate the sign towards the right
Add dropshadow of choice
Copy and paste Skull Element1,Resize 35%,Place to your liking
Add dropshadow of choice
Copy and paste Brad1,Resize 35%,Place at the bottom of the sign,Add dropshadow
Copy and paste Bow2,Resize 30%,Place on top of the black skull,Add dropshadow
Copy and paste Beaded Doodle,Resize 35%,Place behind the black skull,Add dropshadow
Copy and paste Wordart1,Resize 30%,Place below the Pink Skull,Add white dropshadow 2x's
Add dark dropshadow
Now Add Your Name and CopyRight Info!!
All done.
Labels:
MY TUTORIALS
|
0
comments
Subscribe to:
Posts (Atom)
Blog Archive
-
▼
2010
(375)
-
▼
January
(33)
- Tickle My Heart
- Dark Obessesions
- Vanity
- Jealousy
- Scrappin Bratz Collab
- Edacity
- Desire
- Apathy
- Anger Issues
- CU FREEBIE~Marbled Objects
- Chrome Hearts CU
- Devil's Pride
- Stunner
- Lucky Star
- CU FREEBIE~Chrome Brads 1/20/2010
- Love Game
- Moonlight Charm
- My Teddy and Me
- NEW KIT~Cheatin Heart 1/15/2010
- CU FREEBIE~BloodSplatters Part 2
- CU FREEBIE~Blood Splatters
- CU FREEBIE~Glitter Splats
- New CU FREEBIE~Oval Diamonds
- NEW KIT~Party Girl 1/9/2010
- Eternally Alone
- Inspiration
- NEW KIT~Broken Halo
- New Beginnings~Toxik Blogtrain
- CU Marble Frames
- Gothic Princess
- Lick You Like A Lollipop
- Punk Princess
- I Don't Care
-
▼
January
(33)
